Build a Route Search plugin
Last updated
We use the Plugin Playground to build a plugin that searches for a route between two points and draws it on the globe. It runs entirely in the browser, so there is no local environment to prepare.
What you will build
Section titled “What you will build”A Route Search widget draws the path between two points on the globe. The reader sets a start and an end, either by typing coordinates or by clicking the map. After a travel mode of walk, bike, or car is picked, the widget calls an external routing service to fetch the route. The route is drawn as a clickable line that reports its distance and travel time, with a marker at each endpoint and a button that clears everything.
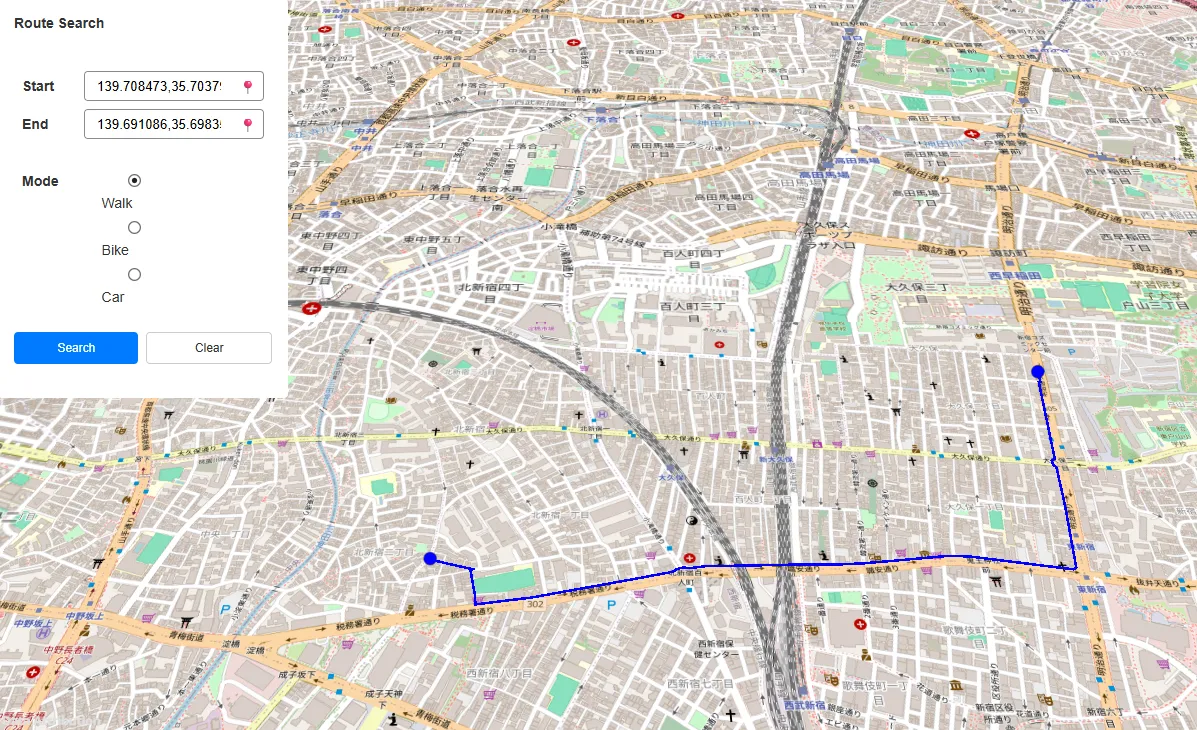
The widget uses four parts of the Plugin API:
- UI and Visualizer communication — passing data in both directions between the widget iframe and the plugin logic, through
reearth.uiandreearth.extension - External API integration — calling a routing service with
fetchand converting the response to GeoJSON - Layers API — adding, updating, finding, and deleting layers at runtime
- Camera API — setting the scene’s opening view
Prerequisites
Section titled “Prerequisites”- A Re:Earth Visualizer project.
- The Plugin Playground open in a browser tab.
- Familiarity with HTML, CSS, and JavaScript. This guide explains the Re:Earth Plugin API rather than general web code.
If this is your first plugin, work through Run it in Plugin Playground, Display UI, and Communicate between a Plugin and Re:Earth first. They cover the Playground’s layout, the reearth.yml manifest, the export and install flow, and the message-passing pattern that this guide reuses.
Step 1 — Open the plugin files
Section titled “Step 1 — Open the plugin files”In the Custom section of the Playground’s file tree, select My Plugin. It already contains a reearth.yml manifest and a demo-widget file, and those are the two files you edit.
Step 2 — Edit the manifest
Section titled “Step 2 — Edit the manifest”Open reearth.yml and replace its contents with a single widget extension:
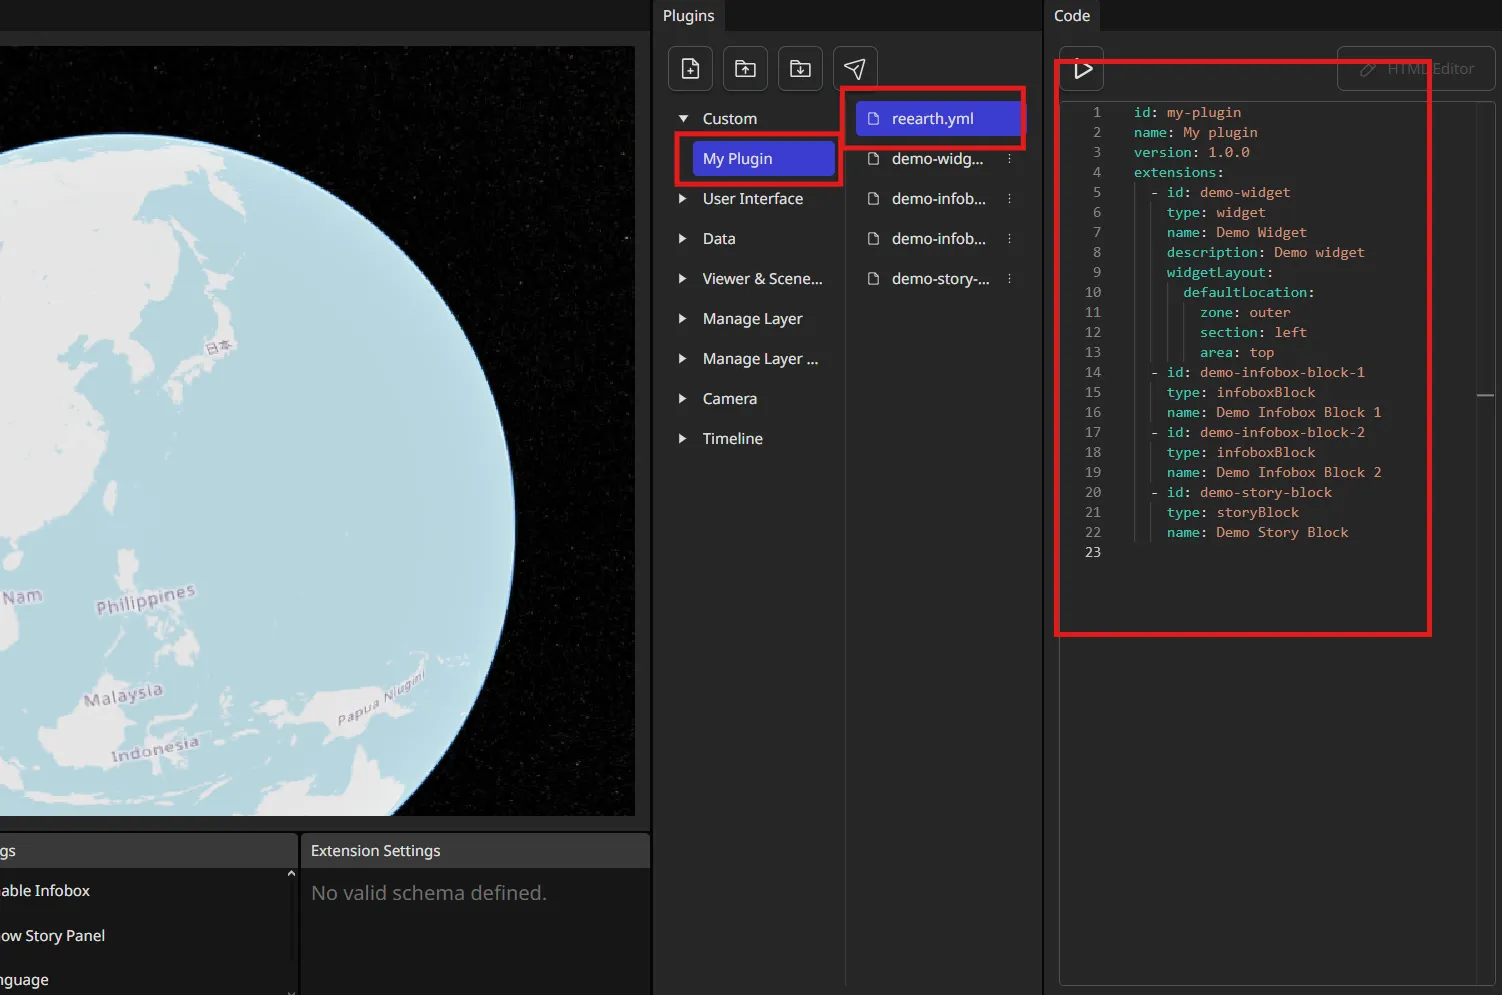
id: route-search-pluginname: Route Searchversion: 1.0.0extensions: - id: demo-widget type: widget name: Route Search description: Search and draw a route between two points widgetLayout: defaultLocation: zone: outer section: left area: topThe extension id stays demo-widget so that it still matches the existing demo-widget file — an extension id and its file name must be identical. The plugin id takes lowercase letters, numbers, _, and -, holds no spaces, and cannot be reearth. Installation fails later if a plugin with the same id is already in the project, so pick an id nothing else uses.
Step 3 — Build the widget UI
Section titled “Step 3 — Build the widget UI”Select demo-widget and replace its contents with the following. reearth.ui.show takes an HTML string and renders it as the widget, inside an iframe:
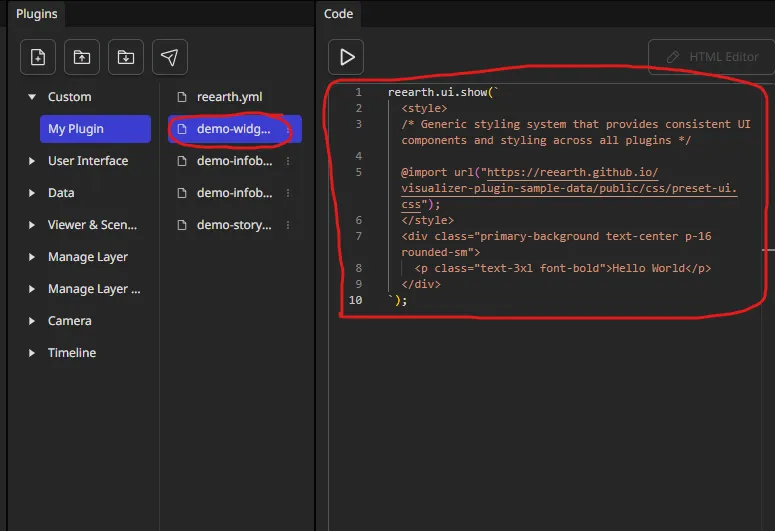
reearth.ui.show(` <style> @import url("https://reearth.github.io/visualizer-plugin-sample-data/public/css/preset-ui.css"); </style> <div class="rounded-sm secondary-background" style="width: 290px"> <div class="display-flex flex-between p-16" style="height: 48px"> <h2 class="text-md">Route Search</h2> </div> <div class="flex-column p-8"> <div class="flex-column gap-8 p-16"> <div class="flex-between" style="gap: 0"> <label class="font-bold" for="start-point">Start</label> <div class="display-flex" style="width: 180px; height: 30px; border-radius: 4px; border: 1px solid #8b8b8b"> <input id="start-point" type="text" placeholder="lng,lat" style="border: none; outline: 0" /> <button class="icon-btn" onclick="handleIconClick('start', this)">📍</button> </div> </div> <div class="flex-between" style="gap: 0"> <label class="font-bold" for="end-point">End</label> <div class="display-flex" style="width: 180px; height: 30px; border-radius: 4px; border: 1px solid #8b8b8b"> <input id="end-point" type="text" placeholder="lng,lat" style="border: none; outline: 0" /> <button class="icon-btn" onclick="handleIconClick('end', this)">📍</button> </div> </div> </div> <div class="display-flex p-16" style="align-items: flex-start; gap: 43px"> <label class="font-bold">Mode</label> <div class="flex-column gap-4"> <label><input type="radio" name="transport" value="foot" checked /> Walk</label> <label><input type="radio" name="transport" value="bike" /> Bike</label> <label><input type="radio" name="transport" value="car" /> Car</label> </div> </div> <div class="display-flex gap-8 p-8"> <button class="btn-primary button-padding w-full text-sm" onclick="searchRoute()">Search</button> <button class="btn-neutral button-padding w-full text-sm" onclick="deleteRouteAndMarker()">Clear</button> </div> <p id="status" class="text-sm p-8" style="margin: 0; min-height: 18px"></p> </div> </div>`);The widget’s behaviour arrives as a <script> block in the steps that follow, so the buttons do nothing yet.
Step 4 — Switch the basemap to OpenStreetMap
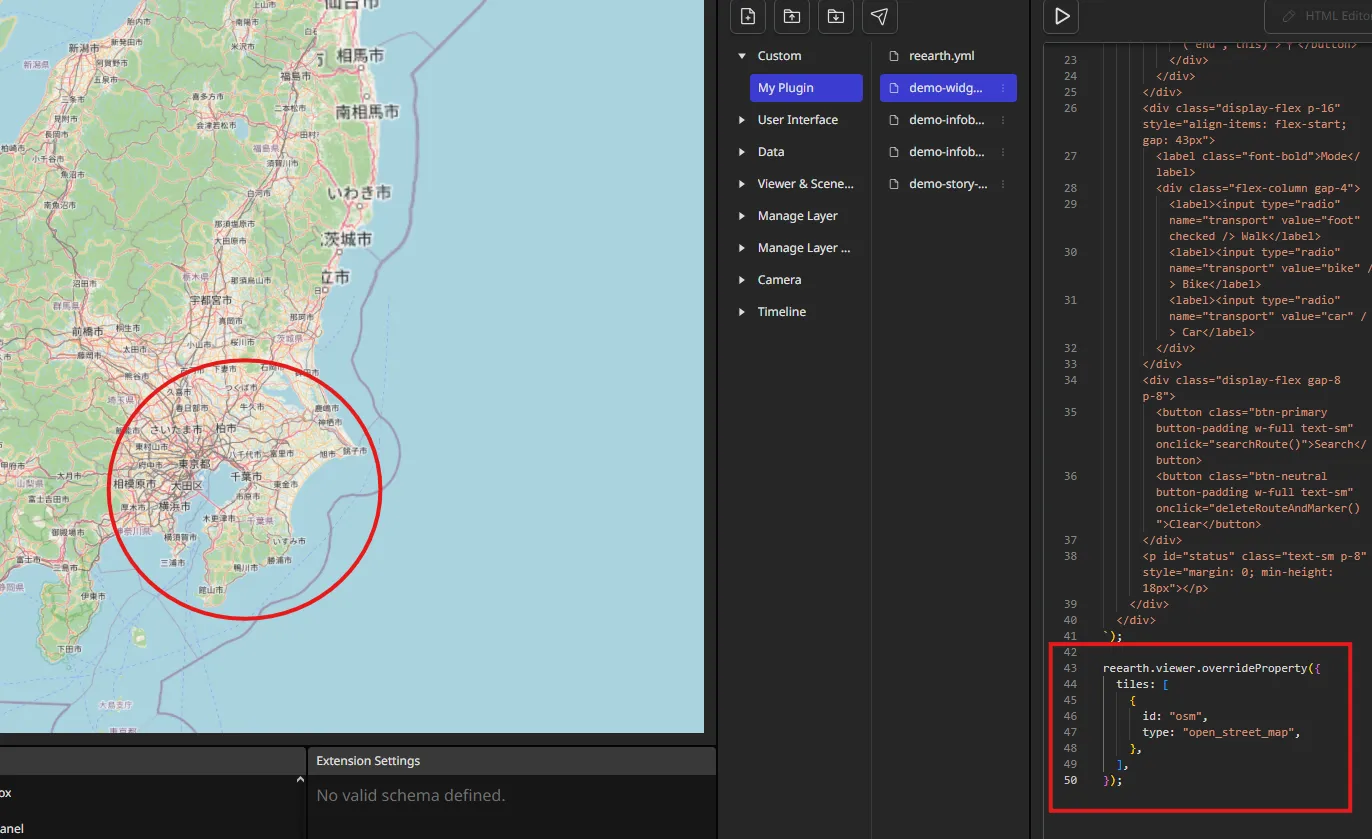
Section titled “Step 4 — Switch the basemap to OpenStreetMap”The route comes from OpenStreetMap data, so switch the scene’s basemap to match it before you start clicking around the map. Below reearth.ui.show(...), add:
reearth.viewer.overrideProperty({ tiles: [ { id: "osm", type: "open_street_map", }, ],});open_street_map is one of Re:Earth Visualizer’s built-in basemaps and needs no Cesium Ion access token, unlike some of the project’s own basemap options. See Change the basemap for the other built-in choices and for using a custom tile server instead.
Step 5 — Select points on the map
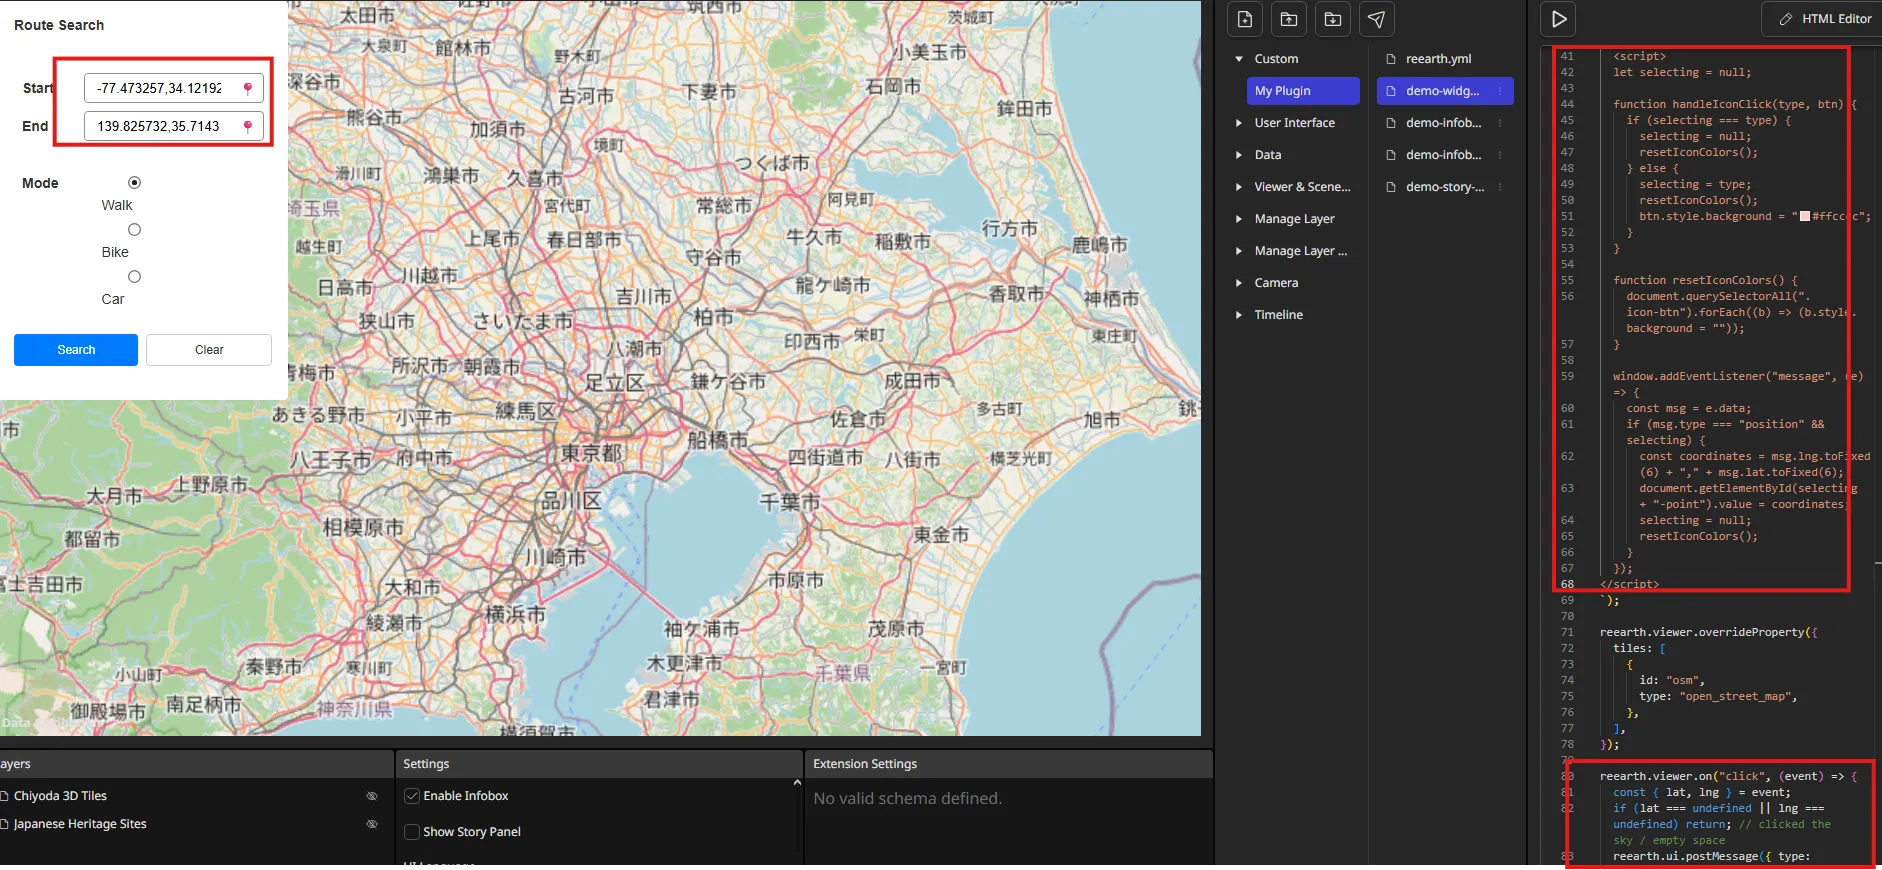
Section titled “Step 5 — Select points on the map”The reader clicks the 📍 icon to enter pick mode, then clicks the map to fill the matching input. That takes a message in each direction.
Send the clicked coordinate to the UI
Section titled “Send the clicked coordinate to the UI”Below reearth.ui.show(...), add a listener for map clicks:
reearth.viewer.on("click", (event) => { const { lat, lng } = event; if (lat === undefined || lng === undefined) return; // clicked the sky / empty space reearth.ui.postMessage({ type: "position", lat, lng });});reearth.viewer.on("click", ...) fires on every map click, and reearth.ui.postMessage sends data from the Visualizer into the widget iframe. A click that misses the globe carries no coordinate, which is why the handler returns early: posting a position of undefined leaves the widget calling .toFixed() on nothing, and pick mode jams with no visible cause.
Receive the coordinate in the widget
Section titled “Receive the coordinate in the widget”Inside the HTML you passed to reearth.ui.show, just before the closing backtick, add a <script> block:
<script>  let selecting = null;
  function handleIconClick(type, btn) {    if (selecting === type) {      selecting = null;      resetIconColors();    } else {      selecting = type;      resetIconColors();      btn.style.background = "#ffcccc";    }  }
  function resetIconColors() {    document.querySelectorAll(".icon-btn").forEach((b) => (b.style.background = ""));  }
  window.addEventListener("message", (e) => {    const msg = e.data;    if (msg.type === "position" && selecting) {      const coordinates = msg.lng.toFixed(6) + "," + msg.lat.toFixed(6);      document.getElementById(selecting + "-point").value = coordinates;      selecting = null;      resetIconColors();    }  });</script>
Inside the iframe, messages arrive through window.addEventListener("message", ...). While pick mode is on, the coordinate is written into the start or end input. The coordinate order is lng,lat, which is the order the routing service expects.
Click the 📍 icon and then the map: the input fills with the coordinate you clicked.
Step 6 — Show markers for the selected points
Section titled “Step 6 — Show markers for the selected points”A marker on each selected point comes from the Layers API.
Request a marker from the widget
Section titled “Request a marker from the widget”Inside the <script>, add a helper:
function addMarkerLayer(lat, lng, pointName) { parent.postMessage({ action: "addMarkerLayer", lat, lng, pointName }, "*");}Then call it from the message listener by adding addMarkerLayer(msg.lat, msg.lng, selecting); directly above selecting = null;.
parent.postMessage sends data from the widget iframe back to the Visualizer. Together with reearth.ui.postMessage from the previous step, it forms the two-way channel that carries almost every interactive plugin.
Add the marker on the Visualizer side
Section titled “Add the marker on the Visualizer side”Below the reearth.viewer.on("click", ...) block, add the id variables that will track this plugin’s own layers, and a handler for messages coming from the widget:
let startMarkerId = null;let endMarkerId = null;
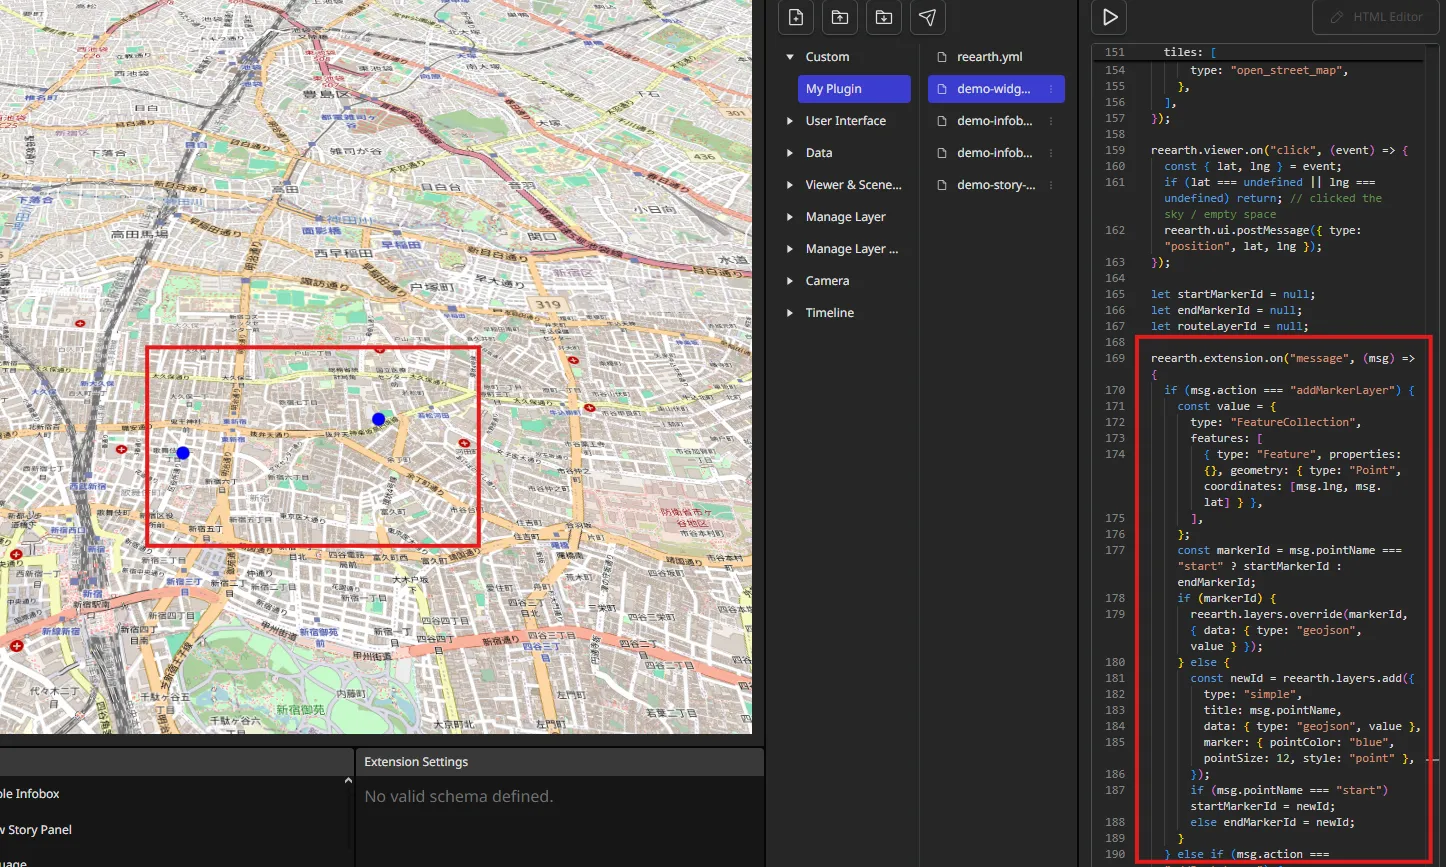
reearth.extension.on("message", (msg) => {  if (msg.action === "addMarkerLayer") {    const value = {      type: "FeatureCollection",      features: [        { type: "Feature", properties: {}, geometry: { type: "Point", coordinates: [msg.lng, msg.lat] } },      ],    };    const markerId = msg.pointName === "start" ? startMarkerId : endMarkerId;    if (markerId) {      reearth.layers.override(markerId, { data: { type: "geojson", value } });    } else {      const newId = reearth.layers.add({        type: "simple",        title: msg.pointName,        data: { type: "geojson", value },        marker: { pointColor: "blue", pointSize: 12, style: "point" },      });      if (msg.pointName === "start") startMarkerId = newId;      else endMarkerId = newId;    }  }});
reearth.extension.on("message", ...) receives what the widget sends, and the handler branches on msg.action. startMarkerId and endMarkerId hold the id reearth.layers.add returns for each marker. Looking a layer up by id, rather than by searching for a layer titled start or end with reearth.layers.find, is what keeps reearth.layers.override from touching some other layer that happens to share that title — an existing layer already in the project, or a temporary one added by another plugin.
A blue marker now appears where you click, and picking a new point moves it rather than leaving a trail.
Step 7 — Search the route
Section titled “Step 7 — Search the route”The route comes from OSRM (Open Source Routing Machine), an open-source routing engine, through its public demo server. Add these functions inside the <script>:
// The demo server serves each travel mode from its own host.const OSRM_HOSTS = {  foot: "https://routing.openstreetmap.de/routed-foot",  bike: "https://routing.openstreetmap.de/routed-bike",  car: "https://routing.openstreetmap.de/routed-car",};
function setStatus(text) {  document.getElementById("status").textContent = text || "";}
async function getRoute(start, end, mode) {  const url =    OSRM_HOSTS[mode] +    "/route/v1/driving/" + start + ";" + end +    "?overview=full&geometries=geojson";
  const res = await fetch(url);  const data = await res.json();  if (!res.ok || data.code !== "Ok") throw new Error(data.message || "No route found");
  const route = data.routes[0];  return {    type: "Feature",    geometry: route.geometry,    properties: { distance: route.distance, duration: route.duration },  };}
function addRouteLayer(geojson) {  parent.postMessage({ action: "addRouteLayer", geojson }, "*");}
async function searchRoute() {  const start = document.getElementById("start-point").value.trim();  const end = document.getElementById("end-point").value.trim();  if (!start || !end) {    setStatus("Set both a start and an end point.");    return;  }  const mode = document.querySelector('input[name="transport"]:checked').value;  setStatus("Searching...");  try {    const [startLng, startLat] = start.split(",").map(Number);    const [endLng, endLat] = end.split(",").map(Number);    if ([startLng, startLat, endLng, endLat].some(Number.isNaN)) {      throw new Error("Enter coordinates as lng,lat");    }    addMarkerLayer(startLat, startLng, "start");    addMarkerLayer(endLat, endLng, "end");    const geojson = await getRoute(start, end, mode);    addRouteLayer(geojson);    setStatus("");  } catch (err) {    console.error("Failed to get route:", err);    setStatus("Route search failed.");  }}
getRoute calls the routing service with fetch, checks the response, and reshapes it into a GeoJSON Feature carrying distance in metres and duration in seconds. searchRoute validates the two inputs, parses each into lng and lat, and calls addMarkerLayer for both points before it calls getRoute. That is what gives a start or end point typed directly into the input its marker too, not just one picked on the map — until now, typing a coordinate moved the route but left the marker at wherever it last was, or missing entirely. Failures — an empty field, text that will not parse as coordinates, or a rejected route — all land in the status line under the buttons, so they report themselves instead of doing nothing.
Each travel mode has its own host, which is why OSRM_HOSTS maps a radio value to a host while the path stays /driving/. The profile segment of an OSRM URL does not select the travel mode on the public demo server: a request to router.project-osrm.org/route/v1/foot/... is accepted and still returns a driving route, which would leave the Walk, Bike, and Car options with no effect.
Step 8 — Draw the route layer
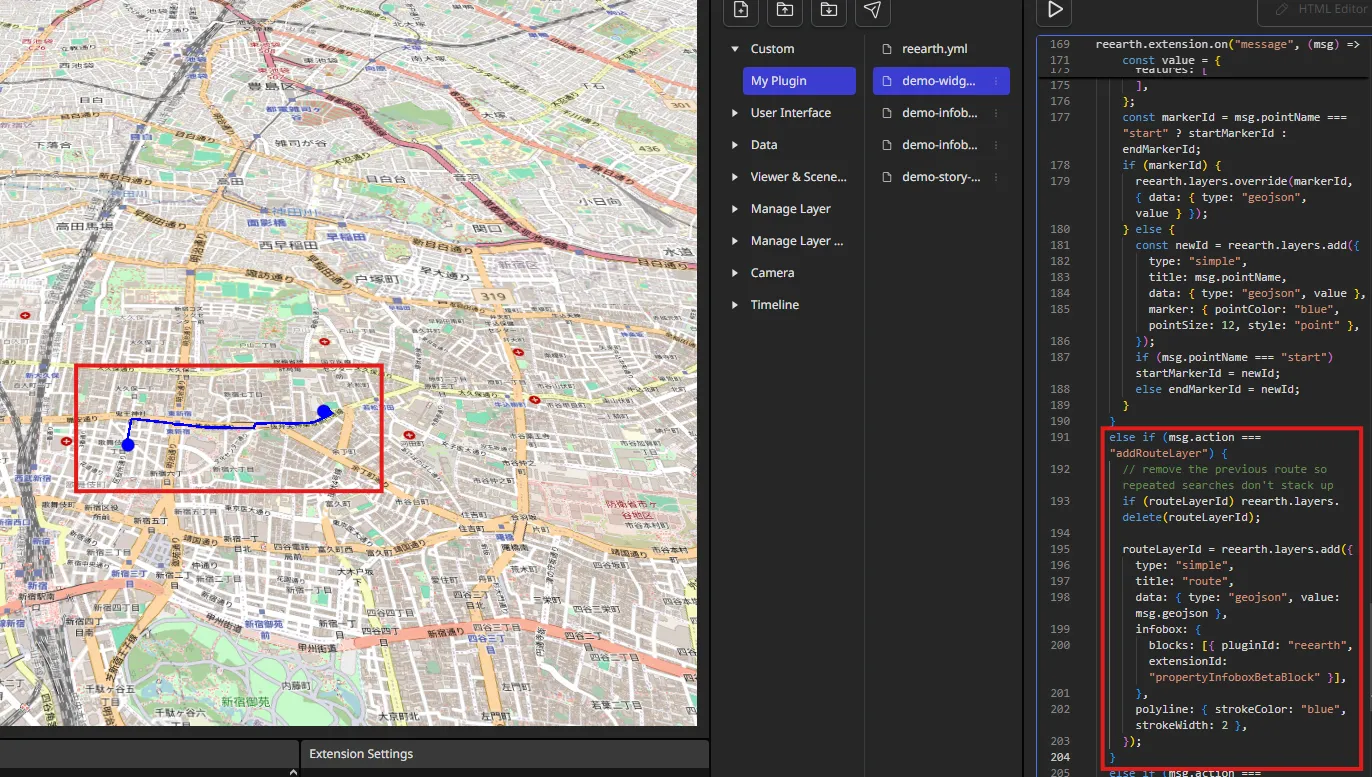
Section titled “Step 8 — Draw the route layer”Handle the addRouteLayer action on the Visualizer side. This is a second branch of the same reearth.extension.on("message", ...) handler from the marker step: the leading } closes the addMarkerLayer branch, so replace that branch’s closing brace with the block below rather than pasting it after the whole handler. Also add a third id variable next to startMarkerId and endMarkerId: let routeLayerId = null;.
} else if (msg.action === "addRouteLayer") {  // remove the previous route so repeated searches don't stack up  if (routeLayerId) reearth.layers.delete(routeLayerId);
  routeLayerId = reearth.layers.add({    type: "simple",    title: "route",    data: { type: "geojson", value: msg.geojson },    infobox: {      blocks: [{ pluginId: "reearth", extensionId: "propertyInfoboxBetaBlock" }],    },    polyline: { strokeColor: "blue", strokeWidth: 2 },  });}
The route is a simple layer whose GeoJSON comes straight from the routing response. polyline styles the line. infobox reports the route’s distance and duration when the line is clicked. routeLayerId tracks this layer the same way startMarkerId and endMarkerId track the markers, so deleting the previous route before adding the new one only ever touches a layer this plugin created.
Set both points, choose a mode, and select Search: a blue line follows the route, and clicking it opens the infobox.
Step 9 — Clear the route and markers
Section titled “Step 9 — Clear the route and markers”Inside the <script>, add the function behind the Clear button:
function deleteRouteAndMarker() { document.getElementById("start-point").value = ""; document.getElementById("end-point").value = ""; selecting = null; resetIconColors(); setStatus(""); parent.postMessage({ action: "deleteRouteAndMarkerLayer" }, "*");}On the Visualizer side, chain a third branch onto the same handler, the way the route branch was added:
} else if (msg.action === "deleteRouteAndMarkerLayer") { if (routeLayerId) { reearth.layers.delete(routeLayerId); routeLayerId = null; } if (startMarkerId) { reearth.layers.delete(startMarkerId); startMarkerId = null; } if (endMarkerId) { reearth.layers.delete(endMarkerId); endMarkerId = null; }}reearth.layers.delete removes a layer by id — the same three ids the other two branches maintain. Setting each one back to null after deleting it is what lets the next search create a fresh marker or route layer, rather than overriding a layer that no longer exists.
Step 10 — Set the initial camera view
Section titled “Step 10 — Set the initial camera view”Give the scene an opening position. Add this once, after reearth.ui.show(...):
reearth.camera.setView({ lat: 35.68426, lng: 139.71043, height: 2000, heading: 0, pitch: -0.785, roll: 0,});setView moves to a position immediately. reearth.camera.flyTo animates there instead.
Step 11 — Export and install the plugin
Section titled “Step 11 — Export and install the plugin”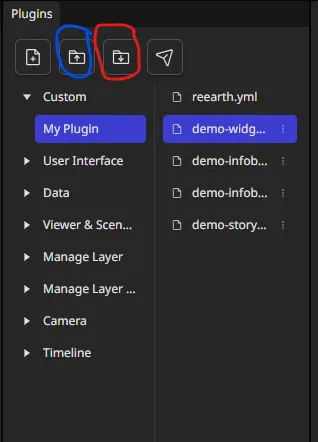
- In the Playground, select Export plugin to download a
.zip. - In your Re:Earth Visualizer project, open the plugin install dialog and choose Zip file from PC, then select the file you downloaded.
- After the upload reports success, add the widget from the Widgets tab.
If installation fails, check that reearth.yml is valid, that no plugin with the same id is installed already, and that the .zip holds a single folder with reearth.yml at its root. Some compression tools write a .zip that the dialog rejects, so try another one.
Step 12 — Check the result
Section titled “Step 12 — Check the result”
Confirm the finished widget end to end:
- Select the 📍 next to Start, then click the map. The input fills and a blue marker appears.
- Do the same for End.
- Choose a travel mode and select Search. The route line is drawn, and clicking it reports distance and duration.
- Select Clear. The line and both markers are removed.
Full demo-widget code
// ---------- Plugin context: build and show the widget UI ----------// (only the code inside the <script> below runs in the widget iframe)reearth.ui.show(`  <style>    @import url("https://reearth.github.io/visualizer-plugin-sample-data/public/css/preset-ui.css");  </style>  <div class="rounded-sm secondary-background" style="width: 290px">    <div class="display-flex flex-between p-16" style="height: 48px">      <h2 class="text-md">Route Search</h2>    </div>    <div class="flex-column p-8">      <div class="flex-column gap-8 p-16">        <div class="flex-between" style="gap: 0">          <label class="font-bold" for="start-point">Start</label>          <div class="display-flex" style="width: 180px; height: 30px; border-radius: 4px; border: 1px solid #8b8b8b">            <input id="start-point" type="text" placeholder="lng,lat" style="border: none; outline: 0" />            <button class="icon-btn" onclick="handleIconClick('start', this)">📍</button>          </div>        </div>        <div class="flex-between" style="gap: 0">          <label class="font-bold" for="end-point">End</label>          <div class="display-flex" style="width: 180px; height: 30px; border-radius: 4px; border: 1px solid #8b8b8b">            <input id="end-point" type="text" placeholder="lng,lat" style="border: none; outline: 0" />            <button class="icon-btn" onclick="handleIconClick('end', this)">📍</button>          </div>        </div>      </div>      <div class="display-flex p-16" style="align-items: flex-start; gap: 43px">        <label class="font-bold">Mode</label>        <div class="flex-column gap-4">          <label><input type="radio" name="transport" value="foot" checked /> Walk</label>          <label><input type="radio" name="transport" value="bike" /> Bike</label>          <label><input type="radio" name="transport" value="car" /> Car</label>        </div>      </div>      <div class="display-flex gap-8 p-8">        <button class="btn-primary button-padding w-full text-sm" onclick="searchRoute()">Search</button>        <button class="btn-neutral button-padding w-full text-sm" onclick="deleteRouteAndMarker()">Clear</button>      </div>      <p id="status" class="text-sm p-8" style="margin: 0; min-height: 18px"></p>    </div>  </div>
  <script>    let selecting = null;
    // The demo server serves each travel mode from its own host.    const OSRM_HOSTS = {      foot: "https://routing.openstreetmap.de/routed-foot",      bike: "https://routing.openstreetmap.de/routed-bike",      car: "https://routing.openstreetmap.de/routed-car",    };
    function setStatus(text) {      document.getElementById("status").textContent = text || "";    }
    function resetIconColors() {      document.querySelectorAll(".icon-btn").forEach((b) => (b.style.background = ""));    }
    function handleIconClick(type, btn) {      if (selecting === type) {        selecting = null;        resetIconColors();      } else {        selecting = type;        resetIconColors();        btn.style.background = "#ffcccc";      }    }
    function addMarkerLayer(lat, lng, pointName) {      parent.postMessage({ action: "addMarkerLayer", lat, lng, pointName }, "*");    }
    function addRouteLayer(geojson) {      parent.postMessage({ action: "addRouteLayer", geojson }, "*");    }
    async function getRoute(start, end, mode) {      const url =        OSRM_HOSTS[mode] +        "/route/v1/driving/" + start + ";" + end +        "?overview=full&geometries=geojson";
      const res = await fetch(url);      const data = await res.json();      if (!res.ok || data.code !== "Ok") throw new Error(data.message || "No route found");
      const route = data.routes[0];      return {        type: "Feature",        geometry: route.geometry,        properties: { distance: route.distance, duration: route.duration },      };    }
    async function searchRoute() {      const start = document.getElementById("start-point").value.trim();      const end = document.getElementById("end-point").value.trim();      if (!start || !end) {        setStatus("Set both a start and an end point.");        return;      }      const mode = document.querySelector('input[name="transport"]:checked').value;      setStatus("Searching...");      try {        const [startLng, startLat] = start.split(",").map(Number);        const [endLng, endLat] = end.split(",").map(Number);        if ([startLng, startLat, endLng, endLat].some(Number.isNaN)) {          throw new Error("Enter coordinates as lng,lat");        }        addMarkerLayer(startLat, startLng, "start");        addMarkerLayer(endLat, endLng, "end");        const geojson = await getRoute(start, end, mode);        addRouteLayer(geojson);        setStatus("");      } catch (err) {        console.error("Failed to get route:", err);        setStatus("Route search failed.");      }    }
    function deleteRouteAndMarker() {      document.getElementById("start-point").value = "";      document.getElementById("end-point").value = "";      selecting = null;      resetIconColors();      setStatus("");      parent.postMessage({ action: "deleteRouteAndMarkerLayer" }, "*");    }
    window.addEventListener("message", (e) => {      const msg = e.data;      if (msg.type === "position" && selecting) {        const target = selecting;        document.getElementById(target + "-point").value =          msg.lng.toFixed(6) + "," + msg.lat.toFixed(6);        addMarkerLayer(msg.lat, msg.lng, target);        selecting = null;        resetIconColors();      }    });  </script>`);
// ---------- Plugin logic (runs in the Visualizer context) ----------
reearth.viewer.overrideProperty({  tiles: [    {      id: "osm",      type: "open_street_map",    },  ],});
reearth.viewer.on("click", (event) => {  const { lat, lng } = event;  if (lat === undefined || lng === undefined) return; // clicked the sky / empty space  reearth.ui.postMessage({ type: "position", lat, lng });});
let startMarkerId = null;let endMarkerId = null;let routeLayerId = null;
reearth.extension.on("message", (msg) => {  if (msg.action === "addMarkerLayer") {    const value = {      type: "FeatureCollection",      features: [        { type: "Feature", properties: {}, geometry: { type: "Point", coordinates: [msg.lng, msg.lat] } },      ],    };    const markerId = msg.pointName === "start" ? startMarkerId : endMarkerId;    if (markerId) {      reearth.layers.override(markerId, { data: { type: "geojson", value } });    } else {      const newId = reearth.layers.add({        type: "simple",        title: msg.pointName,        data: { type: "geojson", value },        marker: { pointColor: "blue", pointSize: 12, style: "point" },      });      if (msg.pointName === "start") startMarkerId = newId;      else endMarkerId = newId;    }  } else if (msg.action === "addRouteLayer") {    // remove the previous route so repeated searches don't stack up    if (routeLayerId) reearth.layers.delete(routeLayerId);
    routeLayerId = reearth.layers.add({      type: "simple",      title: "route",      data: { type: "geojson", value: msg.geojson },      infobox: {        blocks: [{ pluginId: "reearth", extensionId: "propertyInfoboxBetaBlock" }],      },      polyline: { strokeColor: "blue", strokeWidth: 2 },    });  } else if (msg.action === "deleteRouteAndMarkerLayer") {    if (routeLayerId) {      reearth.layers.delete(routeLayerId);      routeLayerId = null;    }    if (startMarkerId) {      reearth.layers.delete(startMarkerId);      startMarkerId = null;    }    if (endMarkerId) {      reearth.layers.delete(endMarkerId);      endMarkerId = null;    }  }});
reearth.camera.setView({  lat: 35.68426,  lng: 139.71043,  height: 2000,  heading: 0,  pitch: -0.785,  roll: 0,});