Creating an Integration
Last updated
To use Integration API or Webhook, you first need to create an Integration. The process has two steps.
- Create an Integration on your personal account
- Connect the Integration to the workspace you want to use it with
1. Create an Integration
Section titled “1. Create an Integration”-
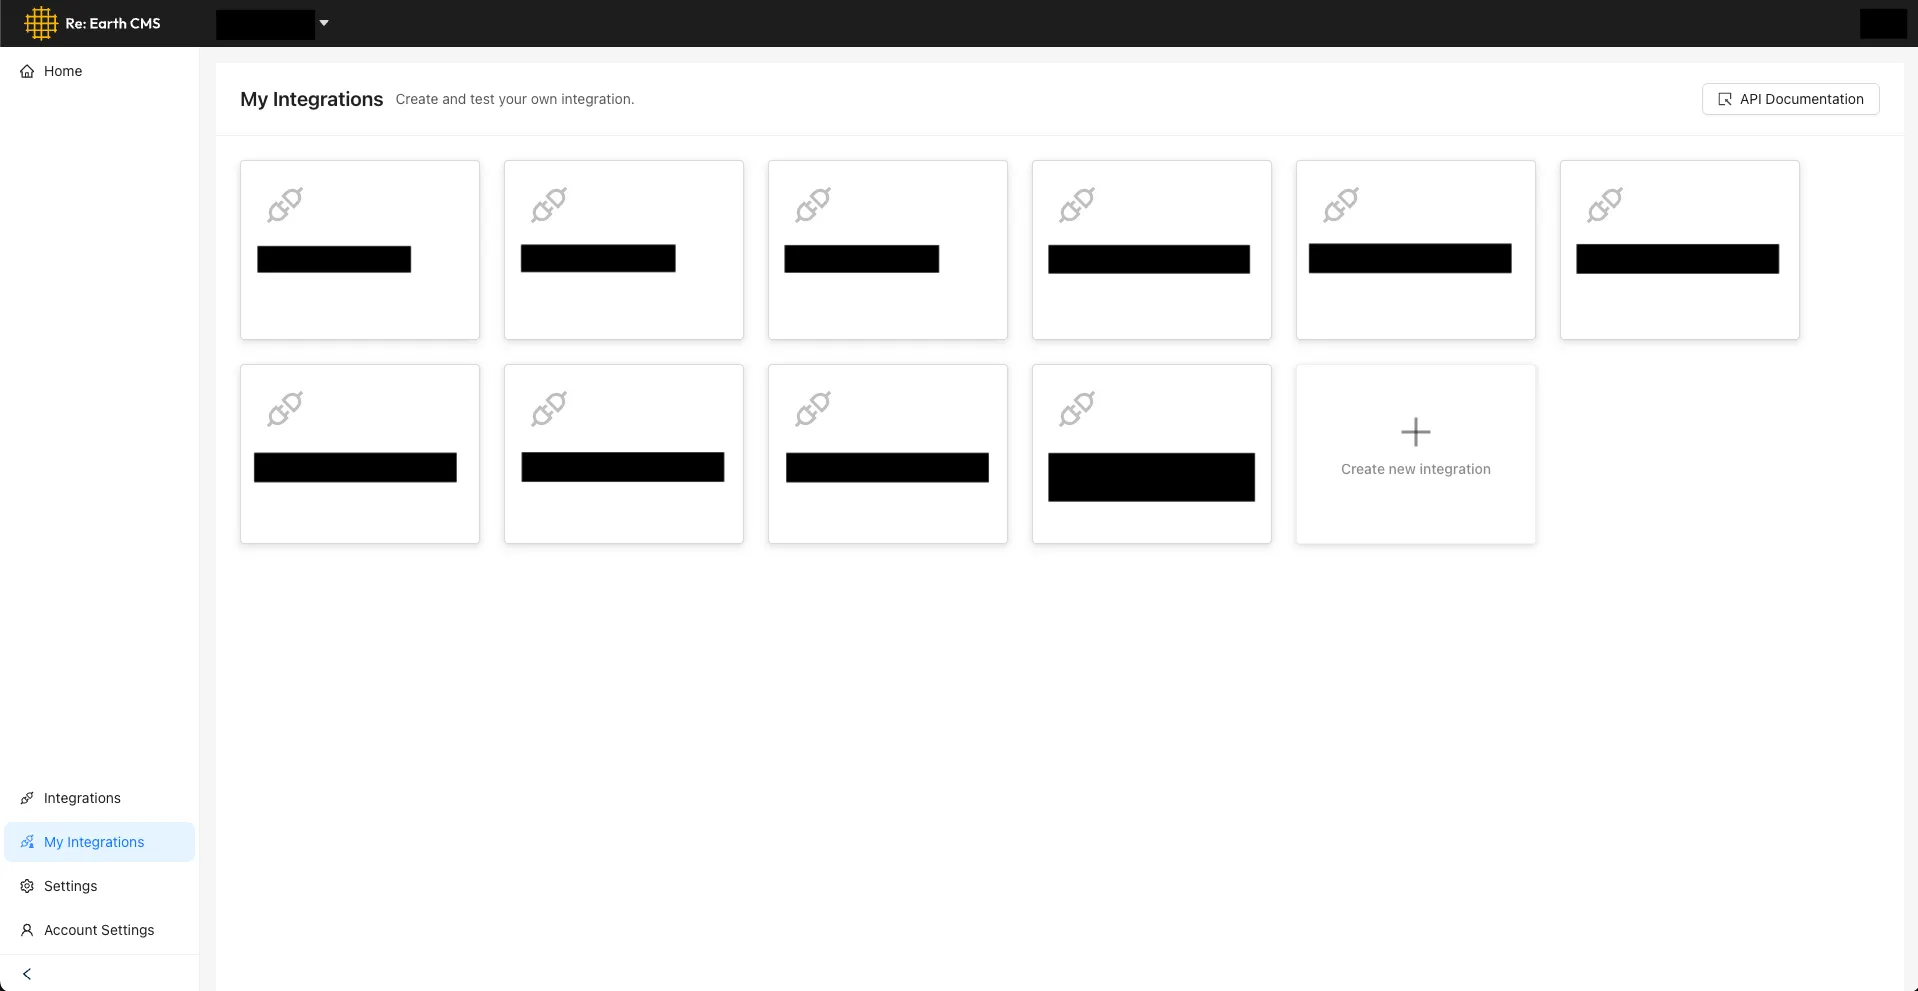
Go to your personal account and open the My Integrations tab in the Re:Earth CMS management console
-
Click the Create new integration button
-
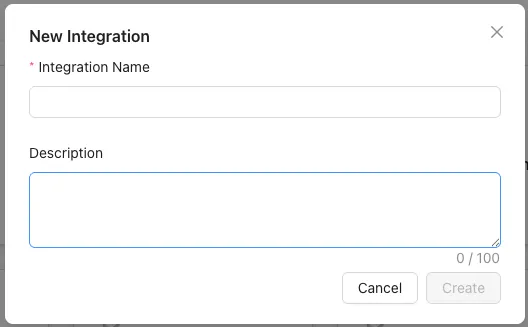
Enter an integration name (required). The description is optional
-
Click the Create button
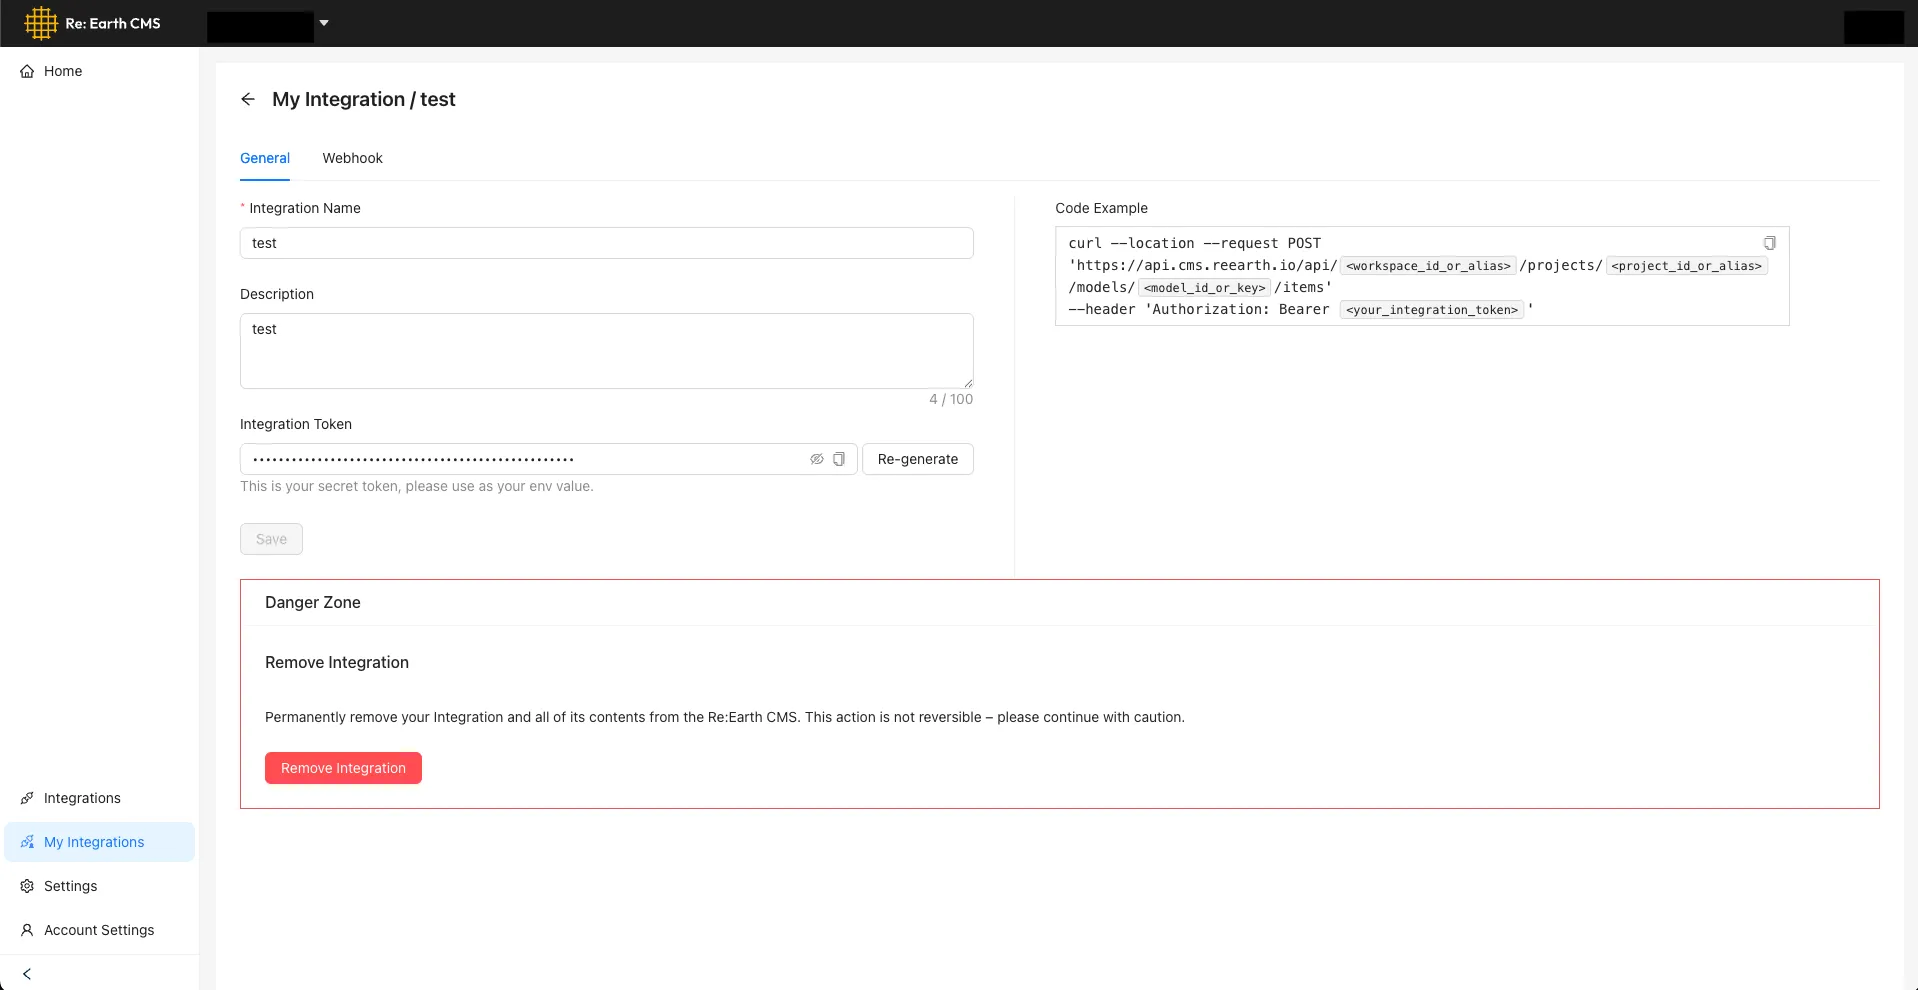
Once created, the new Integration is added to the My Integrations screen. Click it to see its token. Using this token, you can make API requests to create and update items.
2. Connect the Integration to a workspace
Section titled “2. Connect the Integration to a workspace”Connect the Integration you created to the target workspace.
-
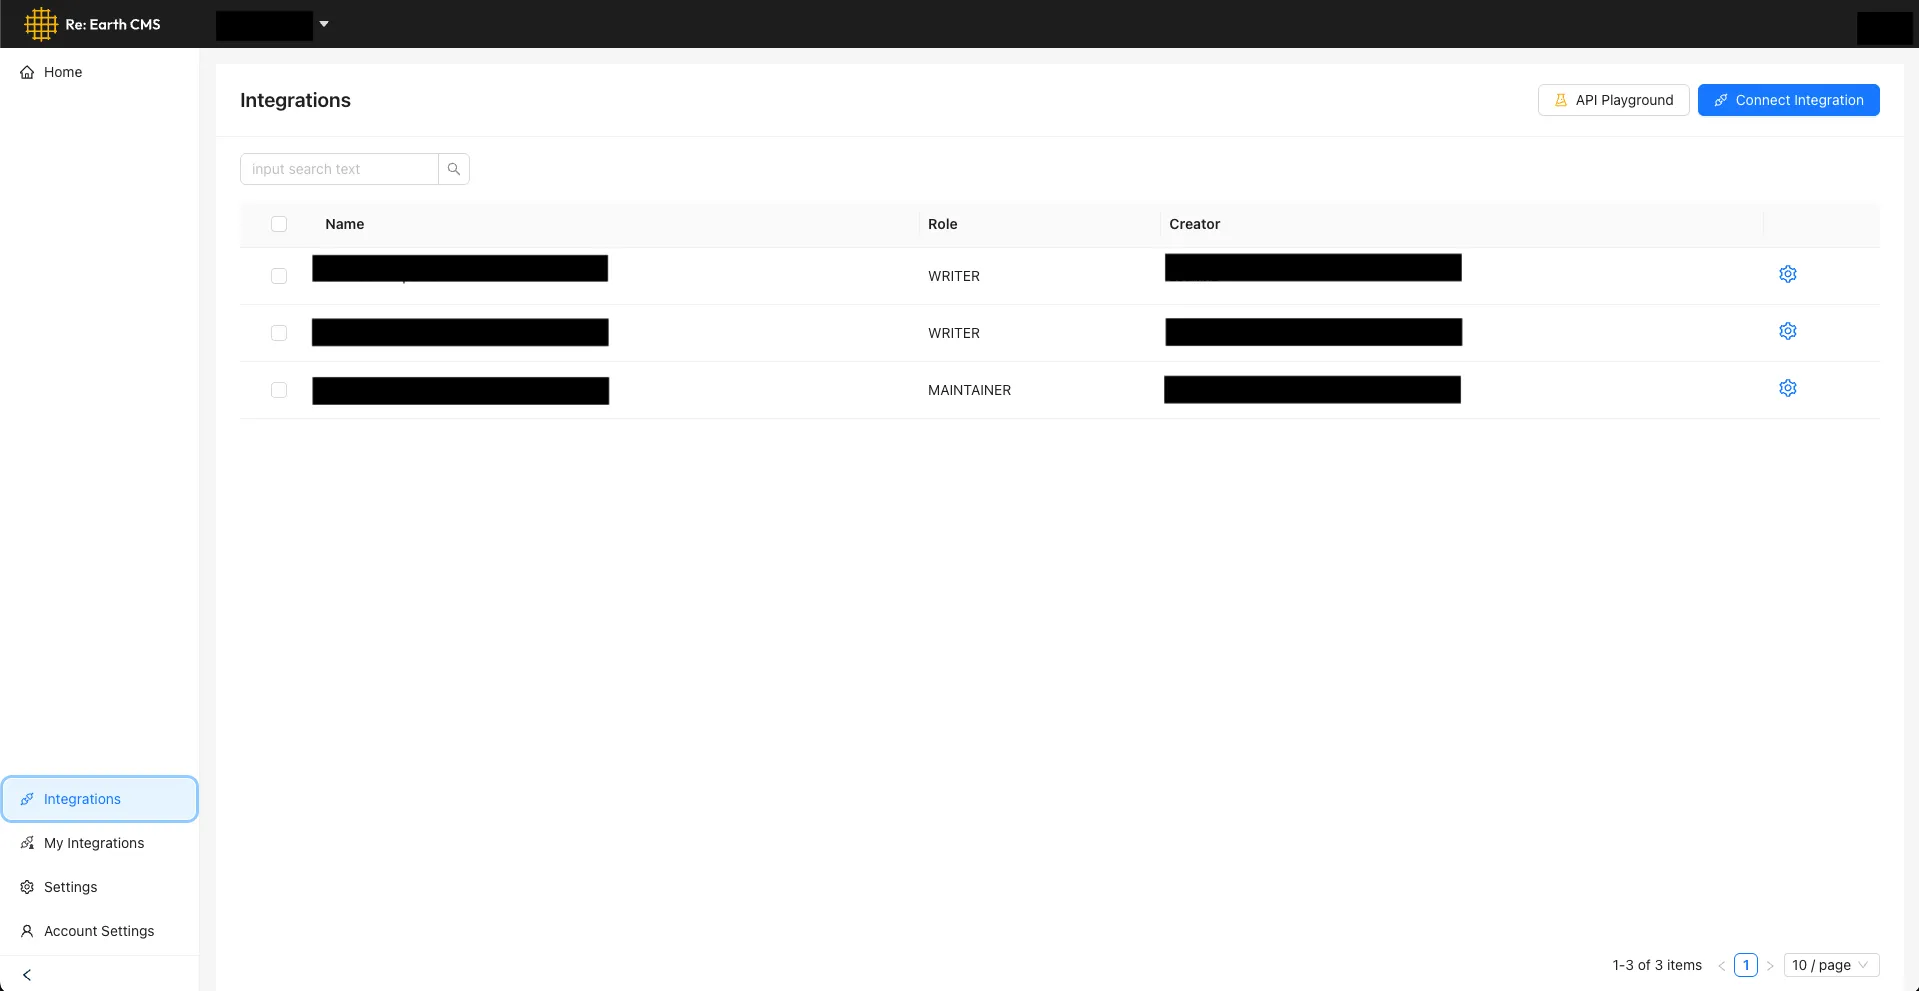
Go to the workspace where you want to use the Integration, open the Integrations tab in the Re:Earth CMS management console, and click the Connect Integration button
-
Select the Integration you created and click the Connect button
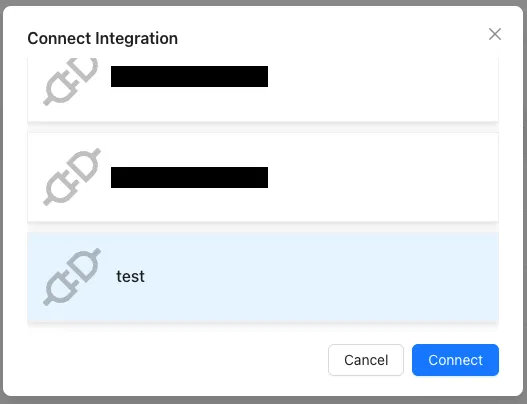
-
Once connected, the Integration appears on the Integrations screen. Use the Settings button to change its role — see “Roles” below for details on each role
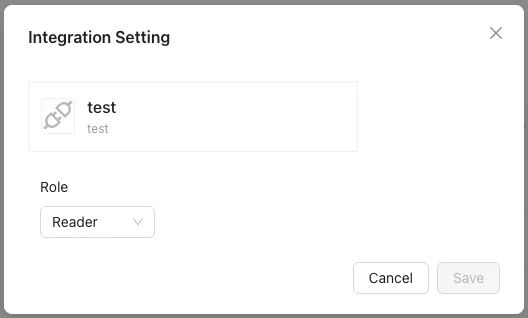
This lets you access the target workspace using the Integration’s token.
When you connect an Integration to a project, you assign it one of four roles. Each role defines what operations the Integration can perform within the project.
| Role | Description |
|---|---|
| owner | Can create, view, update, and delete all resources in the project. The role with the strongest privileges. |
| maintainer | Can broadly manage project settings, models/schemas/groups, items, and assets. Has the same operating privileges as owner. |
| writer | Can create and edit project content. Can only update or delete items it created itself. |
| reader | View-only access. Suited to stakeholders or external reviewers. |
Here’s the breakdown of permissions (✅ = allowed, ⚑ = conditionally allowed, ❌ = not allowed).
| Resource | Operation | owner | maintainer | writer | reader |
|---|---|---|---|---|---|
| Project settings | Create | ✅ | ✅ | ✅ | ❌ |
| Read | ✅ | ✅ | ✅ | ✅ | |
| Update | ✅ | ✅ | ✅ | ❌ | |
| Delete | ✅ | ✅ | ✅ | ❌ | |
| Models / schemas / groups | Create | ✅ | ✅ | ✅ | ❌ |
| Read | ✅ | ✅ | ✅ | ✅ | |
| Update | ✅ | ✅ | ✅ | ❌ | |
| Delete | ✅ | ✅ | ✅ | ❌ | |
| Items | Create | ✅ | ✅ | ✅ | ❌ |
| Read | ✅ | ✅ | ✅ | ✅ | |
| Update | ✅ | ✅ | ⚑ Only items it created itself | ❌ | |
| Delete | ✅ | ✅ | ⚑ Only items it created itself | ❌ | |
| Publish / Unpublish | ✅ | ✅ | ✅ | ❌ | |
| Assets | Create | ✅ | ✅ | ✅ | ❌ |
| Read | ✅ | ✅ | ✅ | ✅ | |
| Update | ✅ | ✅ | ✅ | ❌ | |
| Delete | ✅ | ✅ | ✅ | ❌ |
Regenerating the integration token
Section titled “Regenerating the integration token”If the token may have been compromised, or you want to reset it for security reasons, you can regenerate it.
From the Integration’s detail page, click the Re-generate button to regenerate the token.
Editing an Integration
Section titled “Editing an Integration”You can edit an Integration’s name and description from its detail page. After making changes, click the Save button.
Deleting an Integration
Section titled “Deleting an Integration”Click the Remove Integration button near the bottom of the Integration’s detail page, then click OK on the confirmation screen to delete the Integration.