Build an Infrastructure Inspection Map with the Integration API
Last updated
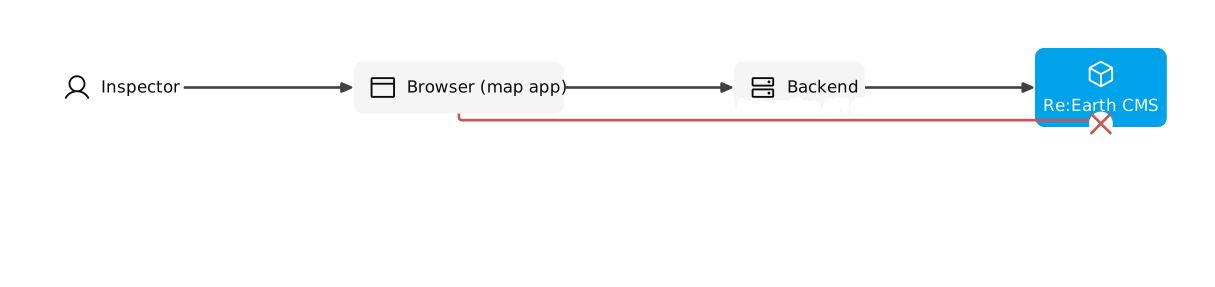
Using Re:Earth CMS’s Integration API, you’ll build a map-based app for reporting the condition of public infrastructure — manholes, streetlights, traffic signs, and public benches. A small backend holds the Integration API token and makes every CMS request on the app’s behalf, so the token never reaches the browser.
What you’ll build
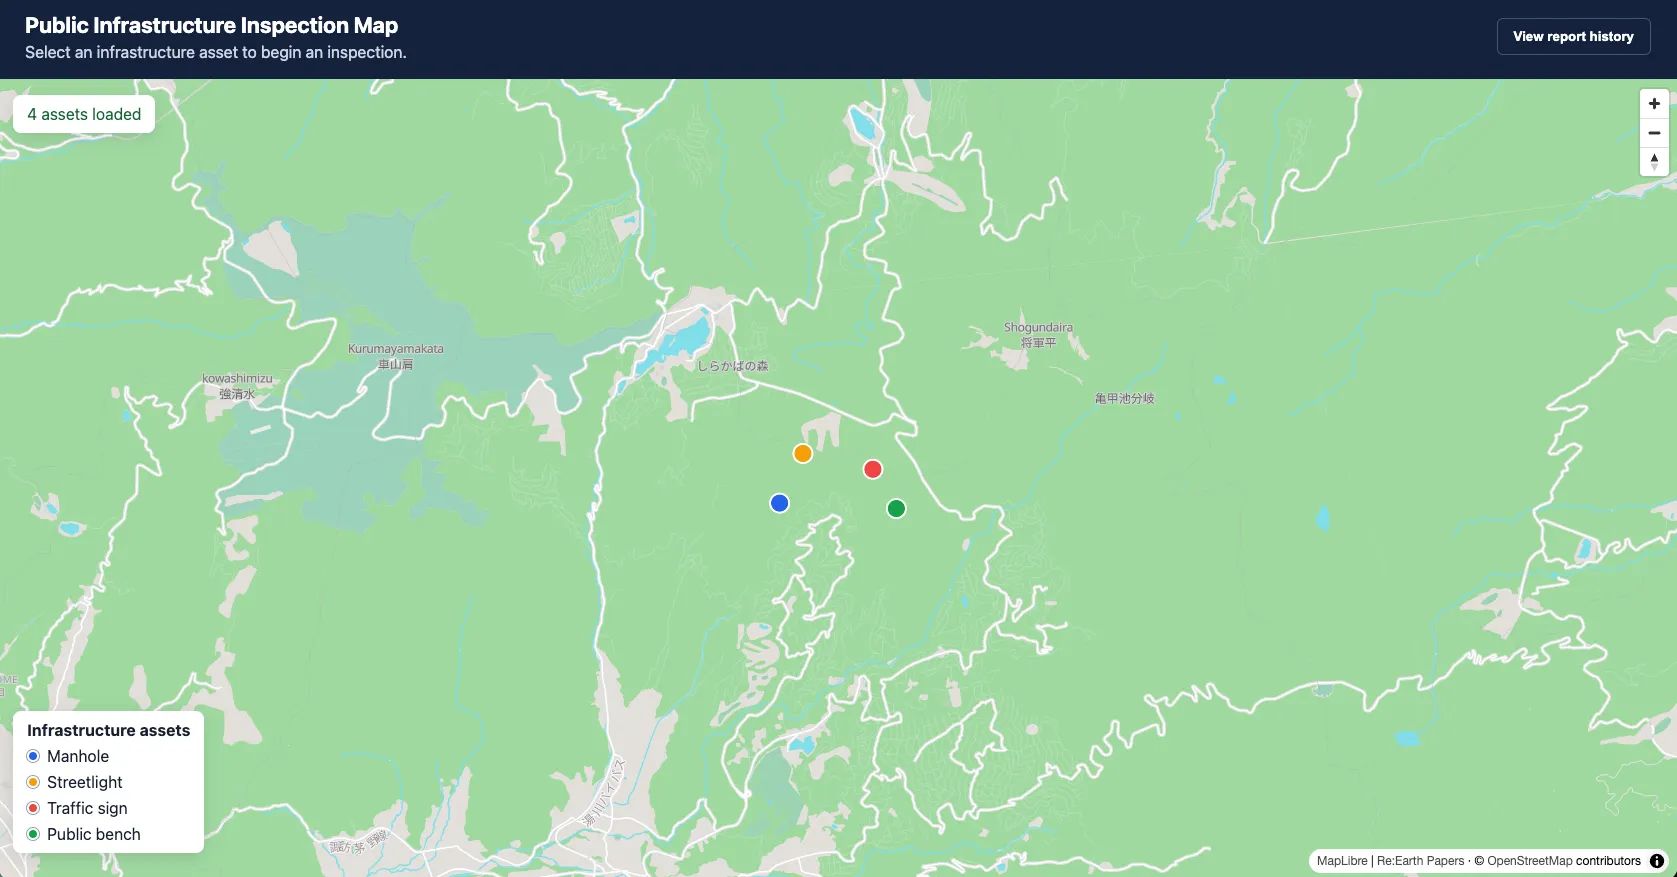
Section titled “What you’ll build”An inspector opens a map, clicks an infrastructure asset, and submits a condition report with an issue category, a severity, notes, and optional photos. Submitting a report creates and publishes an item in CMS through the Integration API, then updates the asset’s own condition and last-inspected date. A “View report history” button lists every report submitted so far.
Compare your project with the finished source code.
Prerequisites
Section titled “Prerequisites”- Node.js 20 or later
- Git
- A Re:Earth CMS workspace
- Basic familiarity with TypeScript
Step 1 — Set up the CMS project
Section titled “Step 1 — Set up the CMS project”Create the models
Section titled “Create the models”In the Re:Earth CMS management console, create a project, then add two models to it:
- On the project’s Models screen, click New Model, enter a name, and click OK
- On the model’s Schema screen, under Add Field, click a field type to add each field below
infrastructure-assets — the assets shown on the map.
| Field key | Field type | Options | Required |
|---|---|---|---|
asset-id | Text | — | Yes |
asset-name | Text | — | Yes |
asset-type | Option | manhole / streetlight / traffic_sign / public_bench | Yes |
location | Geometry Editor | Point | Yes |
current-condition | Option | good / fair / poor / critical / Not inspected | No |
last-inspected-at | Date | — | No |
reference-photo | Asset | — | No |
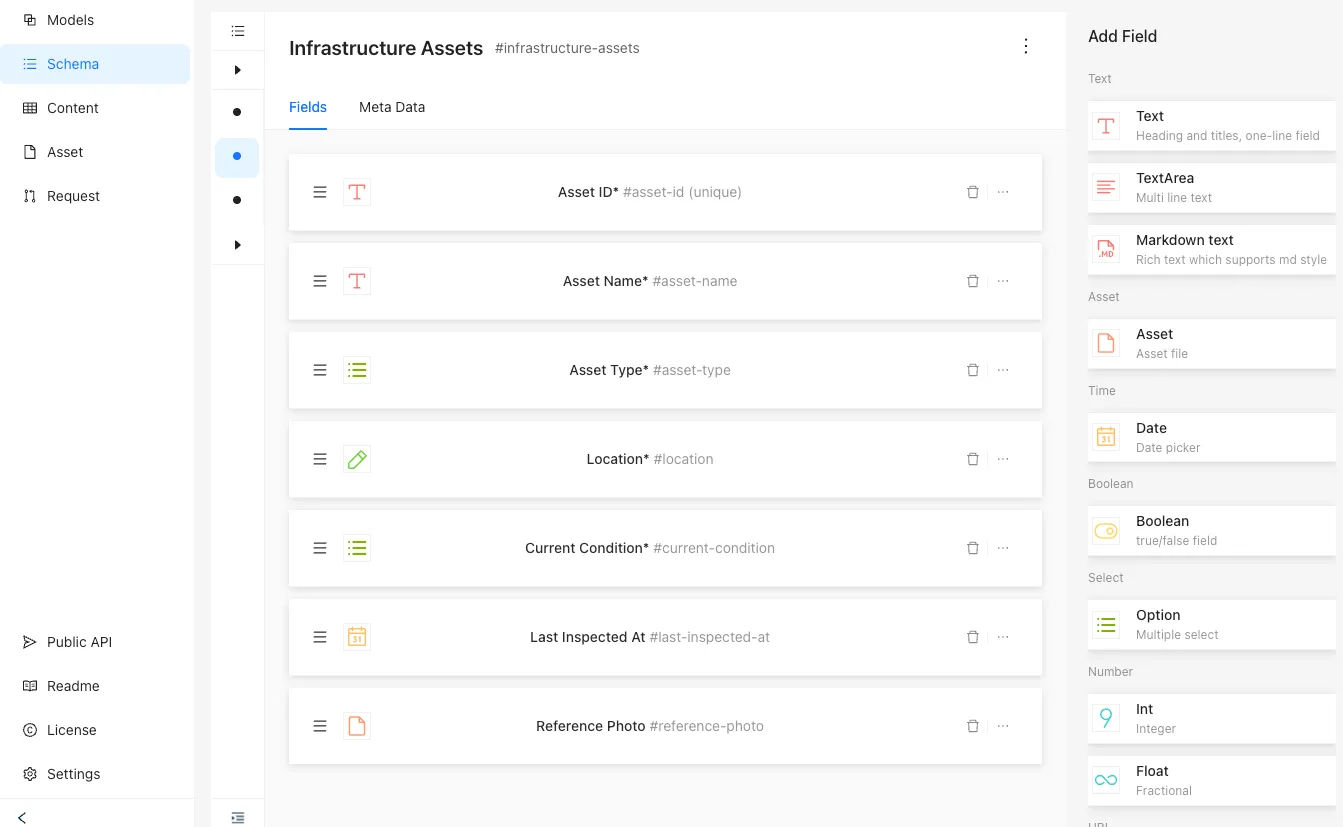
current-condition defaults to Not inspected on a newly created asset — you don’t need to set it yourself.
inspection-reports — the reports inspectors submit.
| Field key | Field type | Options | Required |
|---|---|---|---|
asset-id | Text | — | Yes |
asset-type | Option | manhole / streetlight / traffic_sign / public_bench | Yes |
location | Geometry Editor | Point | Yes |
inspection-date | Date | — | Yes |
condition | Option | good / fair / poor / critical | Yes |
issue-category | Option | no_issue / damage / obstruction / missing_component / malfunction / cleaning_required / other | Yes |
severity | Option | low / medium / high / urgent / not_applicable | Yes |
notes | TextArea | — | No |
photos | Asset, support multiple values | — | No |
report-status | Option | pending / approved / resolved | Yes |
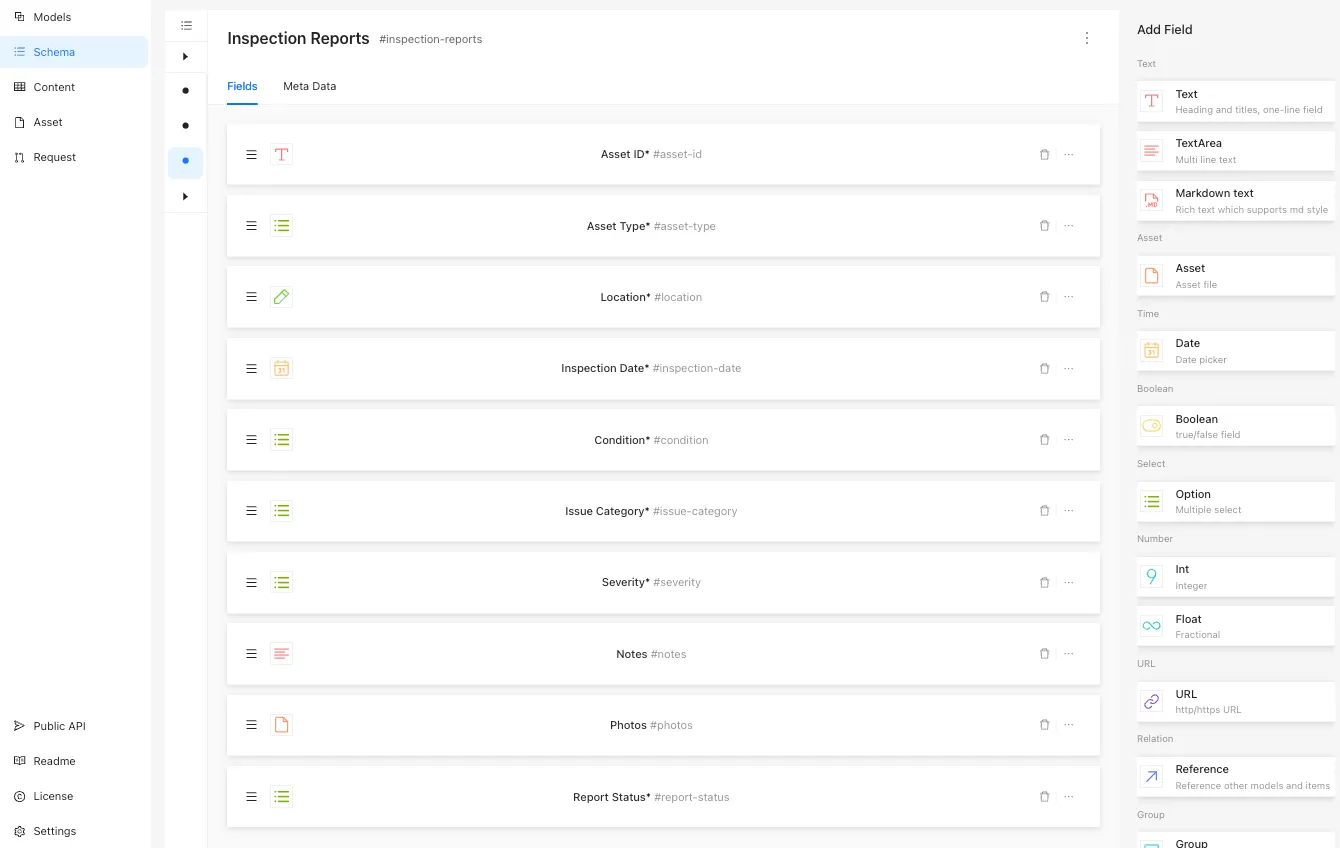
Create an Integration and connect it
Section titled “Create an Integration and connect it”- From your personal account, open My Integrations and create a new Integration — see Creating an Integration for the full walkthrough
- From the workspace that holds your project, open Integrations and connect the Integration you created
- Set its role to maintainer
Copy the Integration’s token. Treat it like a password: never commit it, and never put it in frontend code.
Try the Integration API with curl
Section titled “Try the Integration API with curl”Before touching the app, make one request directly — this is the exact shape the backend code in Step 3 builds on. Replace <base-url>, <workspace>, <project>, <assets-model>, and <token> with your own values: <base-url> is https://api.cms.reearth.io/api, <workspace> and <project> are visible in the browser’s URL bar when you’re viewing that workspace or project in the CMS management console, <assets-model> is the Model key shown when you created infrastructure-assets above, and <token> is the Integration token you just copied.
curl -X POST \ '<base-url>/<workspace>/projects/<project>/models/<assets-model>/items' \ -H 'Authorization: Bearer <token>' \ -H 'Content-Type: application/json' \ -d '{ "fields": [ { "key": "asset-id", "type": "text", "value": "MH-001" }, { "key": "asset-name", "type": "text", "value": "Demo Manhole 001" }, { "key": "asset-type", "type": "select", "value": "manhole" }, { "key": "location", "type": "geometryEditor", "value": "{\"type\":\"Point\",\"coordinates\":[138.26,36.06]}" } ] }'CMS returns the created item, including the id you’ll need next:
{ "id": "01...", "fields": [ { "key": "asset-id", "type": "text", "value": "MH-001" }, { "key": "asset-name", "type": "text", "value": "Demo Manhole 001" }, { "key": "asset-type", "type": "select", "value": "manhole" }, { "key": "location", "type": "geometryEditor", "value": "{\"type\":\"Point\",\"coordinates\":[138.26,36.06]}" }, { "key": "current-condition", "type": "select", "value": "Not inspected" } ], "refs": ["latest"]}New items are created as drafts — refs lists only latest. Publish it the same way the app does in Step 3:
curl -X POST \ '<base-url>/<workspace>/projects/<project>/models/<assets-model>/items/<item-id>/publish' \ -H 'Authorization: Bearer <token>'refs now includes public alongside latest — the item is retrievable through Public API too.
This covers one asset. Add a few more — a streetlight, a traffic sign, a public bench — directly through CMS Studio instead of repeating curl: choose the model under Content, click New Item, fill in the fields, then Save. The app has nothing to put on the map until a few assets like these exist.
Step 2 — Clone the repository and configure the backend
Section titled “Step 2 — Clone the repository and configure the backend”git clone https://github.com/eukarya-biz/infrastructure-inspection-tutorial.gitcd infrastructure-inspection-tutorial/backendnpm installcp .env.example .envOn Windows (Command Prompt), use copy .env.example .env instead of cp .env.example .env.
Fill in .env with the values from Step 1.
| Variable | Value |
|---|---|
PORT | Backend port (default 3000) |
CMS_BASE_URL | Your Re:Earth CMS API base URL |
CMS_WORKSPACE_ID | The workspace ID from Step 1 |
CMS_PROJECT_ID | The project ID from Step 1 |
CMS_ASSETS_MODEL | infrastructure-assets’s model key |
CMS_REPORTS_MODEL | inspection-reports’s model key |
CMS_INTEGRATION_TOKEN | The Integration token from Step 1 |
npm run devThe backend starts at http://localhost:3000.
Step 3 — See how the backend uses the Integration API
Section titled “Step 3 — See how the backend uses the Integration API”This is the part the first two steps were setting up for — every CMS write in this app goes through a handful of route handlers, all calling the Integration API with the token from .env.
Shared request helpers
Section titled “Shared request helpers”backend/src/cms.ts builds every CMS request the same way: the project’s base URL, plus an Authorization: Bearer <token> header.
export function cmsProjectUrl(config: CmsConfig, path: string): string {  return `${config.baseUrl}/${config.workspaceId}/projects/${config.projectId}${path}`;}
export function cmsHeaders(  config: CmsConfig,  extra?: Record<string, string>,): Record<string, string> {  return {    Authorization: `Bearer ${config.token}`,    Accept: "application/json",    ...extra,  };}
Creating a report
Section titled “Creating a report”POST /api/reports (backend/src/routes/reports.ts) builds a fields array and posts it to the reports model’s items endpoint.
const fields = [  { key: "asset-id", type: "text", value: assetId },  { key: "asset-type", type: "select", value: assetType },  { key: "location", type: "geometryEditor", value: JSON.stringify(location) },  { key: "inspection-date", type: "date", value: `${inspectionDate}T00:00:00+09:00` },  { key: "condition", type: "select", value: condition },  { key: "issue-category", type: "select", value: issueCategory },  { key: "severity", type: "select", value: severity },  { key: "report-status", type: "select", value: "pending" },];
if (validPhotoIds.length > 0) {  fields.push({ key: "photos", type: "asset", value: validPhotoIds });}
await fetch(cmsProjectUrl(config, `/models/${modelKey}/items`), { method: "POST", headers: cmsHeaders(config, { "Content-Type": "application/json" }), body: JSON.stringify({ fields }),});New items are created as drafts. The app publishes immediately after creating one, using the same Integration API token:
await fetch(`${itemUrl}/publish`, { method: "POST", headers: cmsHeaders(config),});Updating the asset
Section titled “Updating the asset”Once a report is published, PATCH /api/assets/:itemId (backend/src/routes/assets.ts) updates the asset’s own current-condition and last-inspected-at, then republishes it so the change is visible through Public API too:
await fetch(itemUrl, {  method: "PATCH",  headers: cmsHeaders(config, { "Content-Type": "application/json" }),  body: JSON.stringify({    fields: [      { key: "current-condition", type: "select", value: condition },      { key: "last-inspected-at", type: "date", value: inspectedAt },    ],  }),});
await fetch(`${itemUrl}/publish`, {  method: "POST",  headers: cmsHeaders(config),});
The full handlers add validation and error handling around these calls — see backend/src/routes/reports.ts and backend/src/routes/assets.ts for the complete code.
Step 4 — Run the frontend
Section titled “Step 4 — Run the frontend”cd ../frontendnpm installnpm run devOpen http://localhost:5173. The frontend never calls the Integration API directly — it only calls the backend’s own routes (/api/assets, /api/reports, and so on), and Vite’s dev server proxies those to the backend on port 3000. The token stays on the backend throughout.
Click an asset on the map to see its popup, then Start inspection to open the report form.
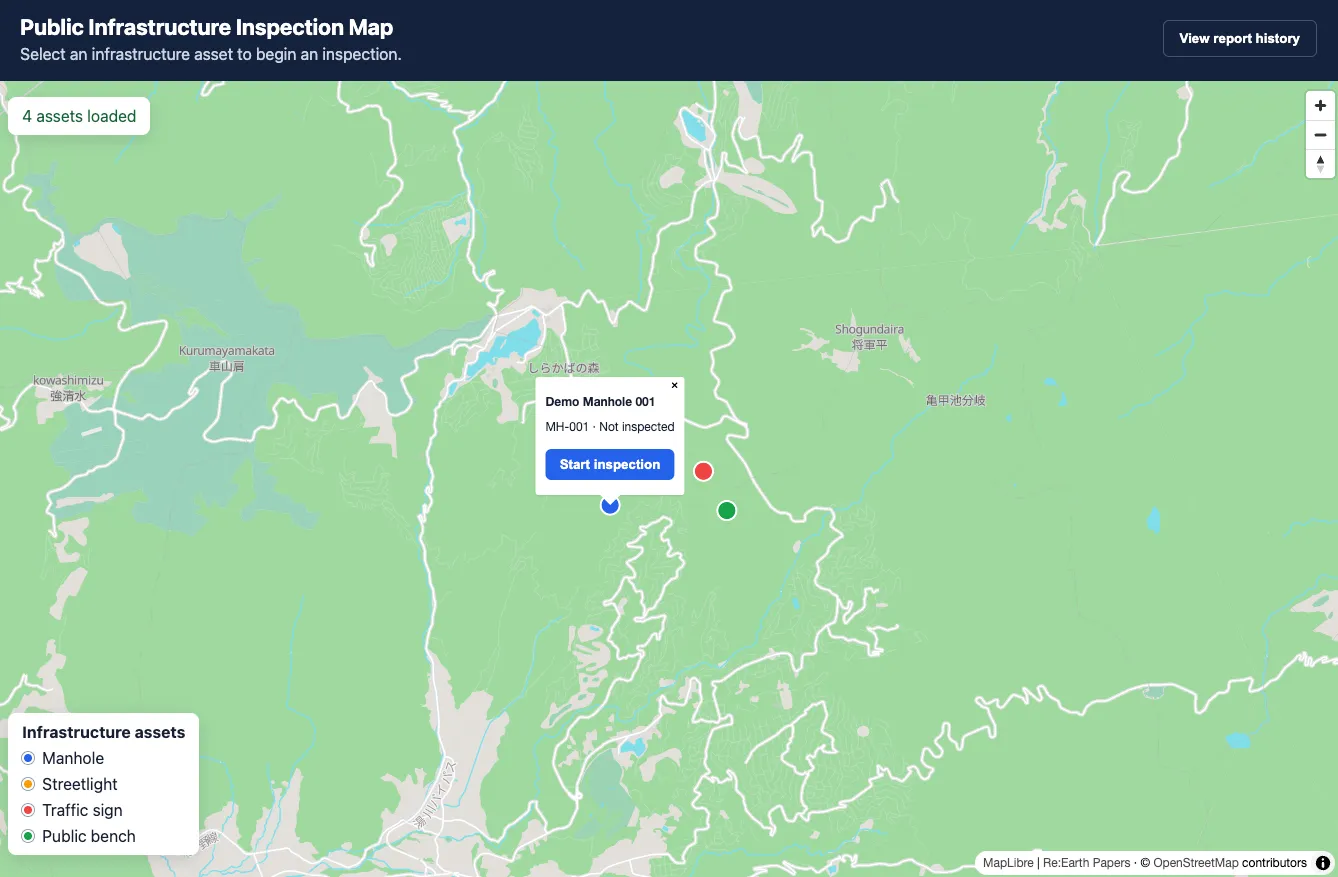
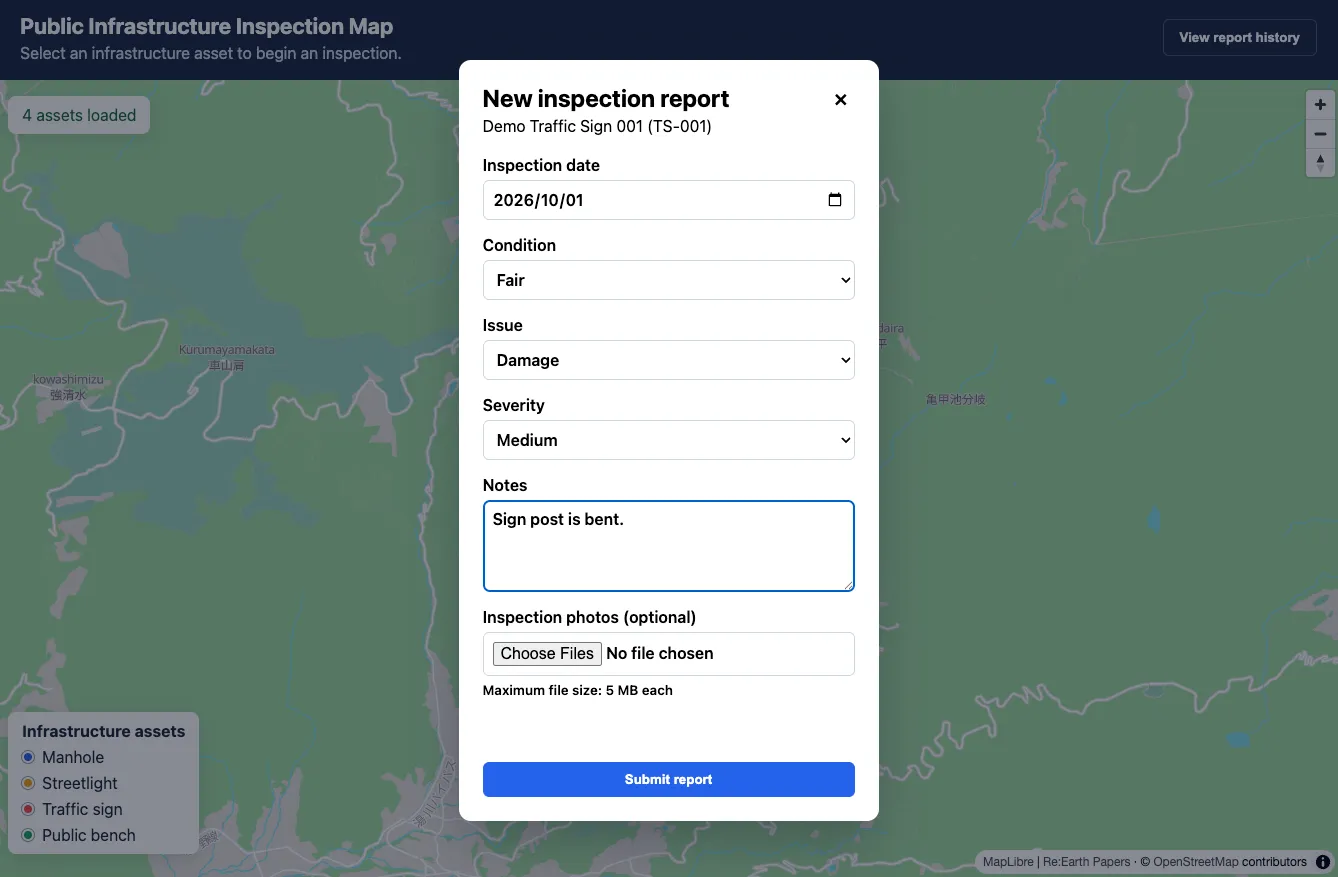
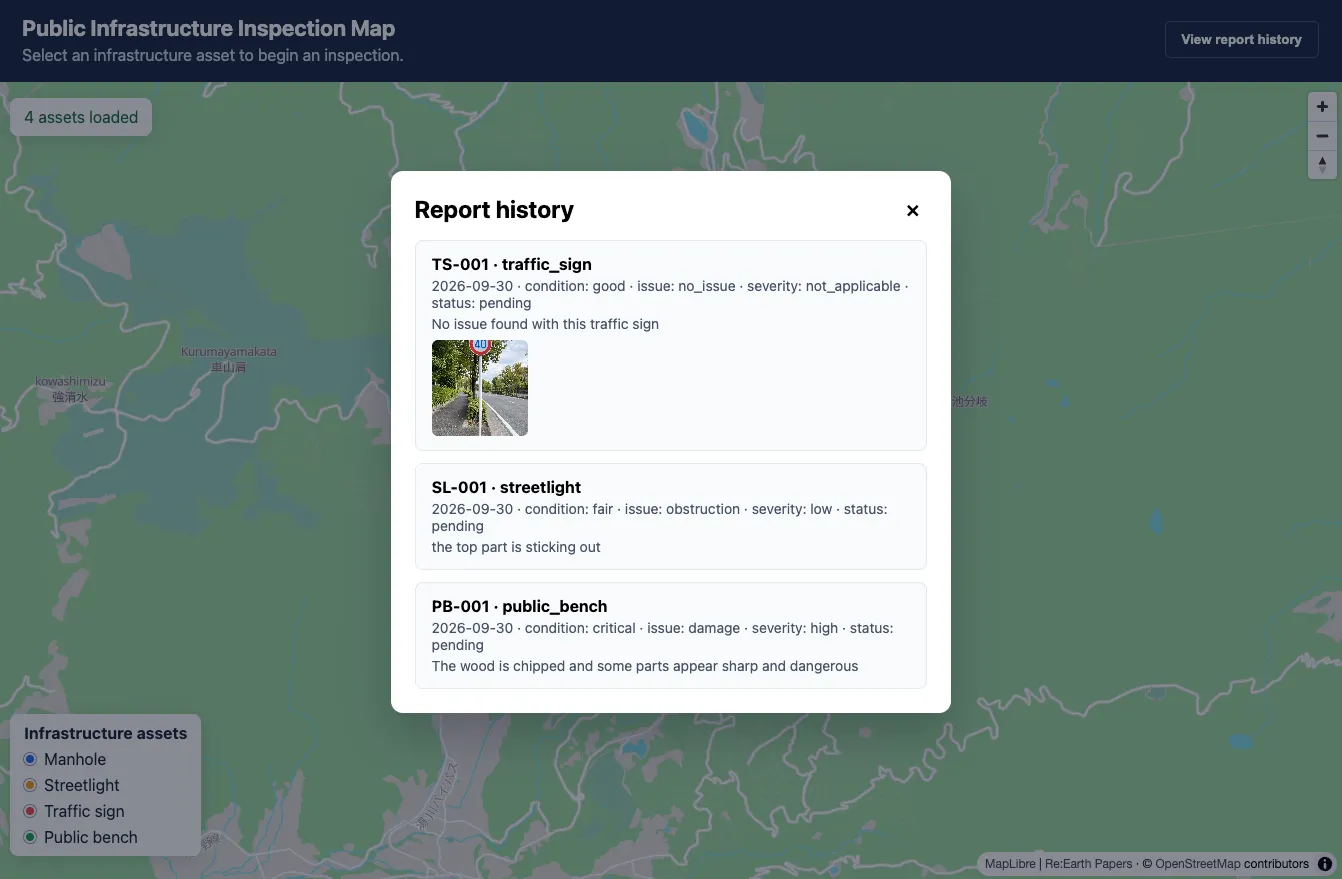
Fill in the form and click Submit report. This calls the backend routes from Step 3 in order: upload any photos, create the report, publish it, then update the asset. On success, the map’s status bar shows “Report submitted and <assetId> updated”. The View report history button lists every report submitted so far, including any attached photos.
Step 5 (optional) — Connect Re:Earth Visualizer
Section titled “Step 5 (optional) — Connect Re:Earth Visualizer”This step is optional — it’s a bonus on top of the app itself, not something the rest of the tutorial depends on.
The two CMS models can also be read directly from the browser, with no backend involved, using Public API.
- In each model’s Public API settings, open the Reading tab, enable the model, and click Save Changes
- Note each model’s
.geojsonendpoint:https://api.cms.reearth.io/api/p/<workspace>/<project>/<model>.geojson
Then, in Re:Earth Visualizer:
- Create a new project
- For each model, click + New Layer → Add Layer from Resource, choose the GeoJSON tab, set Source Type to From Web (not the default From Assets), paste the model’s
.geojsonendpoint as the Resource URL, then click Add to Layer - Open the Publish tab and click Publish
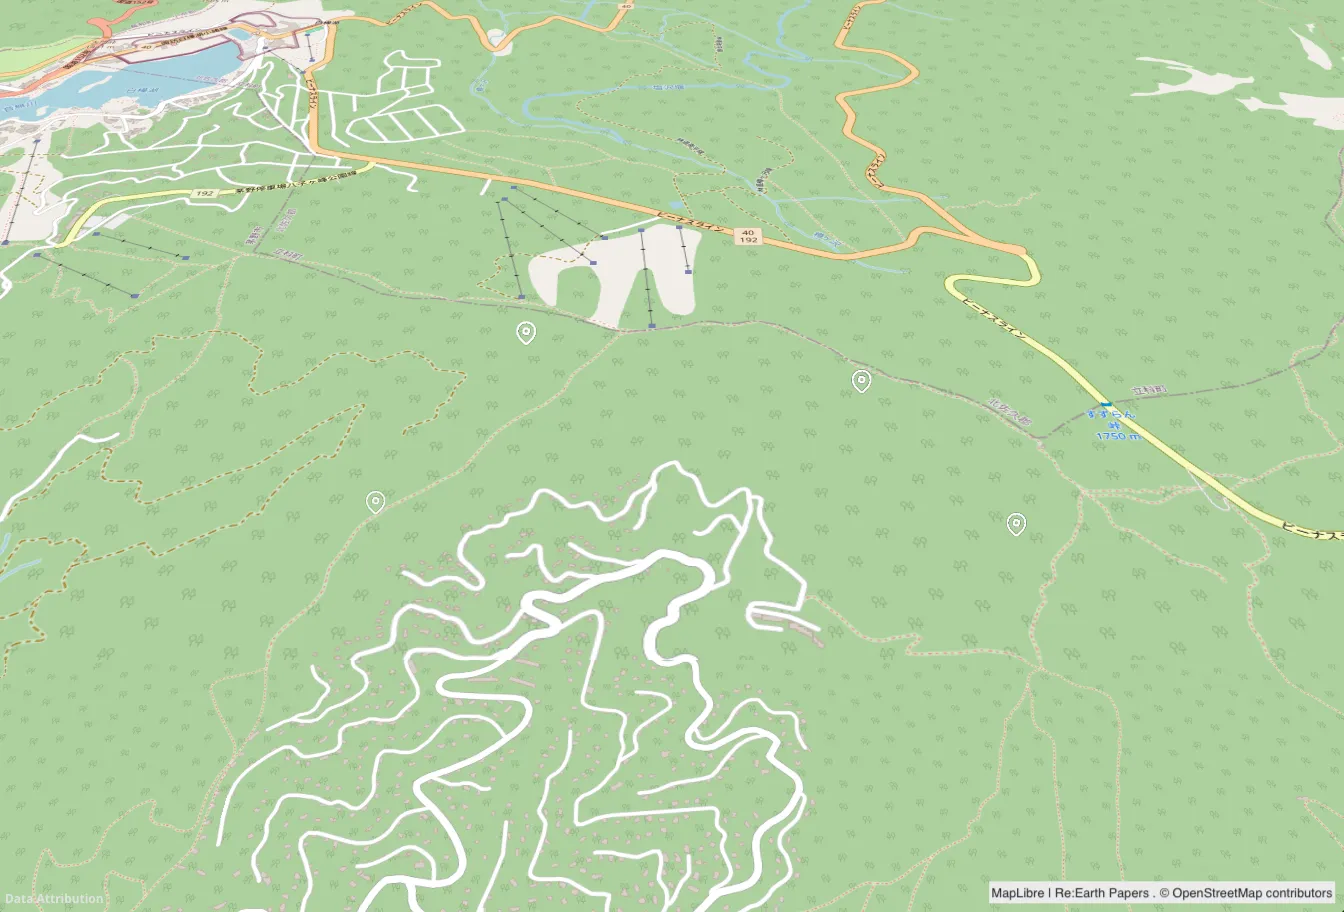
Anyone with the published URL can now see the same infrastructure assets and inspection reports on Visualizer’s map — reading the same CMS project your backend writes to.
Troubleshooting
Section titled “Troubleshooting”Creating a report returns invalid value
The value sent for an Option field doesn’t exactly match one of the options defined on the model — check issue-category, severity, and the other Option fields against the schema from Step 1.
The map loads with no assets
Confirm the backend’s .env points at the right workspace, project, and model keys, and that at least one item exists in infrastructure-assets.
Clicking a marker in Visualizer shows no details
This step reads the CMS data as a plain GeoJSON layer with no per-feature display configured, so markers appear on the map but clicking one doesn’t show photos or any other field values. That’s expected here — this step demonstrates the Public API read, not a fully interactive map view. Building that out would mean writing a Visualizer Plugin to configure the layer’s Infobox, which is beyond this tutorial’s scope.
Completion checklist
Section titled “Completion checklist”- The map shows the infrastructure assets created in Step 1
- Submitting an inspection report creates and publishes an item in
inspection-reports - The inspected asset’s condition and last-inspected date update after a report is submitted
- Report history lists every submitted report
- (optional) Re:Earth Visualizer shows the same data through Public API