Build and install a simple UI plugin
Last updated
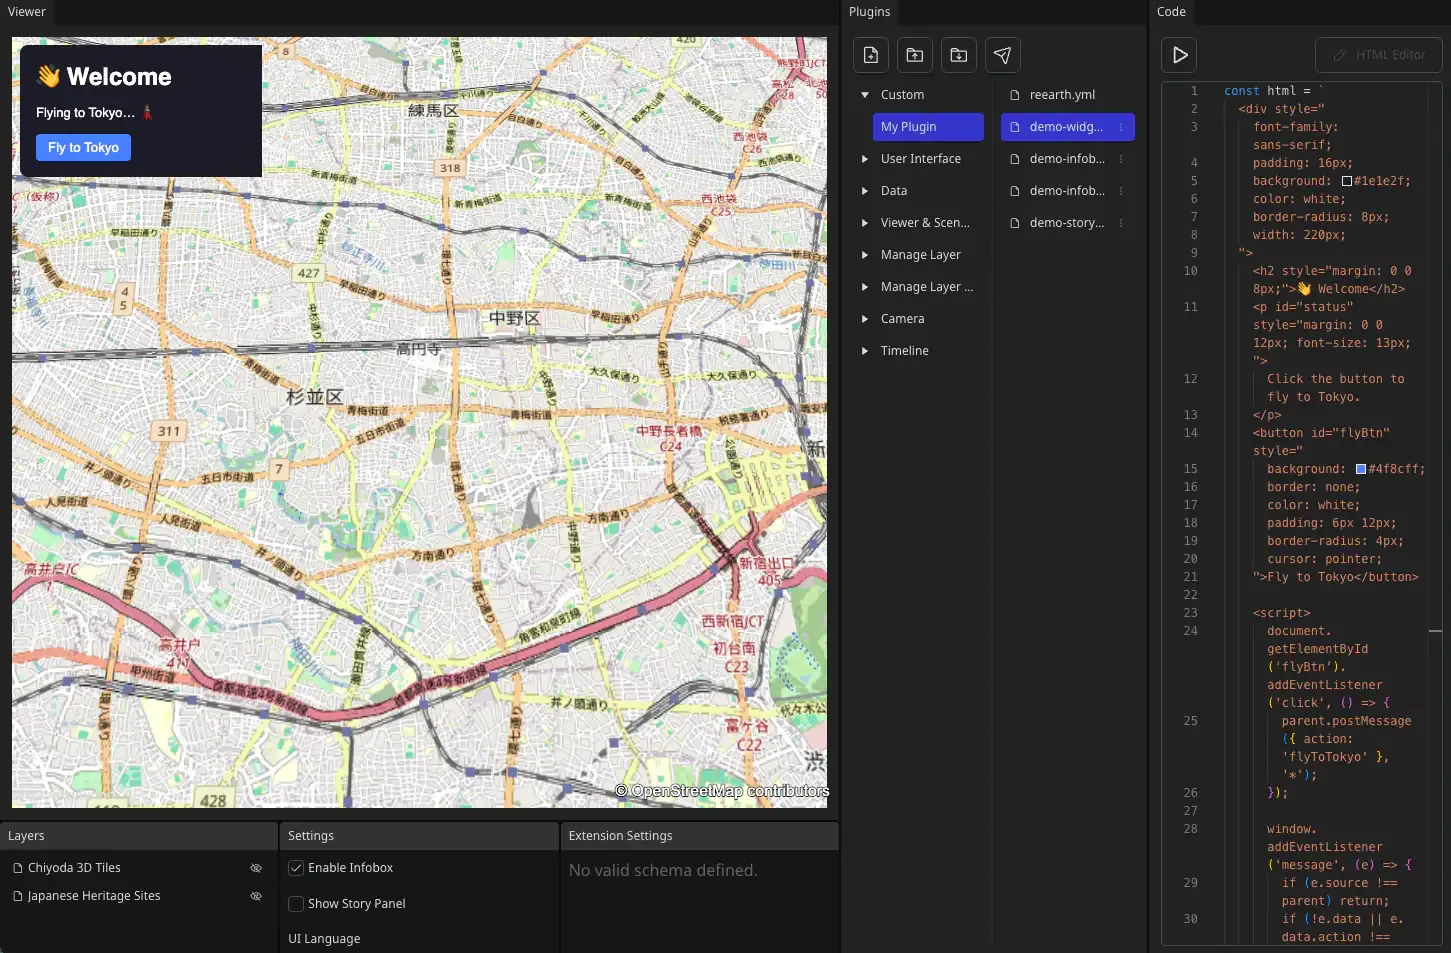
Starting with the files already provided in the Plugin Playground, you will create a Welcome widget, run it in the Viewer, and use its button to move the camera to Tokyo. You will then export the same widget as a ZIP file, install it in Re:Earth Visualizer, and add it to a scene. No local setup is needed.
What you will build
Section titled “What you will build”The finished Welcome widget contains a short message and a Fly to Tokyo button. When the button is clicked, it sends a message to the plugin, which moves the camera to Tokyo and updates the widget’s status message. The completed plugin is exported as a ZIP file and installed in a Visualizer project.
Prerequisites
Section titled “Prerequisites”- A Re:Earth Visualizer account with at least one project open
- A modern desktop browser
- Basic familiarity with HTML and JavaScript
- No local development tools are required
Step 1 — Open the Plugin Playground
Section titled “Step 1 — Open the Plugin Playground”The Plugin Playground is a browser-based editor built into Re:Earth Visualizer. It lets you write, preview, and export plugins without installing anything locally.
- Open Re:Earth Visualizer and sign in.
- Navigate to Editor → Plugin in the left sidebar.
- Click Plugin Playground to open the editor.
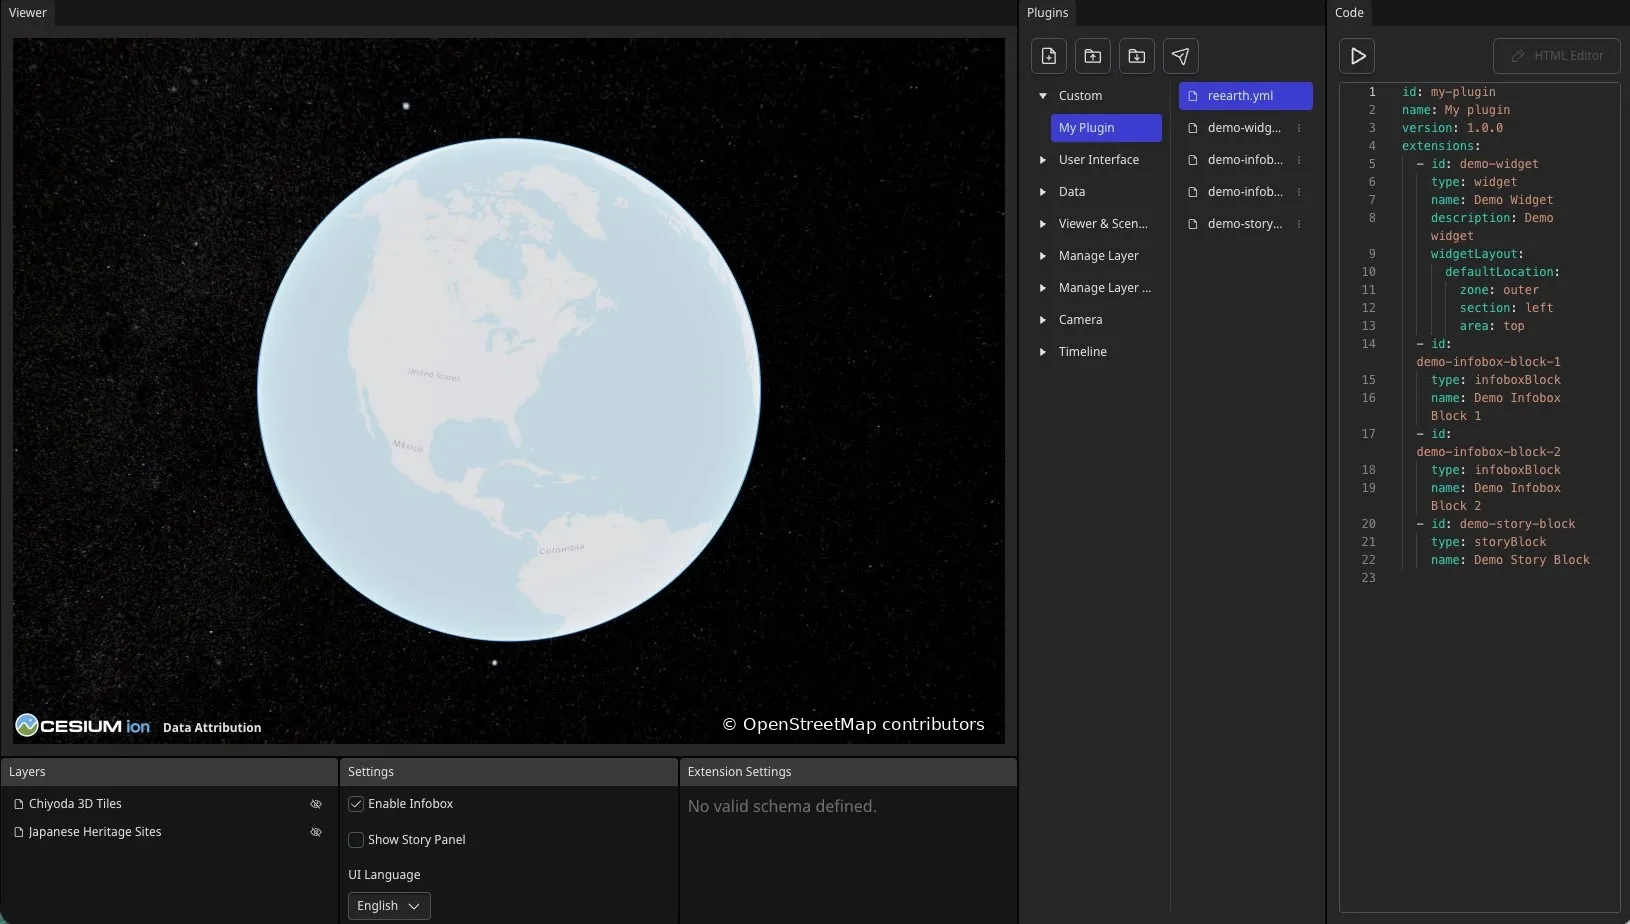
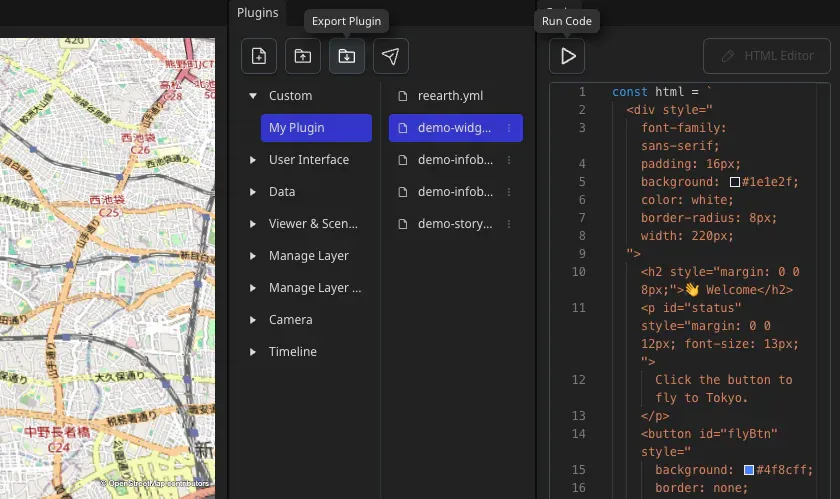
- In the Custom section of the file tree, select My Plugin. It already contains a
reearth.ymlmanifest and example extension files. You will edit the existing manifest and widget file.
Step 2 — Edit the plugin manifest
Section titled “Step 2 — Edit the plugin manifest”Click reearth.yml and replace its contents with the following:
id: welcome-widget-pluginname: Welcome Widgetversion: 1.0.0extensions: - id: demo-widget type: widget name: Welcome description: A simple welcome widget widgetLayout: defaultLocation: zone: outer section: left area: topA Re:Earth plugin can contain one or more extensions. This tutorial creates a widget extension — a user-interface component displayed in the main Visualizer view whose position can be arranged using the Widget Align System. The manifest declares the extension, while the matching JavaScript file supplies its interface and behaviour. Here, the extension ID demo-widget corresponds to demo-widget.js — keep these names exactly as shown.
Learn more about plugin structure and extension types.
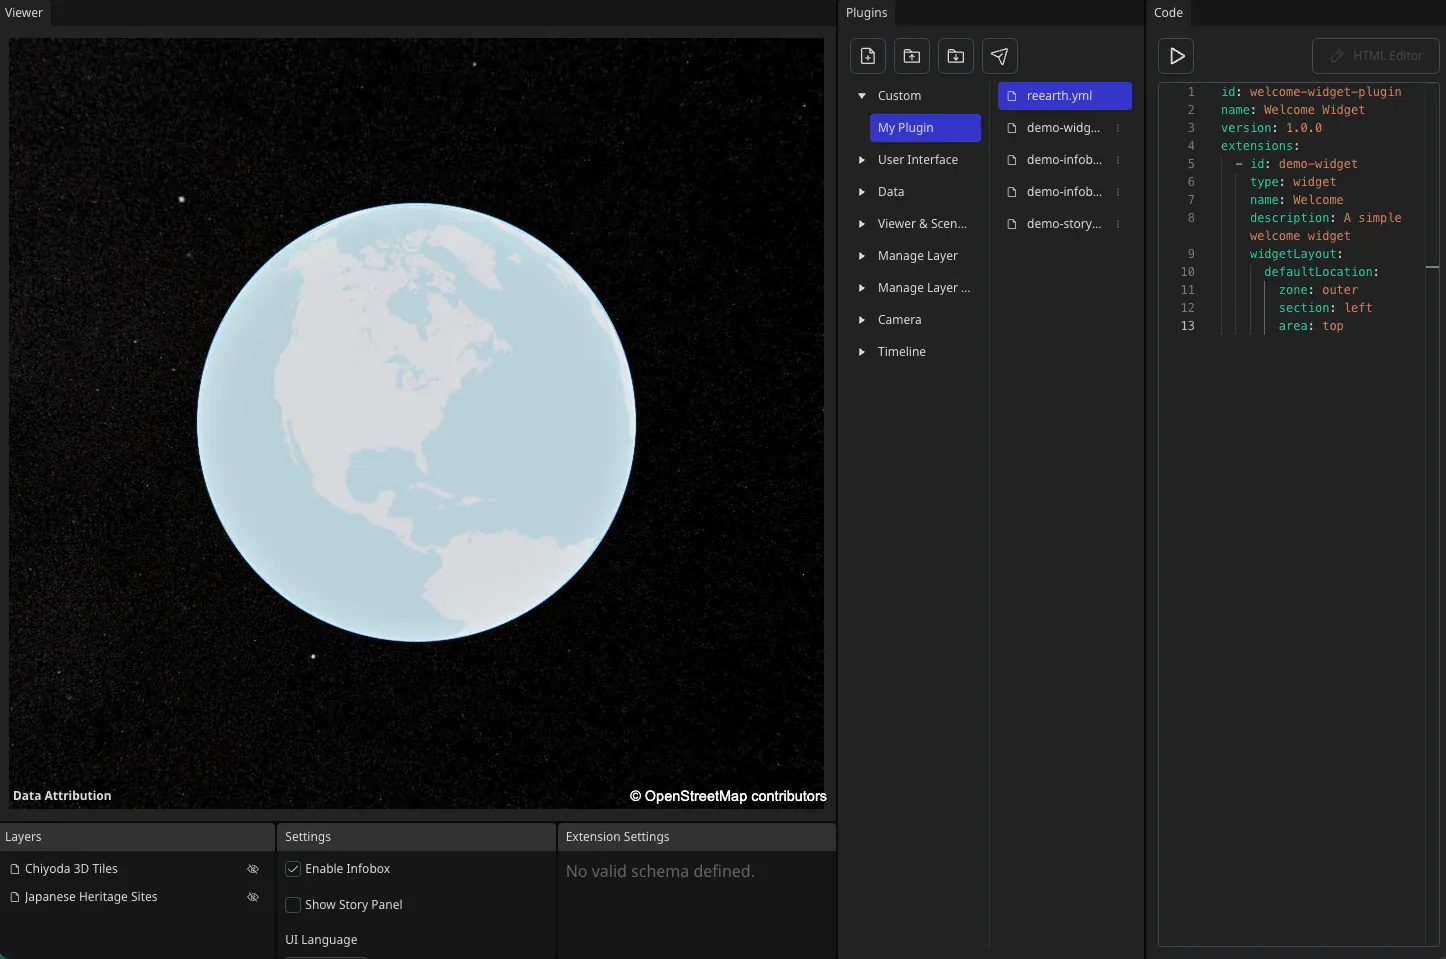
The manifest now declares one widget named Welcome. Its extension ID, demo-widget, matches the existing file demo-widget.js; keep these names exactly as shown so the widget can run.
Step 3 — Edit the widget code
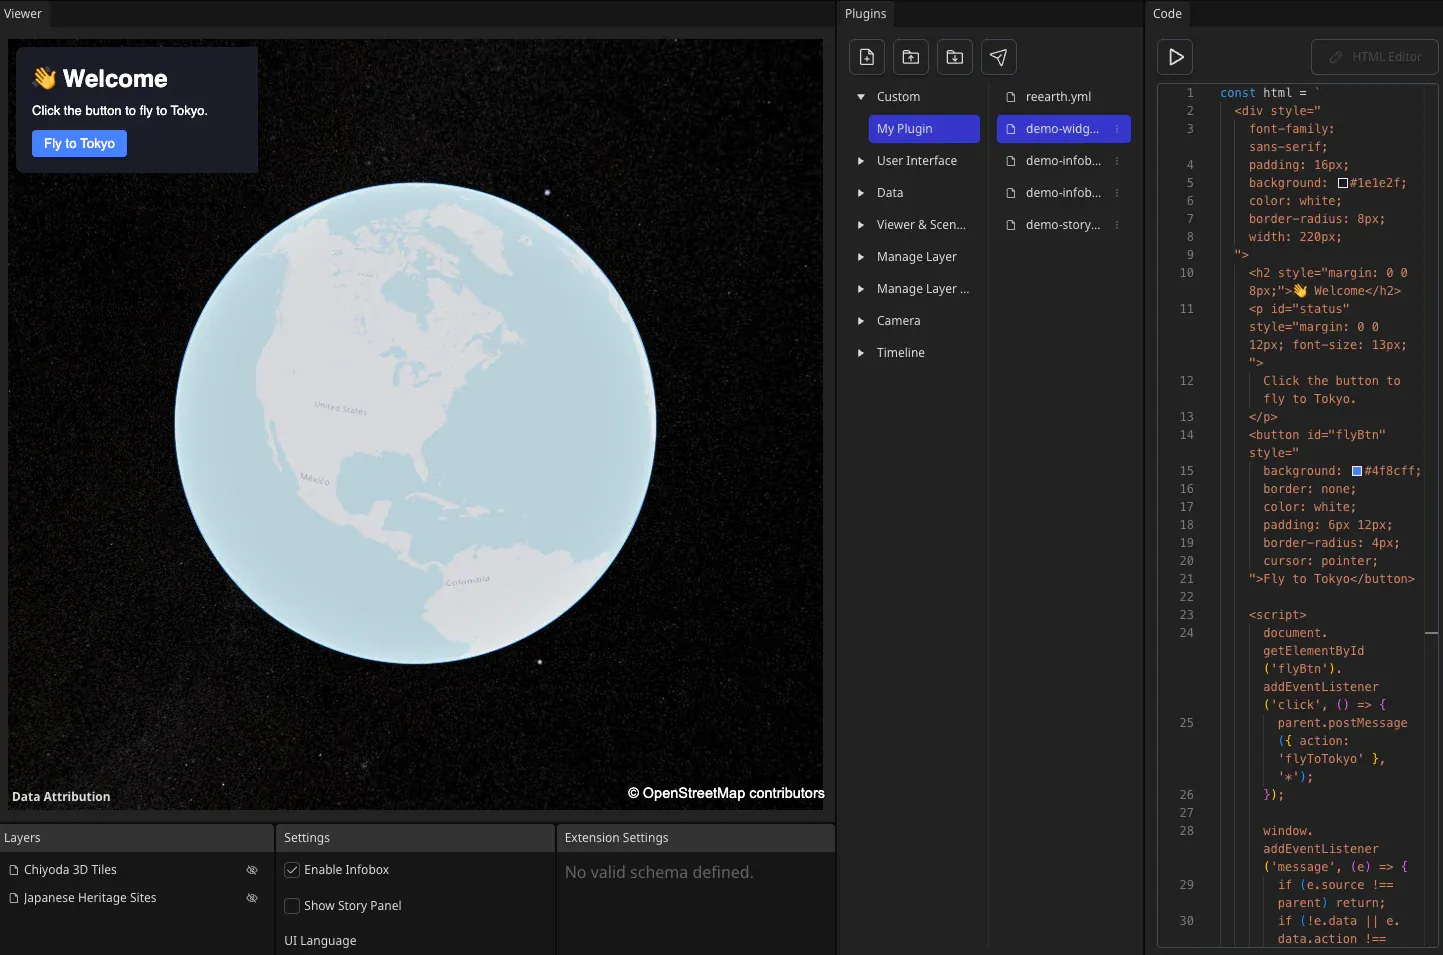
Section titled “Step 3 — Edit the widget code”Select demo-widget.js to open it in the Code panel. Keep the code in the JavaScript editor; the live Playground currently shows the HTML Editor control as disabled for this file.
Replace the contents with:
const html = `  <div style="font-family: sans-serif; padding: 16px; background: #1e1e2f; color: white; border-radius: 8px; width: 220px;">    <h2 style="margin: 0 0 8px;">👋 Welcome</h2>    <p id="status" style="margin: 0 0 12px; font-size: 13px;">Click the button to fly to Tokyo.</p>    <button id="flyBtn" style="background: #4f8cff; border: none; color: white; padding: 6px 12px; border-radius: 4px; cursor: pointer;">Fly to Tokyo</button>    <script>      document.getElementById('flyBtn').addEventListener('click', () => {        parent.postMessage({ action: 'flyToTokyo' }, '*');      });      window.addEventListener('message', (e) => {        if (e.source !== parent) return;        if (!e.data || e.data.action !== 'flying') return;        document.getElementById('status').textContent = e.data.text;      });    <\/script>  </div>`;
reearth.ui.show(html, { width: 250, height: 150 });
reearth.extension.on("message", (msg) => {  if (msg && msg.action === "flyToTokyo") {    reearth.camera.flyTo(      { lat: 35.6764, lng: 139.65, height: 8000, heading: 0, pitch: -1.3, roll: 0 },      { duration: 3 }    );    reearth.ui.postMessage({ action: "flying", text: "Flying to Tokyo… 🗼" });  }});
How the widget code works
Section titled “How the widget code works”The Plugin API is available through the global reearth object on the extension side. The widget interface runs separately inside an iframe, so the two sides exchange messages:
reearth.ui.show(...)displays the HTML as the widget’s iframe.- The button handler runs inside the iframe. Because the iframe cannot call the Plugin API directly,
parent.postMessage(...)sends theflyToTokyoaction to the extension. reearth.extension.on("message", ...)receives the action on the extension side.reearth.camera.flyTo(...)moves the Visualizer camera to Tokyo.reearth.ui.postMessage(...)sends the new status back to the iframe, wherewindow.addEventListener("message", ...)updates the text.
Learn more in How the Plugin System works.
Step 4 — Run and test in the Playground
Section titled “Step 4 — Run and test in the Playground”- Click Run (the triangular play button) in the Playground toolbar.
- Confirm that the Welcome card appears in the Playground viewer.
- Click Fly to Tokyo — the camera should animate to Tokyo and the status text should change to “Flying to Tokyo… 🗼”.
After changing the code, click Run again to load the latest version in the viewer.
Step 5 — Export the plugin
Section titled “Step 5 — Export the plugin”- Select My Plugin in the Playground.
- Click Export (the down-arrow icon at the top of the Plugins panel).
- Save the downloaded ZIP file without extracting it.
The ZIP contains reearth.yml and demo-widget.js at the root — the exact structure Re:Earth Visualizer expects. Re:Earth accepts plugin ZIP files up to 10 MB.
Step 6 — Install the ZIP in Re:Earth Visualizer
Section titled “Step 6 — Install the ZIP in Re:Earth Visualizer”- Open your Visualizer project.
- Open Project settings and select Plugins.
- Open Personally Installed.
- Choose Upload ZIP File from PC.
- Select the ZIP exported from the Playground.
- Wait for the success notification.
Step 7 — Add the widget to a scene
Section titled “Step 7 — Add the widget to a scene”- Return to the Visualizer editor.
- Open Widgets.
- Click Add widget.
- Select Welcome.
- Click Fly to Tokyo and confirm that the camera moves.
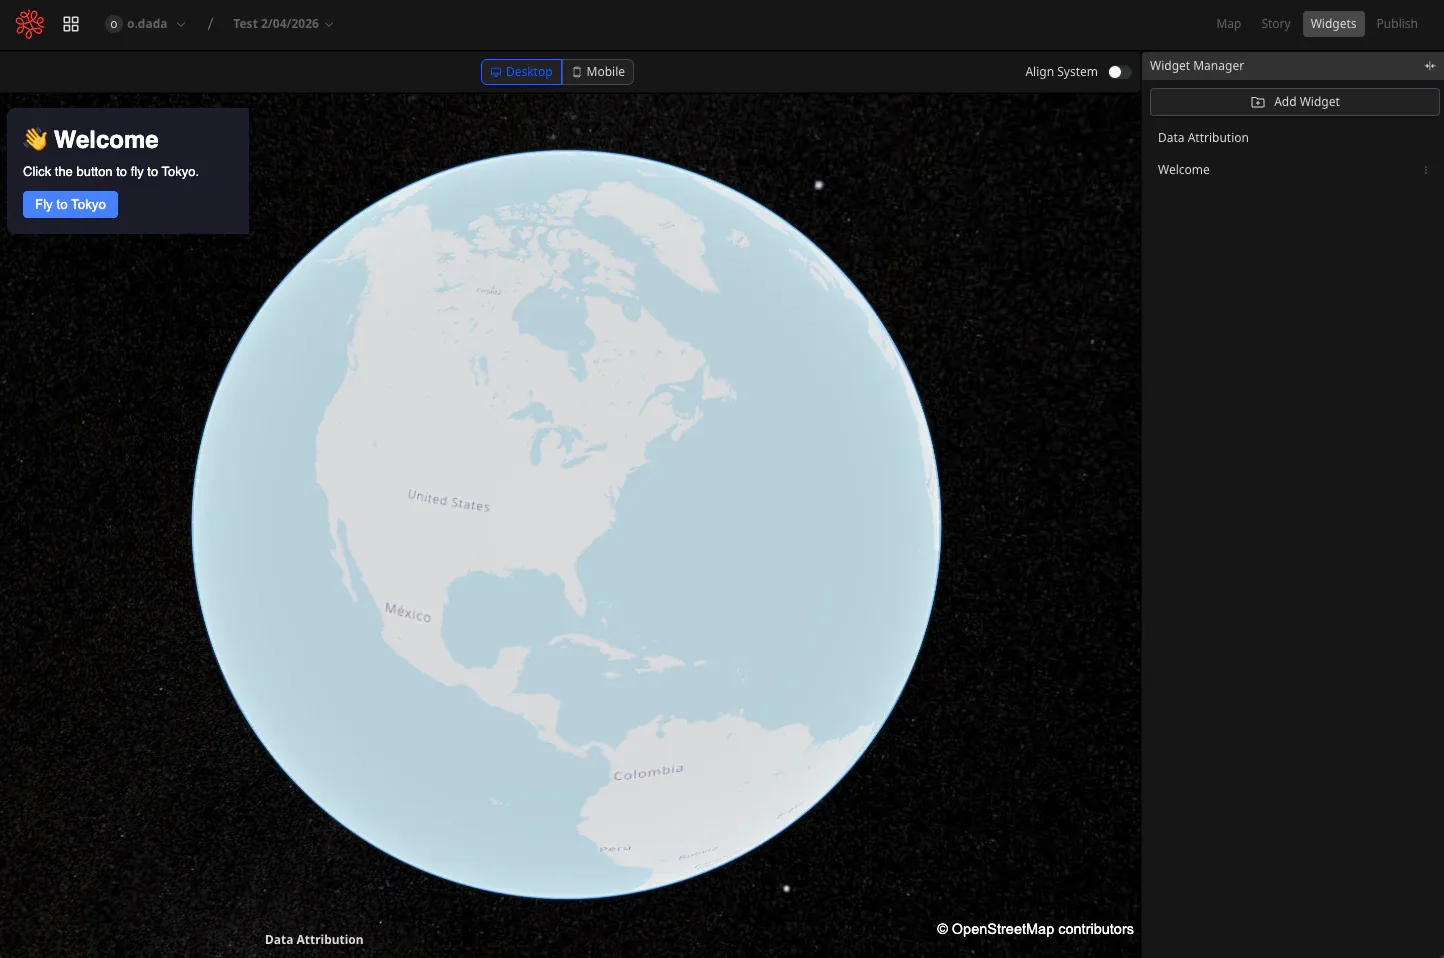
You have now completed the full plugin workflow: edit → preview → export → install → use.
Troubleshooting
Section titled “Troubleshooting”Installation fails
- Validate the indentation and spelling in
reearth.yml. - Make sure the plugin ID is no more than 100 characters, uses only letters, numbers,
_, or-, and does not containreearth. - Make sure no installed plugin already uses the same ID.
- Confirm that
reearth.ymlis at the plugin root and that the ZIP does not contain an extra outer directory. - Export the ZIP again if it may be malformed.
Widget does not appear after enabling
- Confirm that the manifest extension ID is
demo-widget. - Confirm that the exported JavaScript file is
demo-widget.js. - Confirm that the scene has been saved.
- Open the browser developer tools and check the Console for JavaScript errors.
Camera does not move
- Confirm that the iframe sends the message with
parent.postMessage(...). - Confirm that the plugin listens with
reearth.extension.on("message", ...). - Check that both sides use the same action name:
flyToTokyo.
Status text does not update
- The
window.addEventListener('message', ...)inside the<script>tag filters messages wheree.source !== parent. - In the Playground preview this check passes automatically; in a deployed scene it also works because the plugin iframe’s parent is always the Visualizer host.
Manifest and JS filename mismatch
- The extension
idinreearth.ymlmust exactly match the JS filename (without.js).demo-widget→demo-widget.js.
Completion checklist
Section titled “Completion checklist”- Clicking Run displays the Welcome widget in the Playground
- The button starts moving the camera to Tokyo
- The plugin exports as a ZIP file
- The ZIP installs successfully
- The Welcome widget can be added to a Visualizer scene