Managing members
In the members block of the current workspace's setting page we can invite and manage members.
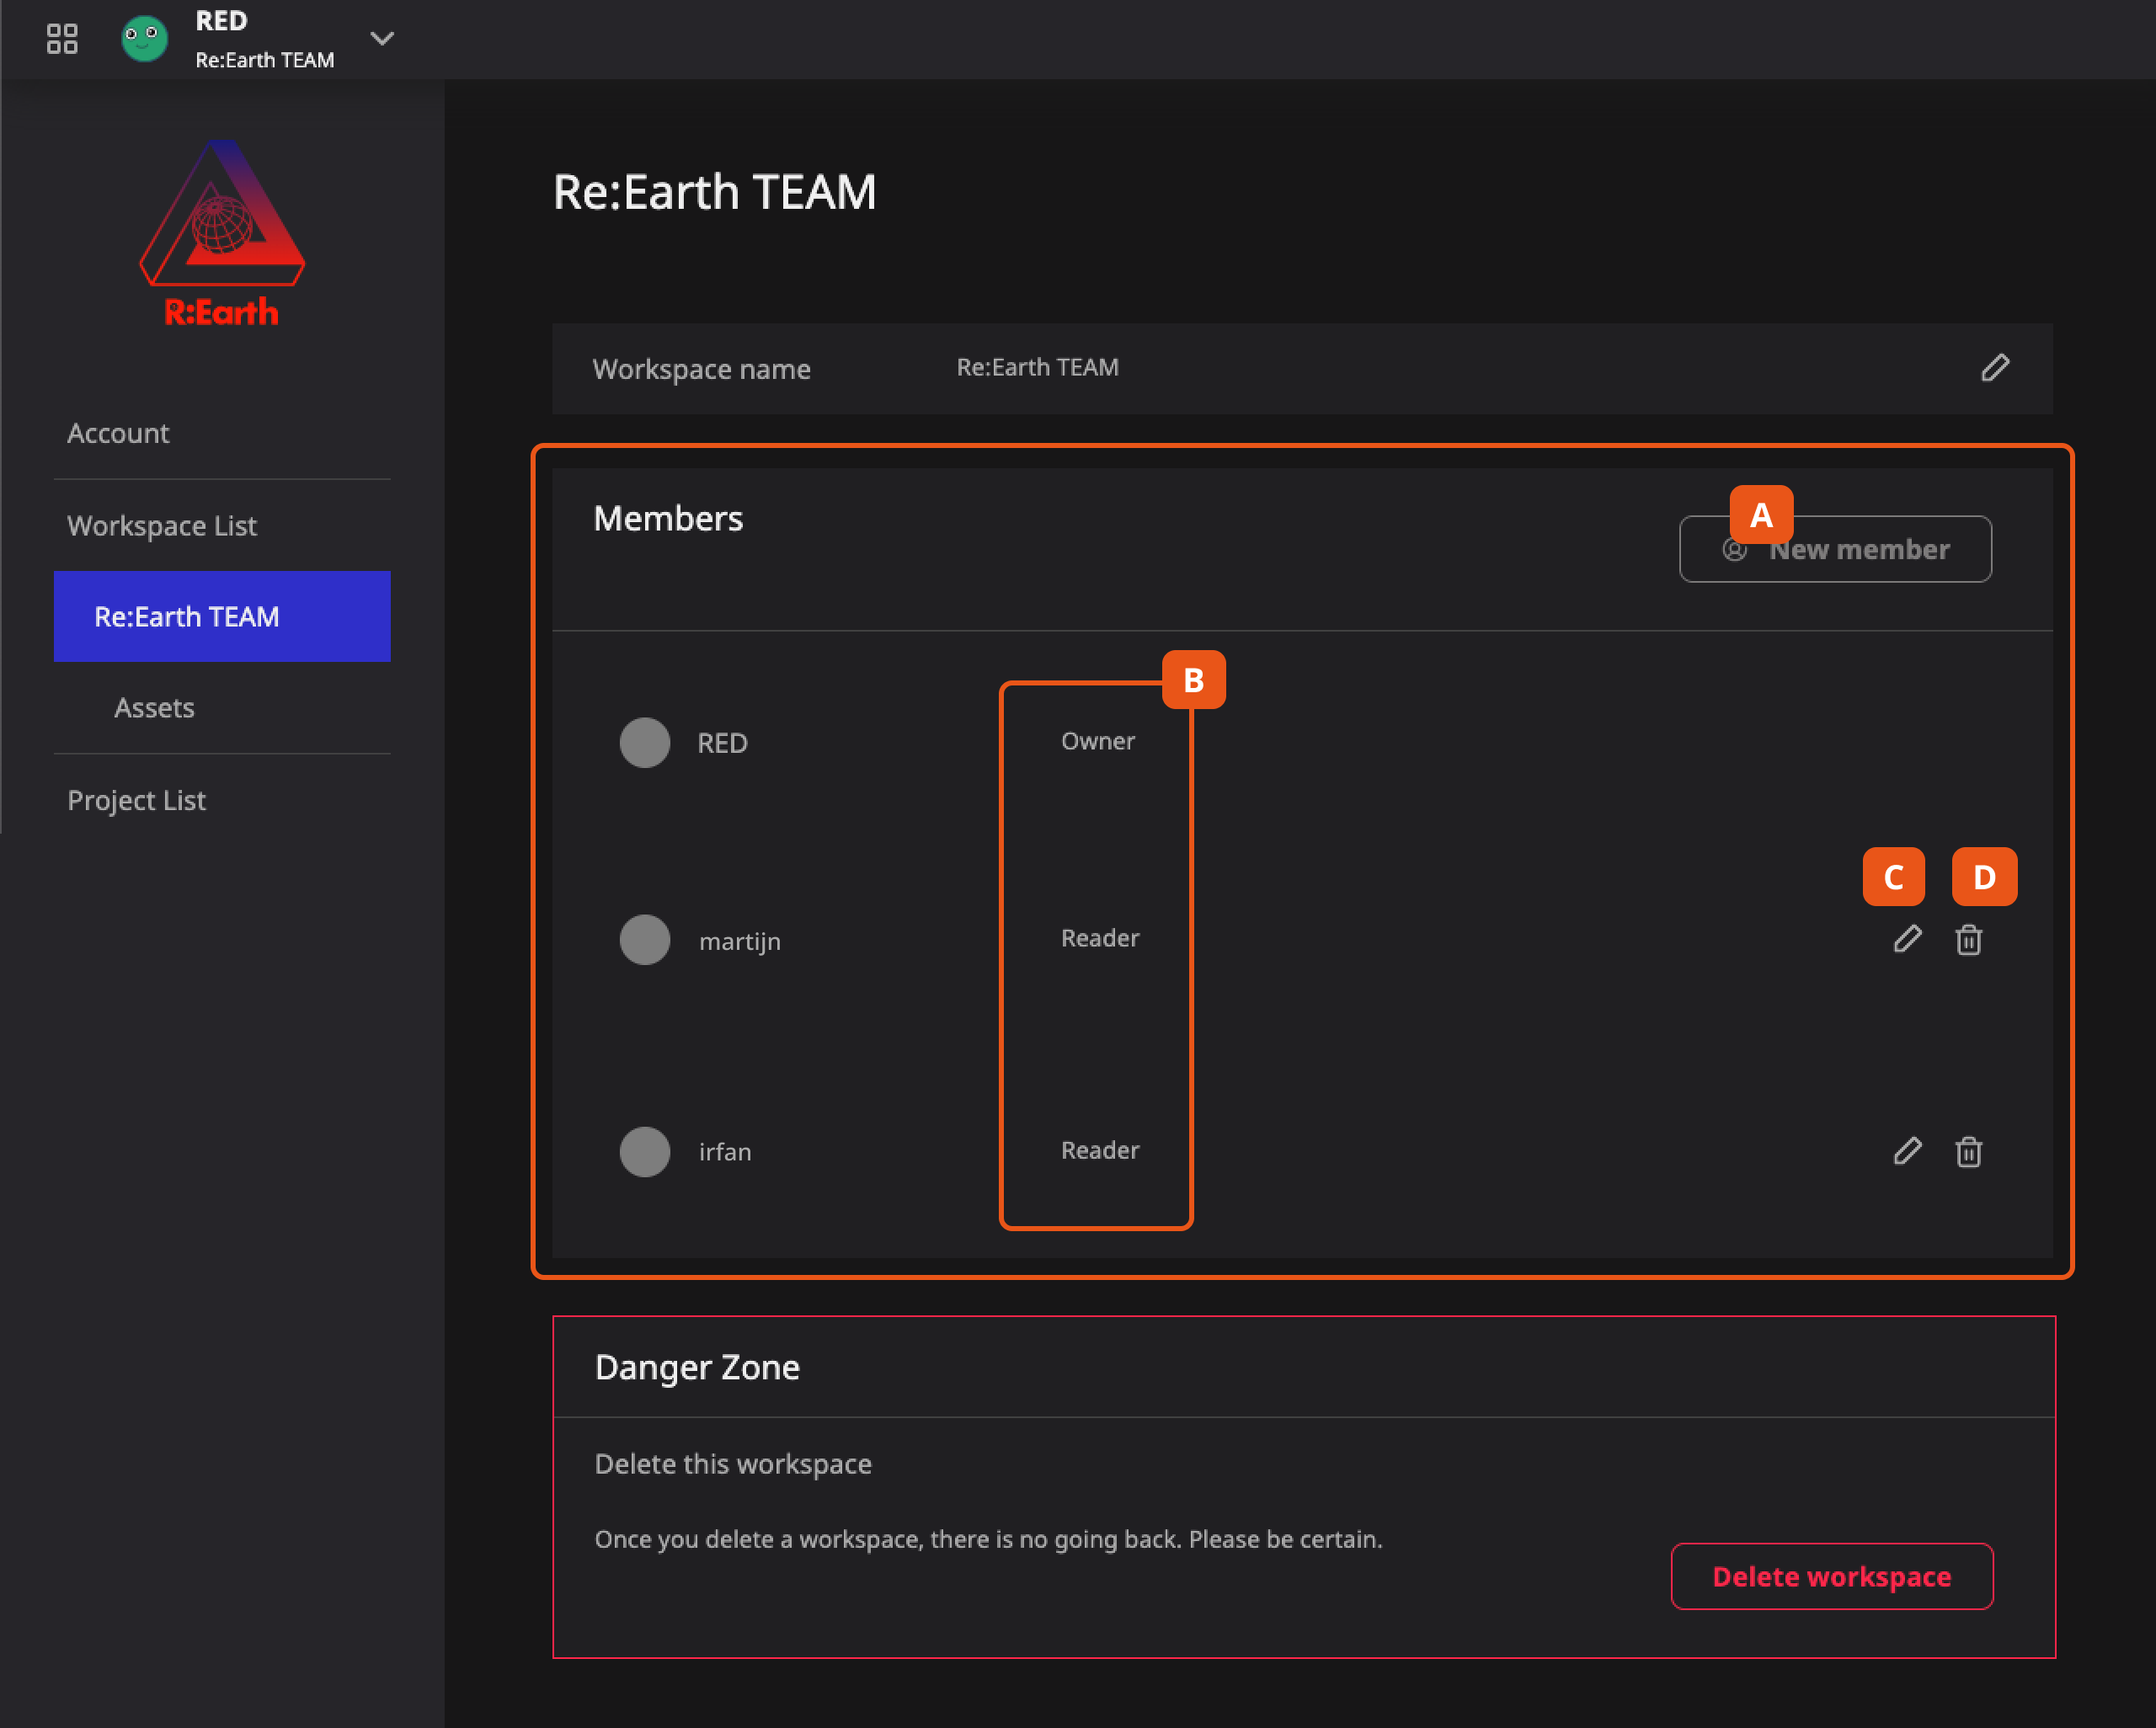
- New member button will be your first step to adding new members.
- Member's role column allows you to check the role of each member.
- Change member's role button allows certain members (depending on their role in the workspace) to edit other member's roles.
- Remove member button, like changing roles, allows certain members to remove others from the workspace.
Invite new members
Follow the steps below to invite new members:
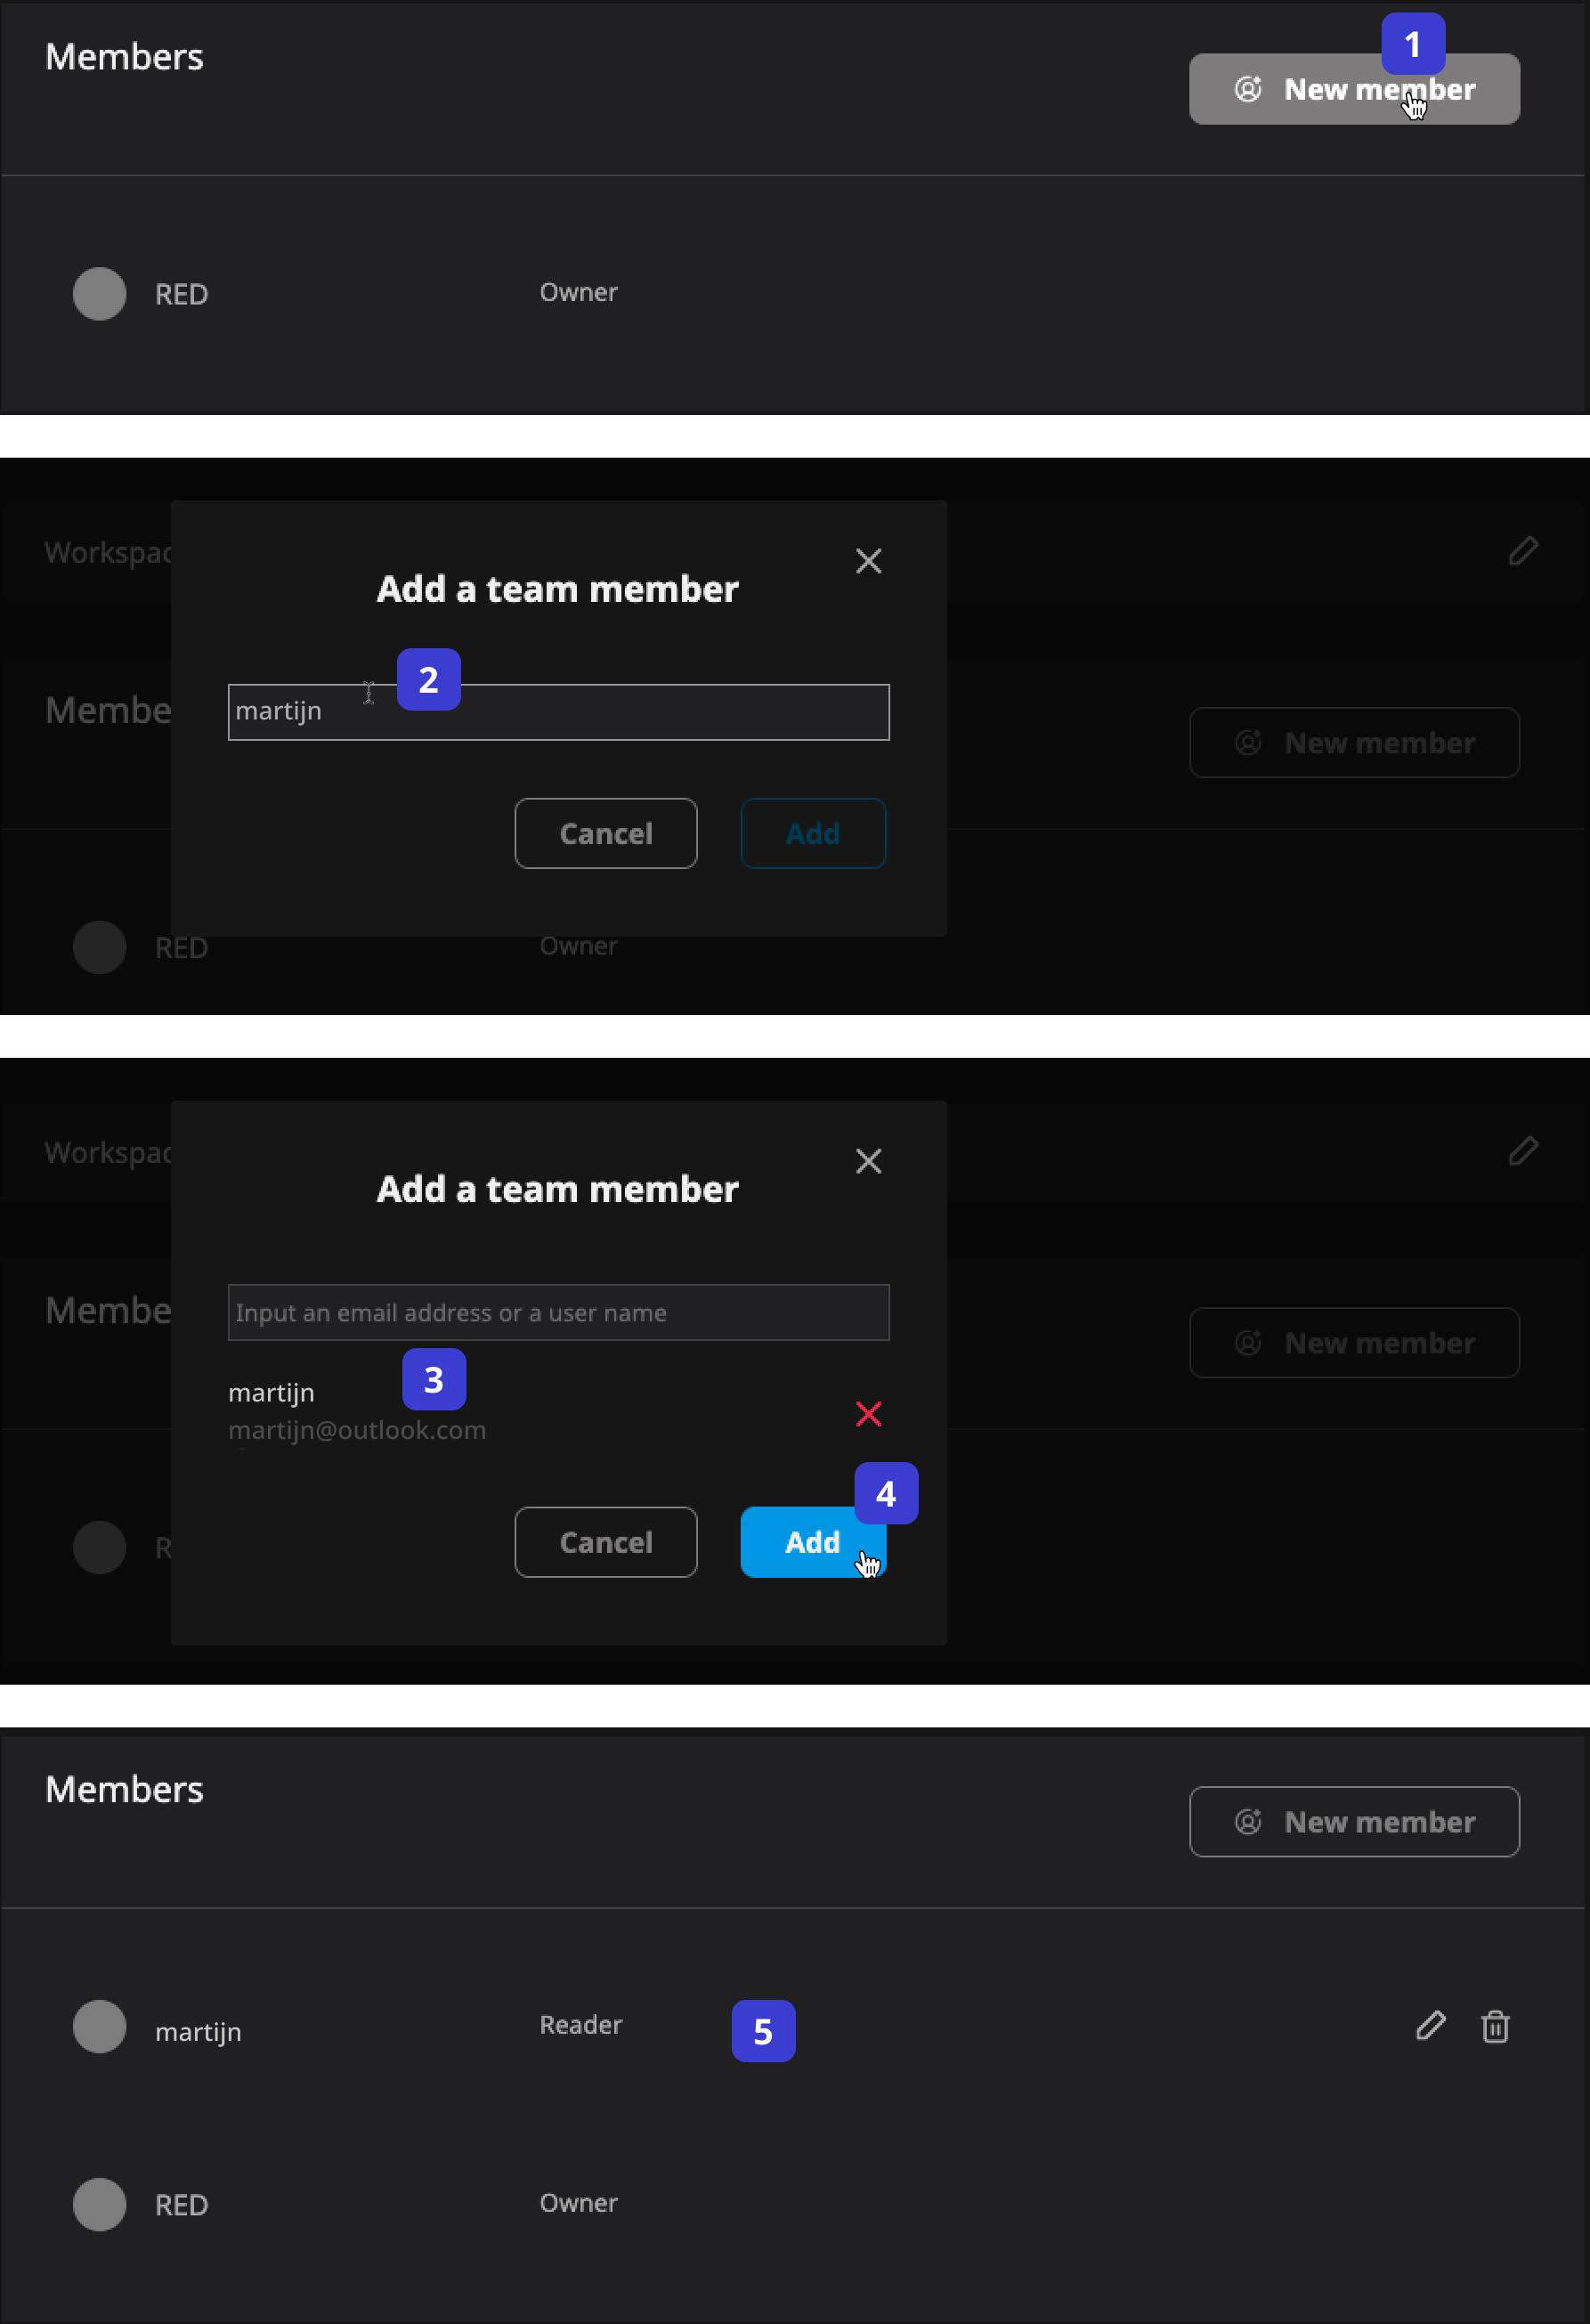
- Click the New member button, and the Add a team member modal will appear.
- Fill in the username or email address of the registered user you want to invite.
- Check whether the search result is the correct user.
- After confirming that it is correct, click the Add button.
- The member will now appear in your members list.
Only users who already have Re:Earth accounts will be able to be added to a team workspace.
Usernames are case sensitive, so please make sure to enter the exact username.
Types of roles
There are three types of member roles (or levels of authority) in Re:Earth:
- Owner: The owner of the workspace has highest authority and has all management tools unlocked.
- Editor: You can view, edit, and publish all projects in the team workspace, and you can also add new members to the workspace.
- Viewer: The reader of the project, can view all the projects and parameters, but cannot edit and modify the project.
An expanded role functionality is under development, so if you need more control over roles please wait for that or feel free to ask us on Discord or through other channels.
Change a member's role
Since each member has their own level of authority (through their roles), it might sometimes be necessary to update a user's role to give (or take away) certain privileges.
Follow the steps below to change a member's role:
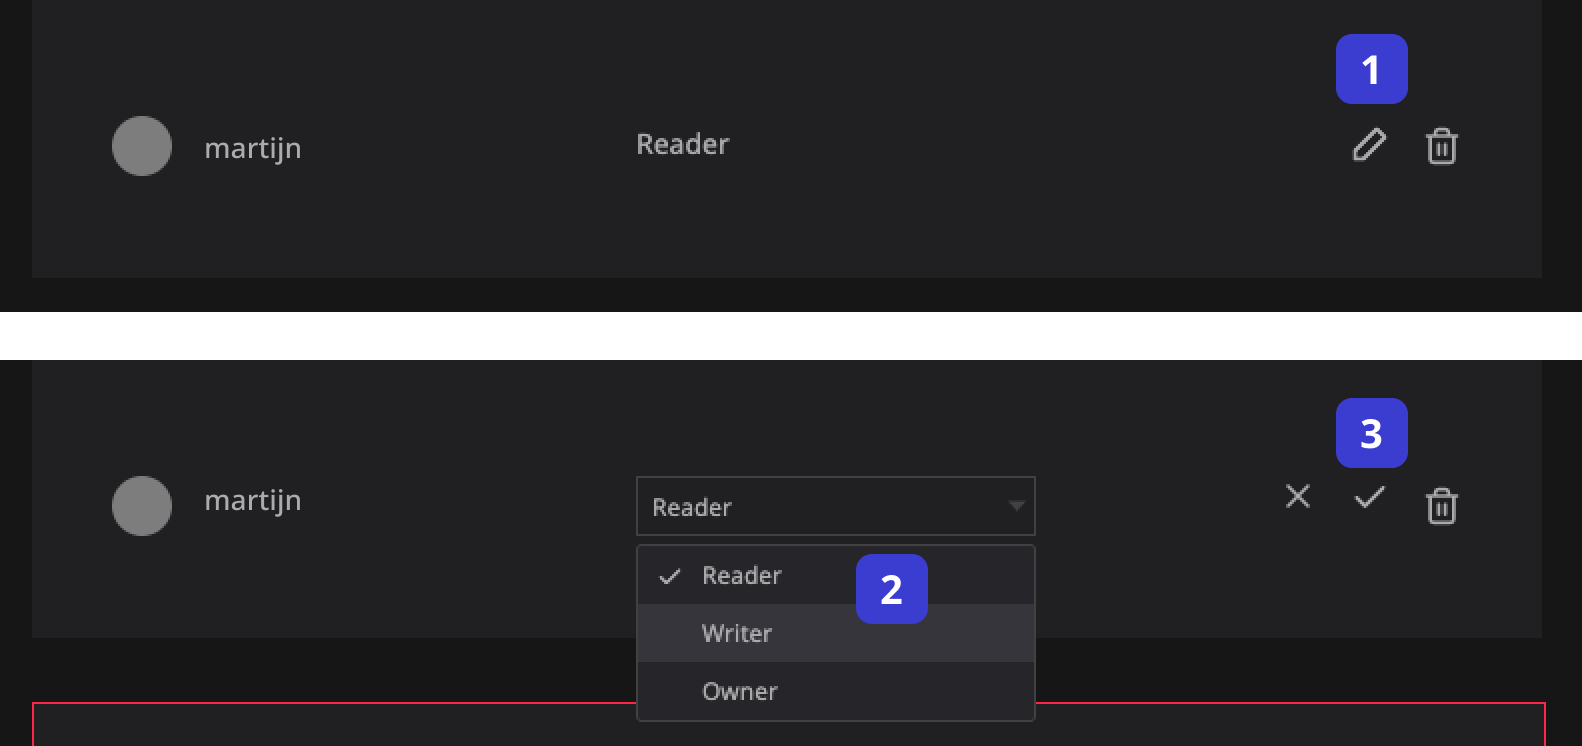
- Click the ✏️ button in the member list.
- Select the role type you want to change in the drop-down list.
- Click the ☑️ button to confirm.
When you don’t see the button that can change member permissions, it’s probably because it is not permissible with your current role. Please contact a workspace owner to change your authority to proceed.