パブリックAPI で作る フィードバック収集・閲覧アプリ
更新日
Re:Earth CMS のパブリックAPI を使い、バックエンド不要のシンプルな 1 ページのフィードバックアプリを作ります。ブラウザから直接 CMS にデータを投稿し、公開済みのフィードバックを一覧表示します。
作成するもの
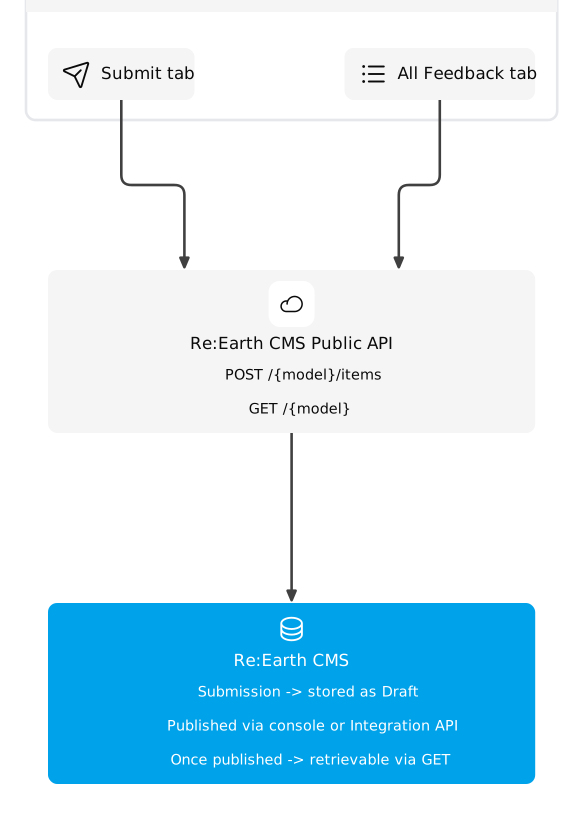
Section titled “作成するもの”ブラウザから Re:Earth CMS のパブリックAPI に直接アクセスする、バックエンド不要の 1 ページアプリです。Submit タブでフィードバックを投稿し、All Feedback タブで公開済みのフィードバックを一覧表示します。投稿されたデータは CMS に下書き状態で保存され、管理画面またはインテグレーションAPI で公開するとブラウザの一覧に反映されます。
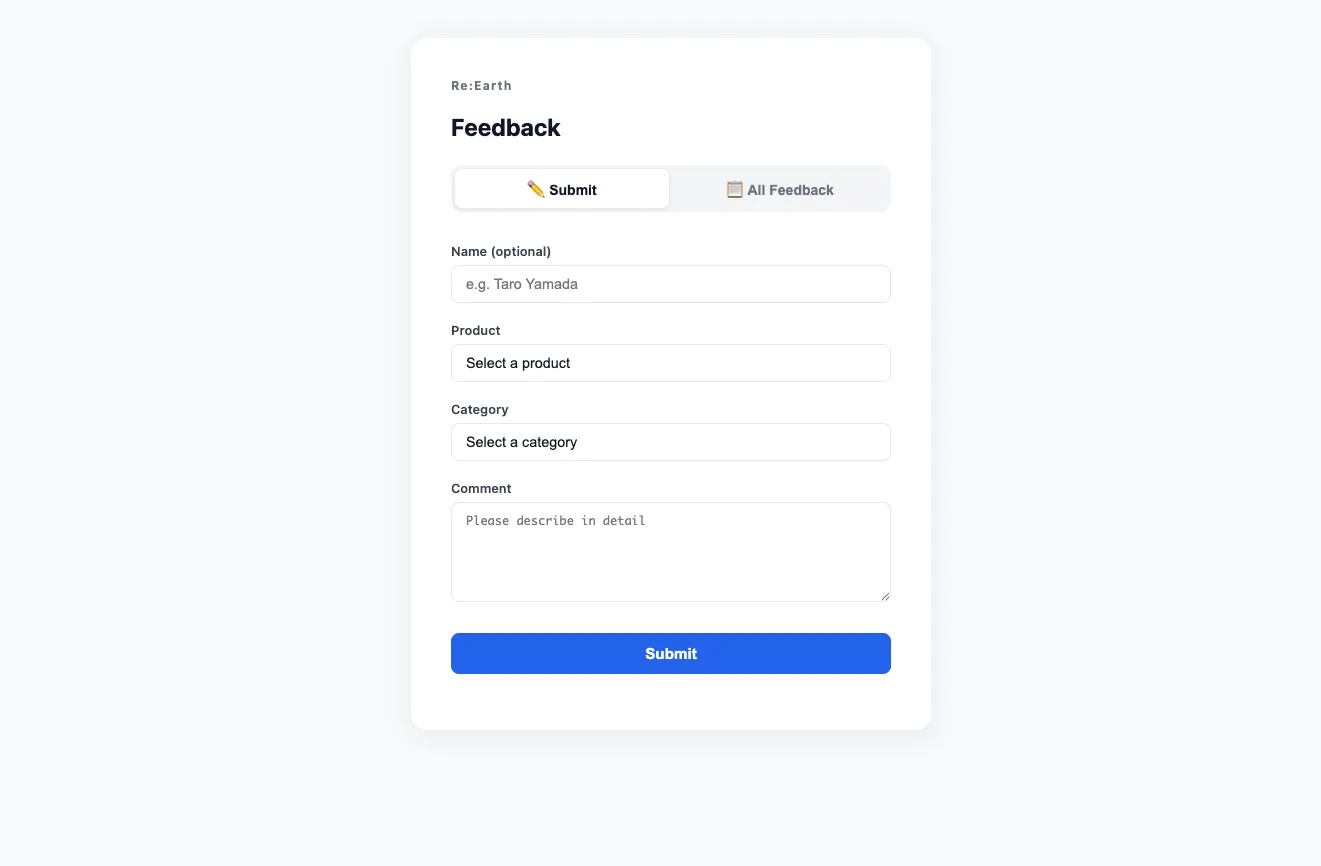
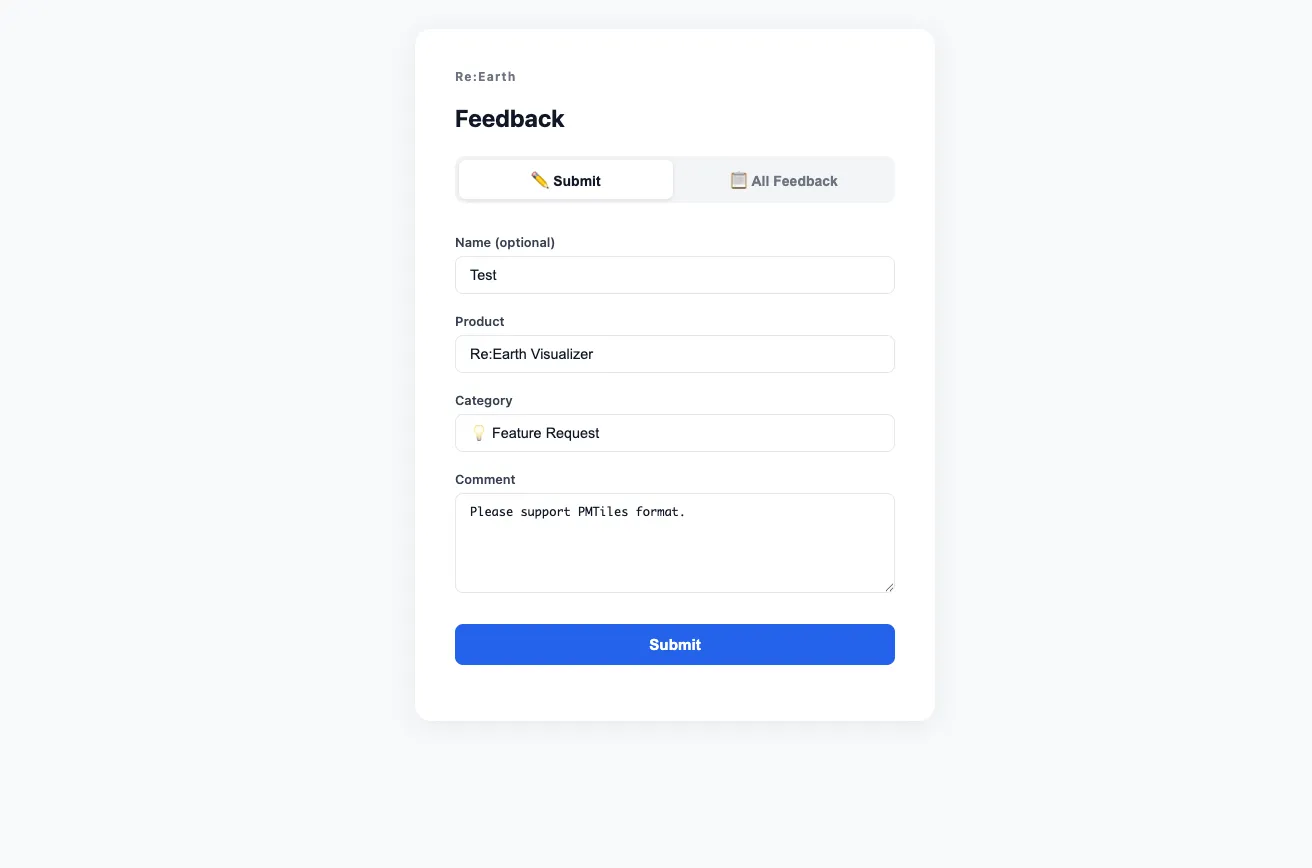
Submit タブは、名前・製品・カテゴリ・コメントを入力してフィードバックを送信するフォームです。
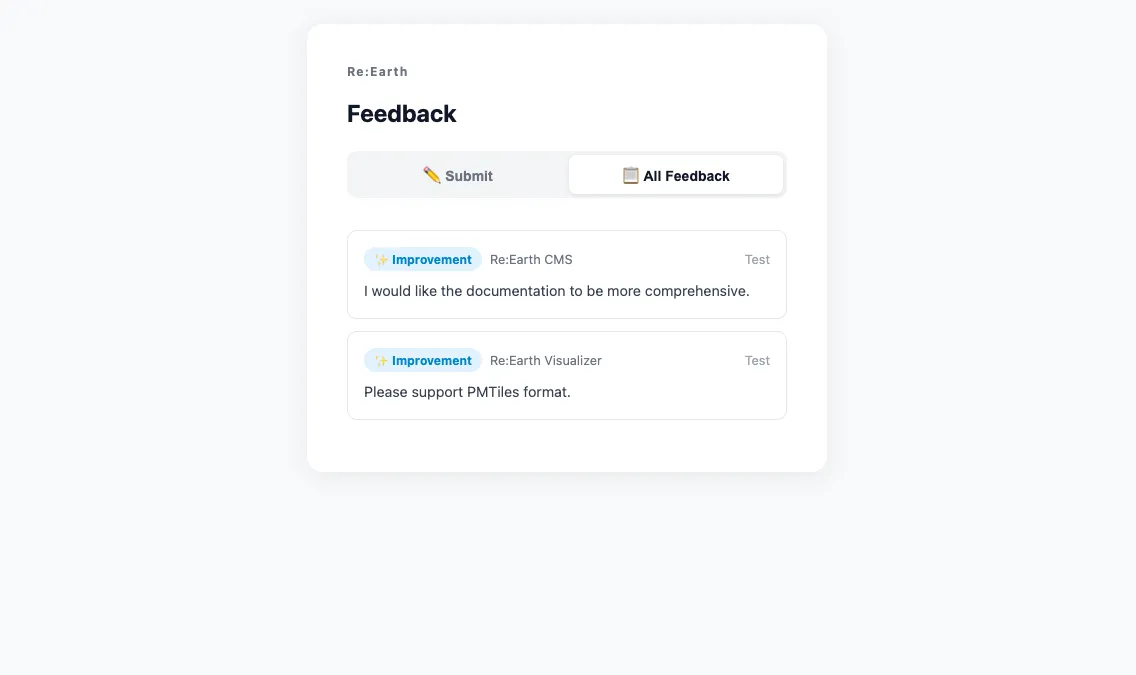
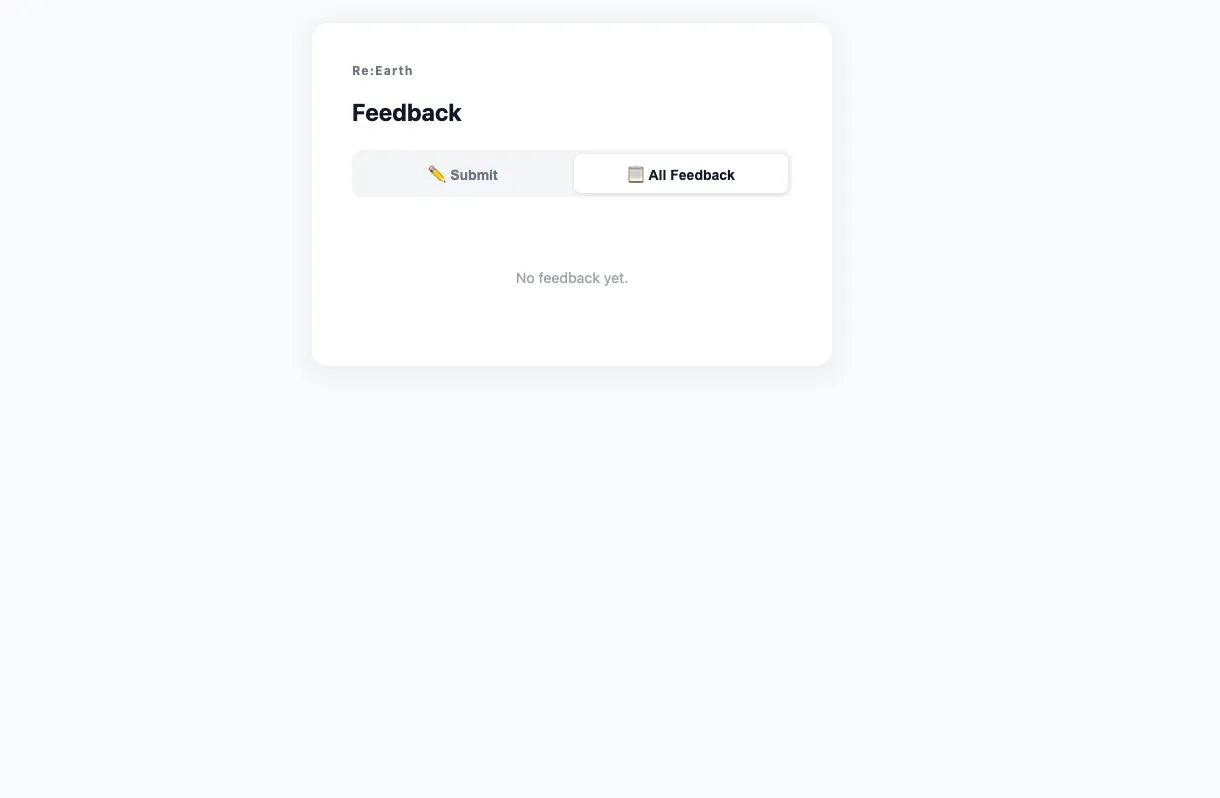
All Feedback タブは、公開済みのフィードバックをカード形式で一覧表示します。
- Re:Earth CMS のアカウントとプロジェクトがあること
- テキストエディタとブラウザアプリケーションがあること
- Node.js がインストールされていること(Vite を使う場合)
ステップ1・CMS でモデルを作る
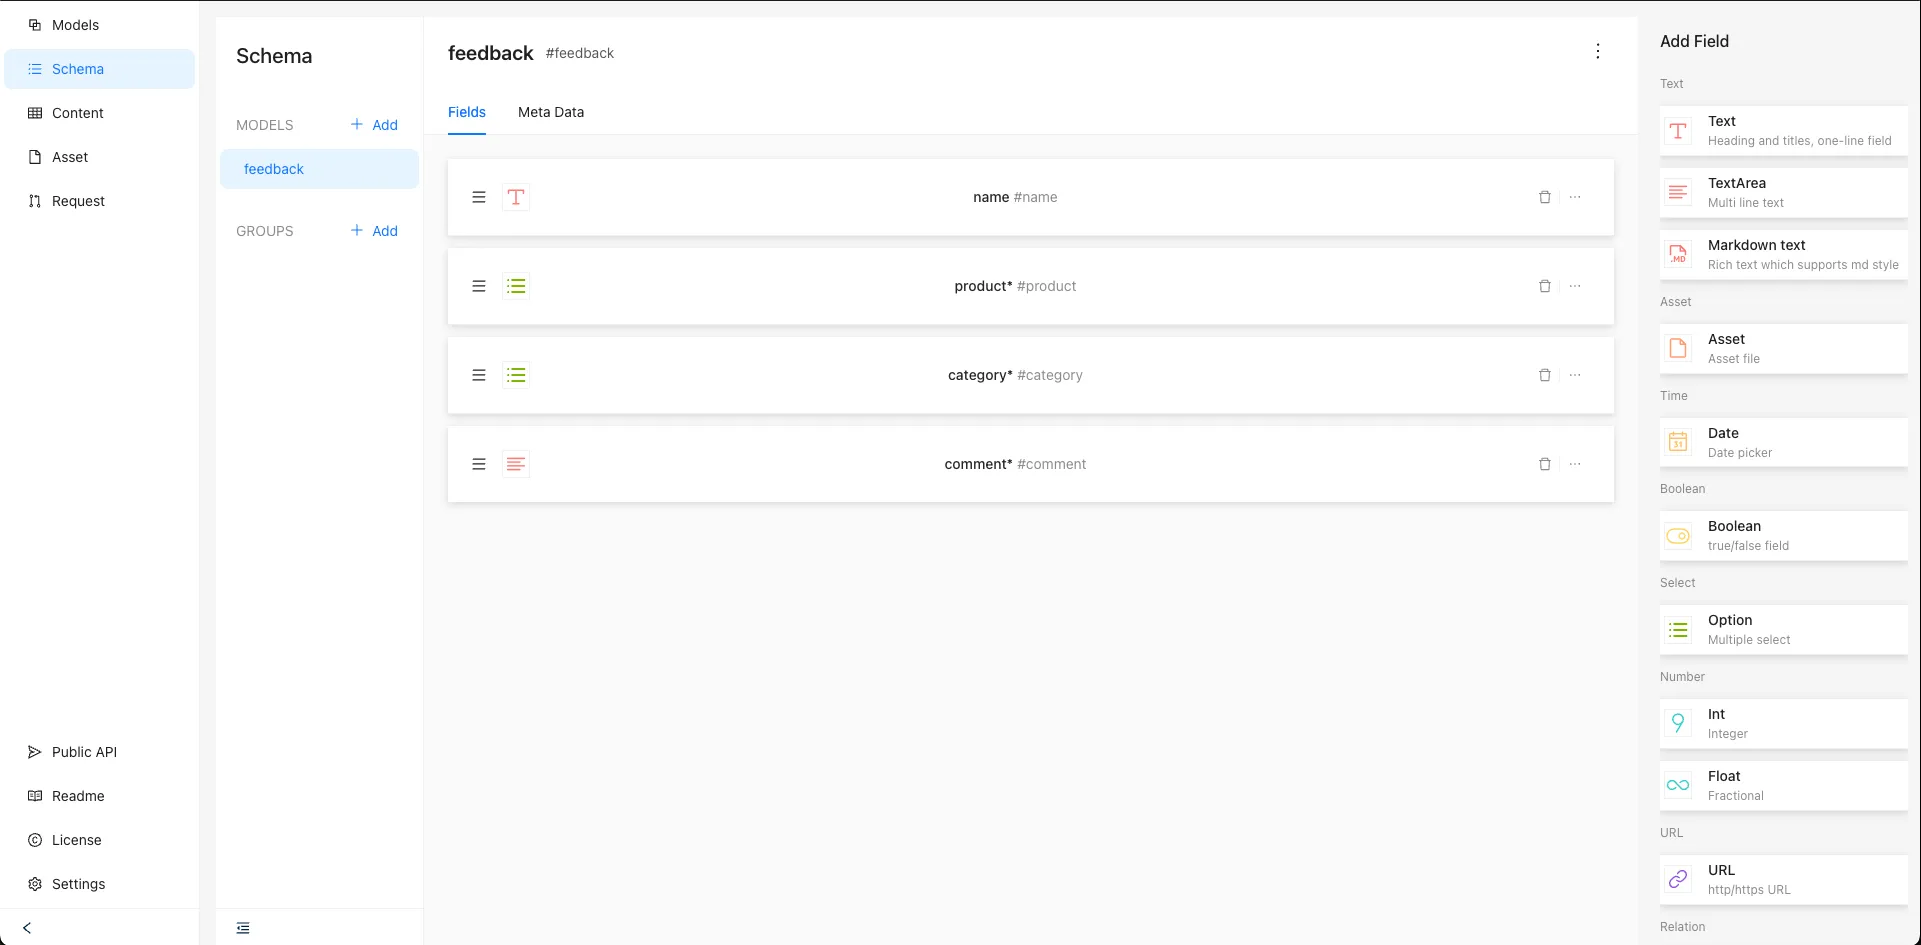
Section titled “ステップ1・CMS でモデルを作る”Re:Earth CMS の管理画面で、以下のフィールドを持つモデルを作成します。
| フィールドキー | フィールド型 | 選択肢 | 必須 |
|---|---|---|---|
name | テキスト | — | ❌ |
product | オプション | visualizer / cms / flow | ✅ |
category | オプション | bug / improvement / feature_request / other | ✅ |
comment | テキストエリア | — | ✅ |
モデルを作成したら、パブリックAPIを設定します。
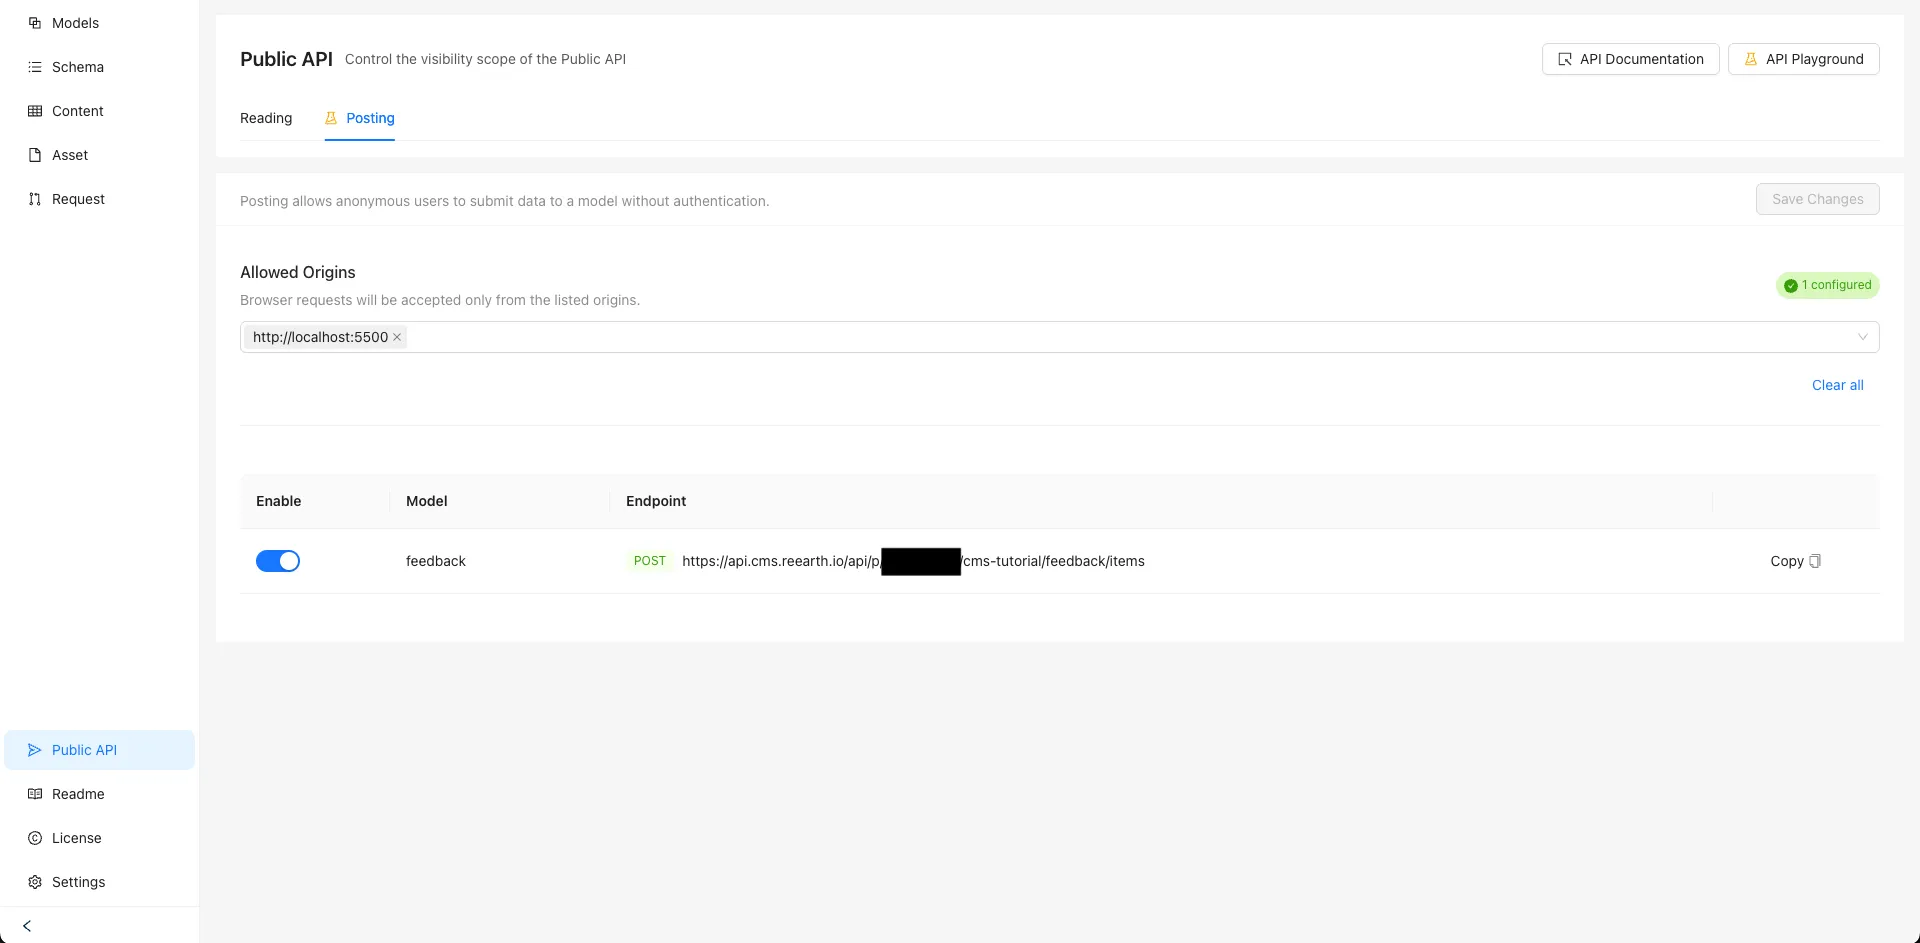
- プロジェクトが非公開の場合は、読み取りから、対象のモデルの パブリックAPI を有効にし、変更を保存をクリックする(公開プロジェクトでは不要です)
- 書き込みから、許可するオリジンを
http://localhost:5500/に設定する - 書き込みから、対象のモデルの パブリックAPI を有効にする
- 書き込みから、変更を保存をクリックする
設定が完了すると、Public API ページの Posting タブは以下のような状態になります。
パブリックAPI のセットアップ方法は 読み取り と 書き込み のページを参照してください。
ステップ2・curl で API の動作を確認する
Section titled “ステップ2・curl で API の動作を確認する”コードを書く前に、curl を使って API が正しく動作するか確認しましょう。
<workspace>・<project>・<model> を実際の値に置き換えて実行してください。
GET — 公開済みアイテムの一覧を取得する
Section titled “GET — 公開済みアイテムの一覧を取得する”パブリックAPI はブラウザや curl から認証なしで呼び出せます。コマンドラインツールから以下のコマンドを実行して、レスポンスが返ってくることを確認します。
curl 'https://api.cms.reearth.io/api/p/<workspace>/<project>/<model>'まだアイテムを公開していない場合は、results が空の JSON が返ります。
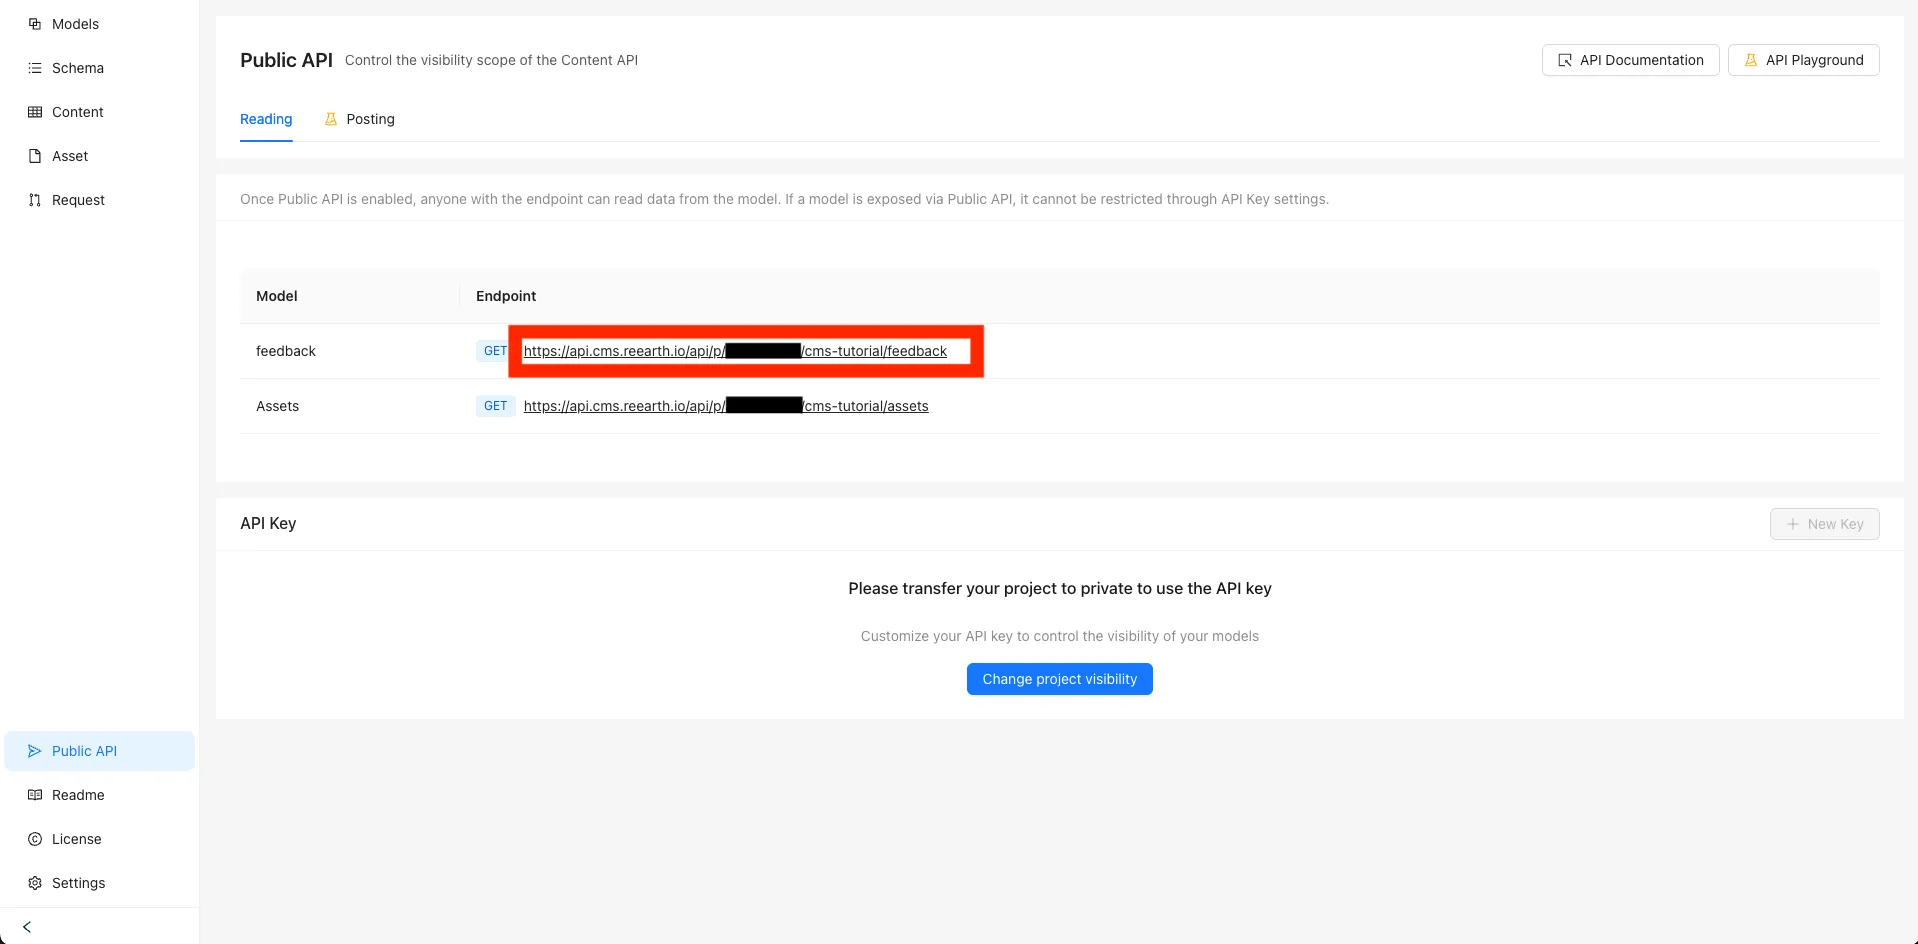
{ "results": [], "totalCount": 0 }パブリックAPI の読み取りから、エンドポイントの URL をクリックすることで同様に取得できます。
POST — フィードバックを投稿する
Section titled “POST — フィードバックを投稿する”次に、フィードバックを 1 件投稿してみます。fields のキーと値が CMS のモデル定義と一致している必要があります。
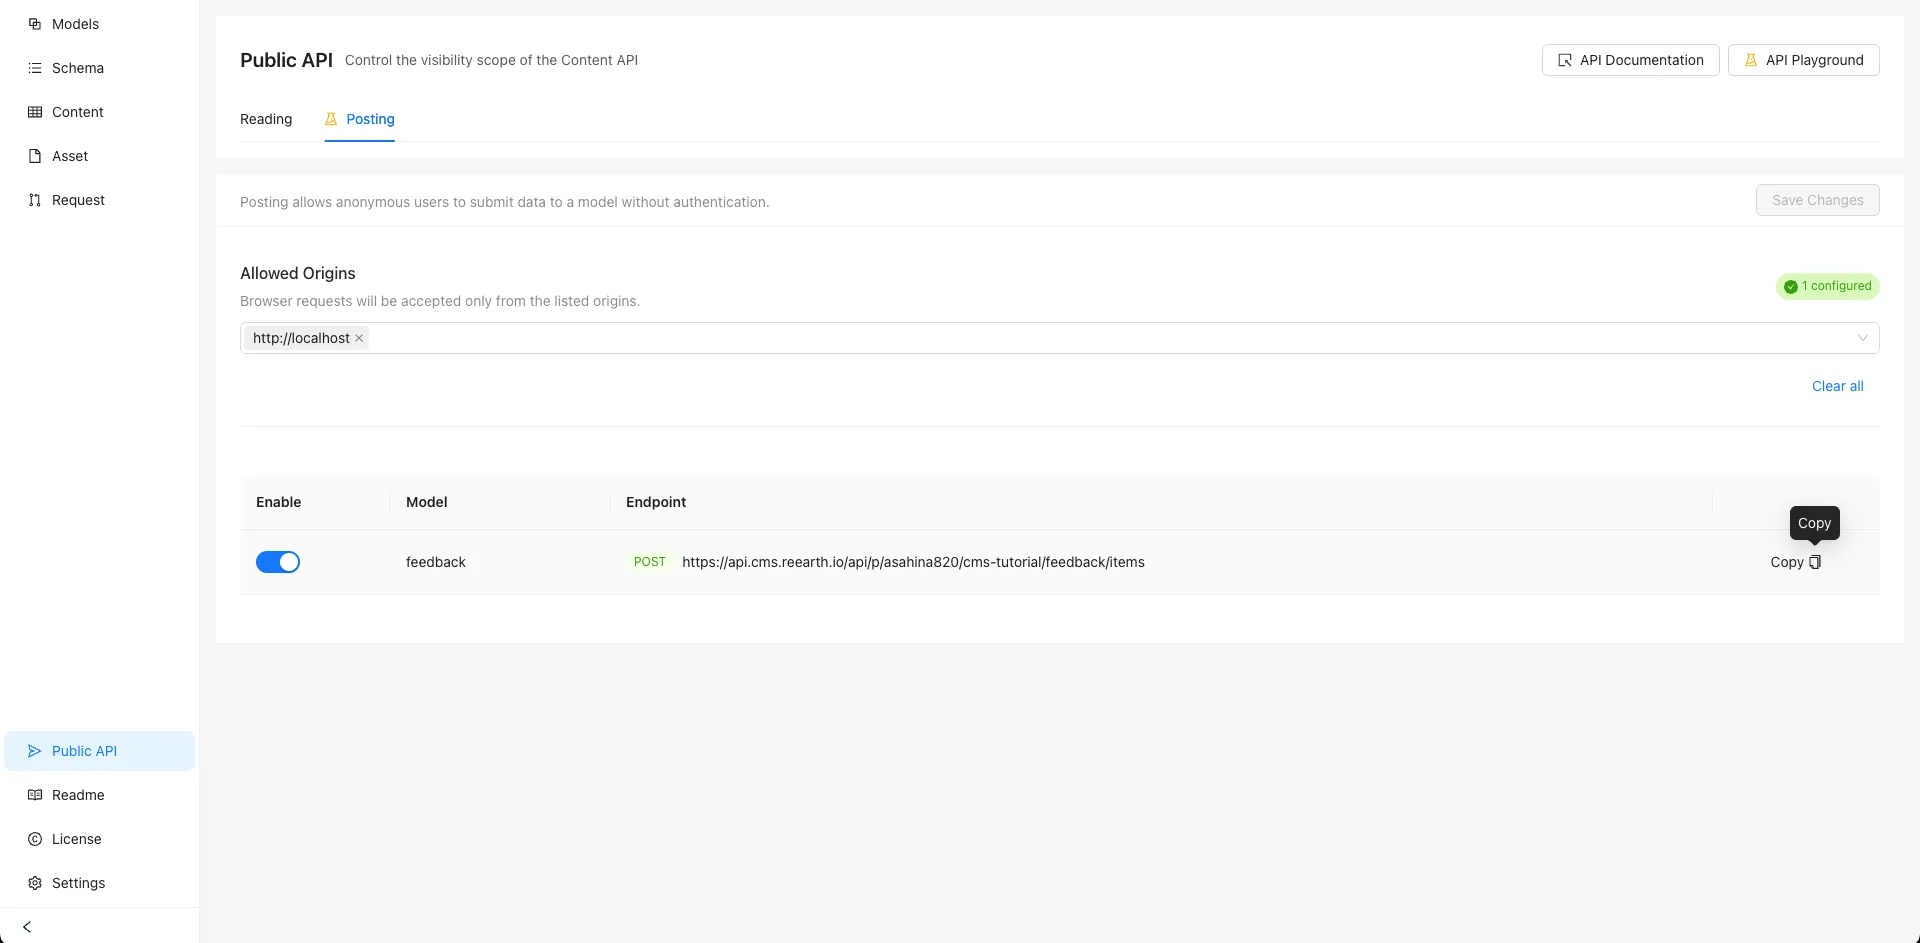
curl -X POST \ 'https://api.cms.reearth.io/api/p/<workspace>/<project>/<model>/items' \ -H 'Content-Type: application/json' \ -H 'Origin: http://localhost:5500' \ -d '{ "fields": { "name": "Test", "product": "cms", "category": "improvement", "comment": "I would like the documentation to be more comprehensive." } }'パブリックAPI の書き込みから、エンドポイントの隣の Copy をクリックすると、curl リクエストをコピーできます。
成功すると、作成されたアイテムの JSON が返ります。
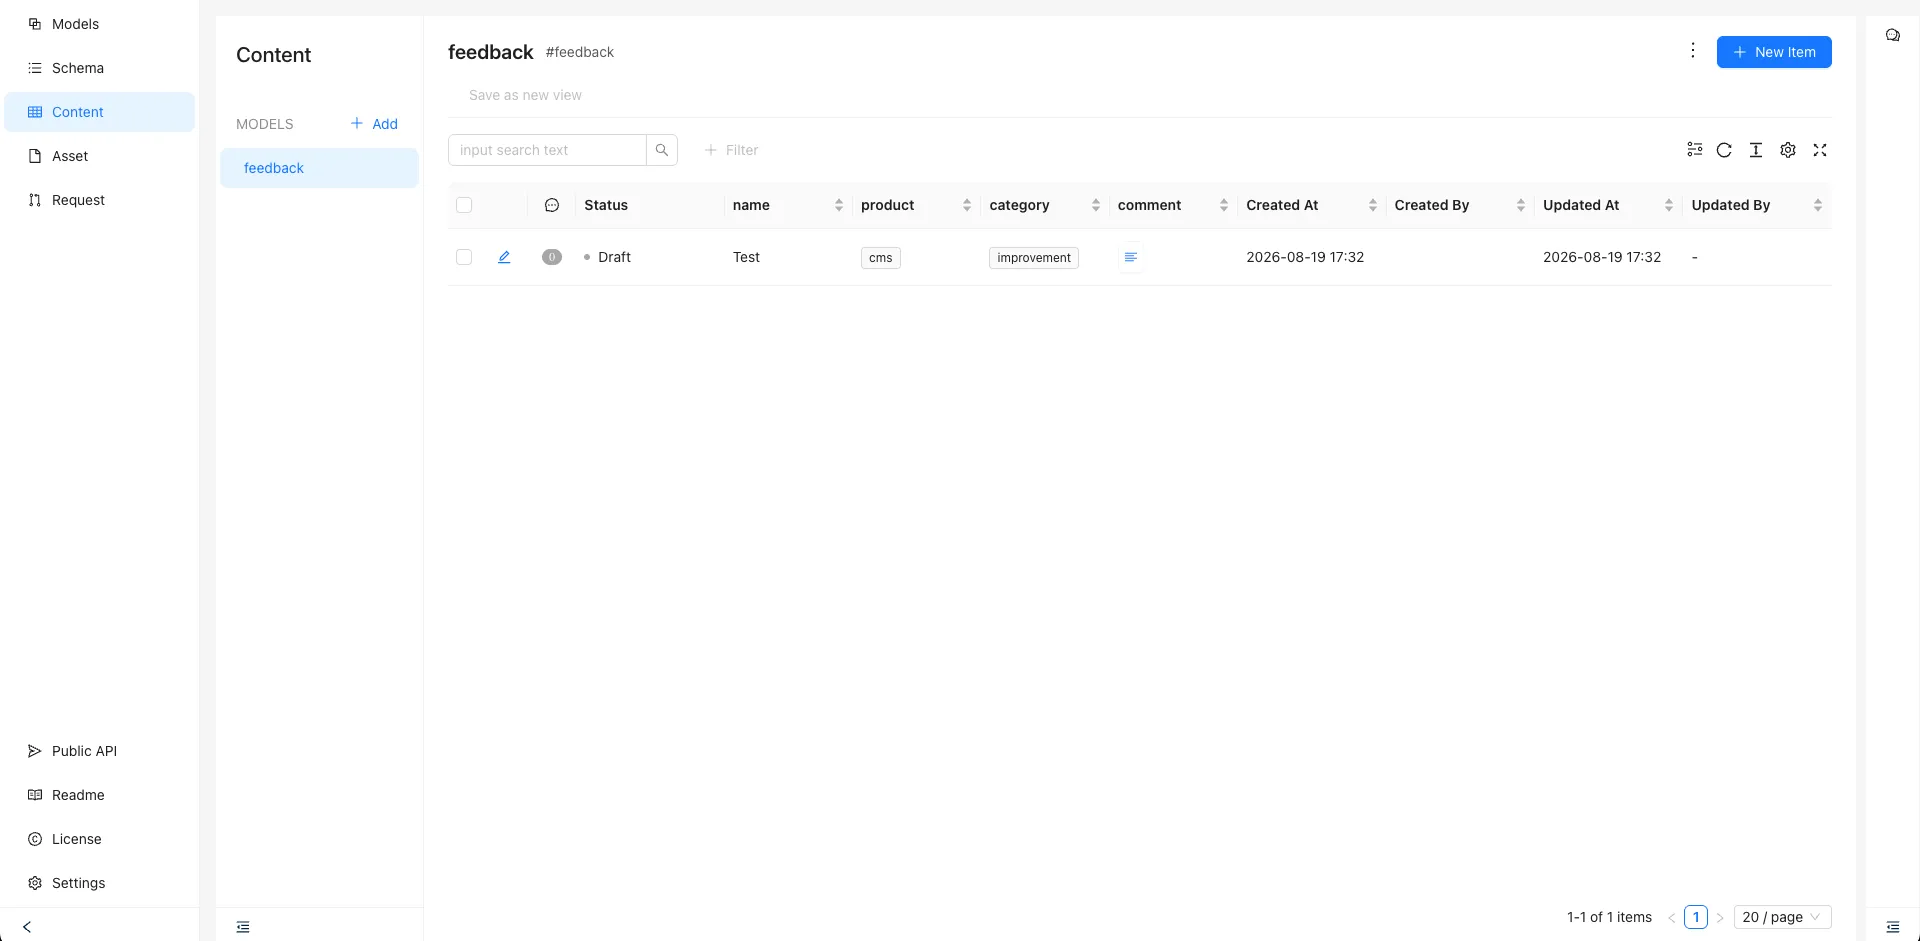
{ "id": "01m098...", "$createdAt": "2026-08-19T00:00:00.000Z", "fields": { "name": "Test", "product": "cms", "category": "improvement", "comment": "I would like the documentation to be more comprehensive." }}投稿は 下書き状態 のため、GET で取得しても一覧には表示されません。CMS の管理画面でアイテムを公開すると、パブリックAPI の GET で取得できるようになります。
ステップ3・作業ディレクトリを作る
Section titled “ステップ3・作業ディレクトリを作る”作業用のディレクトリを作成し、移動します。
mkdir feedback-appcd feedback-appこのディレクトリの中に index.html・style.css・app.js の 3 ファイルを作成していきます。
ステップ4・アプリを作る
Section titled “ステップ4・アプリを作る”API の動作が確認できたら、フロントエンドアプリを作ります。index.html・style.css・app.js の 3 ファイルで構成します。
index.html
Section titled “index.html”HTML の構造を定義します。タブの切り替えや投稿フォーム、一覧表示エリアを配置しています。
<!doctype html><html lang="ja">  <head>    <meta charset="utf-8" />    <title>Re:Earth Feedback</title>    <link rel="stylesheet" href="style.css" />  </head>  <body>    <div class="card">      <div class="logo">Re:Earth</div>      <h1>Feedback</h1>
      <div class="tabs">        <button class="tab active" data-tab="form">✏️ Submit</button>        <button class="tab" data-tab="list">📋 All Feedback</button>      </div>
      <div id="form-section" class="section active">        <form id="feedback-form">          <div class="field">            <label for="name">Name (optional)</label>            <input id="name" type="text" name="name" placeholder="e.g. Taro Yamada" />          </div>          <div class="field">            <label for="product">Product</label>            <select id="product" name="product" required>              <option value="">Select a product</option>              <option value="visualizer">Re:Earth Visualizer</option>              <option value="cms">Re:Earth CMS</option>              <option value="flow">Re:Earth Flow</option>            </select>          </div>          <div class="field">            <label for="category">Category</label>            <select id="category" name="category" required>              <option value="">Select a category</option>              <option value="bug">🐛 Bug Report</option>              <option value="improvement">✨ Improvement</option>              <option value="feature_request">💡 Feature Request</option>              <option value="other">💬 Other</option>            </select>          </div>          <div class="field">            <label for="comment">Comment</label>            <textarea id="comment" name="comment" placeholder="Please describe in detail" required></textarea>          </div>          <button type="submit" class="btn" id="submit-btn">Submit</button>        </form>        <p id="message"></p>      </div>
      <div id="list-section" class="section">        <div id="list-content" class="loading">Loading...</div>      </div>    </div>
    <script type="module" src="app.js"></script>  </body></html>
style.css
Section titled “style.css”スタイルを定義します。
*,*::before,*::after {  box-sizing: border-box;  margin: 0;  padding: 0;}
body {  font-family: "Inter", system-ui, sans-serif;  background: #f8f9fb;  min-height: 100vh;  display: flex;  align-items: flex-start;  justify-content: center;  padding: 40px 16px;}
.card {  background: #fff;  border-radius: 16px;  padding: 40px;  width: 100%;  max-width: 520px;  box-shadow: 0 4px 24px rgba(0, 0, 0, 0.07);}
.logo {  font-size: 0.75rem;  font-weight: 700;  letter-spacing: 0.1em;  color: #6b7280;  margin-bottom: 20px;}
h1 {  font-size: 1.5rem;  font-weight: 700;  color: #111827;  margin-bottom: 24px;}
.tabs {  display: flex;  gap: 4px;  background: #f3f4f6;  border-radius: 10px;  padding: 4px;  margin-bottom: 32px;}
.tab {  flex: 1;  padding: 8px;  border: none;  border-radius: 7px;  font-size: 0.875rem;  font-weight: 600;  cursor: pointer;  background: transparent;  color: #6b7280;  transition: all 0.15s;}
.tab.active {  background: #fff;  color: #111827;  box-shadow: 0 1px 4px rgba(0, 0, 0, 0.1);}
.field {  margin-bottom: 20px;}
label {  display: block;  font-size: 0.8rem;  font-weight: 600;  color: #374151;  margin-bottom: 6px;}
input,select,textarea {  width: 100%;  padding: 10px 14px;  border: 1.5px solid #e5e7eb;  border-radius: 8px;  font-size: 0.9rem;  color: #111827;  background: #fff;  transition: border-color 0.15s;  outline: none;  appearance: none;}
input:focus,select:focus,textarea:focus {  border-color: #2563eb;}
textarea {  resize: vertical;  min-height: 100px;}
.btn {  width: 100%;  margin-top: 8px;  padding: 12px;  background: #2563eb;  color: #fff;  border: none;  border-radius: 8px;  font-size: 0.95rem;  font-weight: 600;  cursor: pointer;  transition: background 0.15s;}
.btn:hover {  background: #1d4ed8;}
.btn:disabled {  background: #93c5fd;  cursor: not-allowed;}
#message {  margin-top: 16px;  font-size: 0.85rem;  text-align: center;  color: #6b7280;}
#message.success {  color: #16a34a;}
#message.error {  color: #dc2626;}
.feedback-item {  border: 1px solid #e5e7eb;  border-radius: 10px;  padding: 16px;  margin-bottom: 12px;}
.feedback-meta {  display: flex;  align-items: center;  gap: 8px;  margin-bottom: 8px;  flex-wrap: wrap;}
.tag {  font-size: 0.75rem;  font-weight: 700;  padding: 2px 10px;  border-radius: 99px;}
.tag-bug             { background: #fee2e2; color: #dc2626; }.tag-improvement     { background: #e0f2fe; color: #0284c7; }.tag-feature_request { background: #fef9c3; color: #ca8a04; }.tag-other           { background: #f3f4f6; color: #6b7280; }
.feedback-product {  font-size: 0.8rem;  color: #6b7280;}
.feedback-name {  font-size: 0.8rem;  color: #9ca3af;  margin-left: auto;}
.feedback-comment {  font-size: 0.9rem;  color: #374151;  line-height: 1.6;}
.empty,.loading {  text-align: center;  color: #9ca3af;  font-size: 0.9rem;  padding: 40px 0;}
.section {  display: none;}
.section.active {  display: block;}
app.js
Section titled “app.js”アプリのロジックを担います。タブの切り替え・一覧の取得・フォームの送信の 3 つの処理を実装します。
<workspace>・<project>・<model> を実際の値に置き換えてください。
const WORKSPACE = "<workspace>";const PROJECT = "<project>";const MODEL = "<model>";const BASE = `https://api.cms.reearth.io/api/p/${WORKSPACE}/${PROJECT}/${MODEL}`;
const PRODUCT_LABEL = {  visualizer: "Re:Earth Visualizer",  cms: "Re:Earth CMS",  flow: "Re:Earth Flow",};
const CATEGORY_LABEL = {  bug: "🐛 Bug Report",  improvement: "✨ Improvement",  feature_request: "💡 Feature Request",  other: "💬 Other",};
// タブ切り替えdocument.querySelectorAll(".tab").forEach((tab) => {  tab.addEventListener("click", () => {    document      .querySelectorAll(".tab")      .forEach((t) => t.classList.remove("active"));    document      .querySelectorAll(".section")      .forEach((s) => s.classList.remove("active"));    tab.classList.add("active");    document      .getElementById(`${tab.dataset.tab}-section`)      .classList.add("active");
    if (tab.dataset.tab === "list") {      loadList();    }  });});
// 一覧取得async function loadList() {  const content = document.getElementById("list-content");  try {    const resp = await fetch(BASE);    if (!resp.ok) {      throw new Error(`Request failed (${resp.status})`);    }    const data = await resp.json();
    if (!data.results || data.results.length === 0) {      content.className = "empty";      content.textContent = "No feedback yet.";      return;    }
    content.className = "";    content.innerHTML = "";
    for (const item of data.results) {      const el = document.createElement("div");      el.className = "feedback-item";
      const meta = document.createElement("div");      meta.className = "feedback-meta";
      const tag = document.createElement("span");      tag.className = `tag tag-${item.category}`;      tag.textContent = CATEGORY_LABEL[item.category] ?? item.category;
      const product = document.createElement("span");      product.className = "feedback-product";      product.textContent = PRODUCT_LABEL[item.product] ?? item.product;
      const name = document.createElement("span");      name.className = "feedback-name";      name.textContent = item.name ?? "Anonymous";
      meta.append(tag, product, name);
      const comment = document.createElement("p");      comment.className = "feedback-comment";      comment.textContent = item.comment;
      el.append(meta, comment);      content.appendChild(el);    }  } catch (err) {    content.className = "empty";    content.textContent = "Failed to load feedback.";    console.error(err);  }}
// 投稿const message = document.getElementById("message");const btn = document.getElementById("submit-btn");
document  .getElementById("feedback-form")  .addEventListener("submit", async (e) => {    e.preventDefault();    btn.disabled = true;    message.className = "";    message.textContent = "Submitting...";
    const formData = new FormData(e.target);    const body = {      fields: {        name: formData.get("name") || undefined,        product: formData.get("product"),        category: formData.get("category"),        comment: formData.get("comment"),      },    };
    try {      const resp = await fetch(`${BASE}/items`, {        method: "POST",        headers: {          "Content-Type": "application/json",          Accept: "application/json",        },        body: JSON.stringify(body),      });
      btn.disabled = false;
      if (!resp.ok) {        const data = await resp.json().catch(() => ({}));        message.className = "error";        message.textContent = `Error: ${data.message ?? `Request failed (${resp.status})`}`;        return;      }
message.className = "success"; message.textContent = "Submitted! It will appear in the list once published in CMS."; e.target.reset(); } catch (err) { btn.disabled = false; message.className = "error"; message.textContent = "Failed to submit. "; console.error(err); } });ステップ5・開発サーバーを起動する
Section titled “ステップ5・開発サーバーを起動する”3 ファイルが揃ったら、ローカルサーバーを起動してブラウザで確認します。
npx vite --port 5500起動後、http://localhost:5500 をブラウザで開きます。
Submit タブは以下のように表示されます。
All Feedback タブは、まだフィードバックを投稿していないため次のように表示されます。
ステップ6・動作確認
Section titled “ステップ6・動作確認”サーバーが起動したら、実際に動作を確認してみましょう。
-
ブラウザでアプリを開き、Submit タブからフィードバックを入力して送信する
-
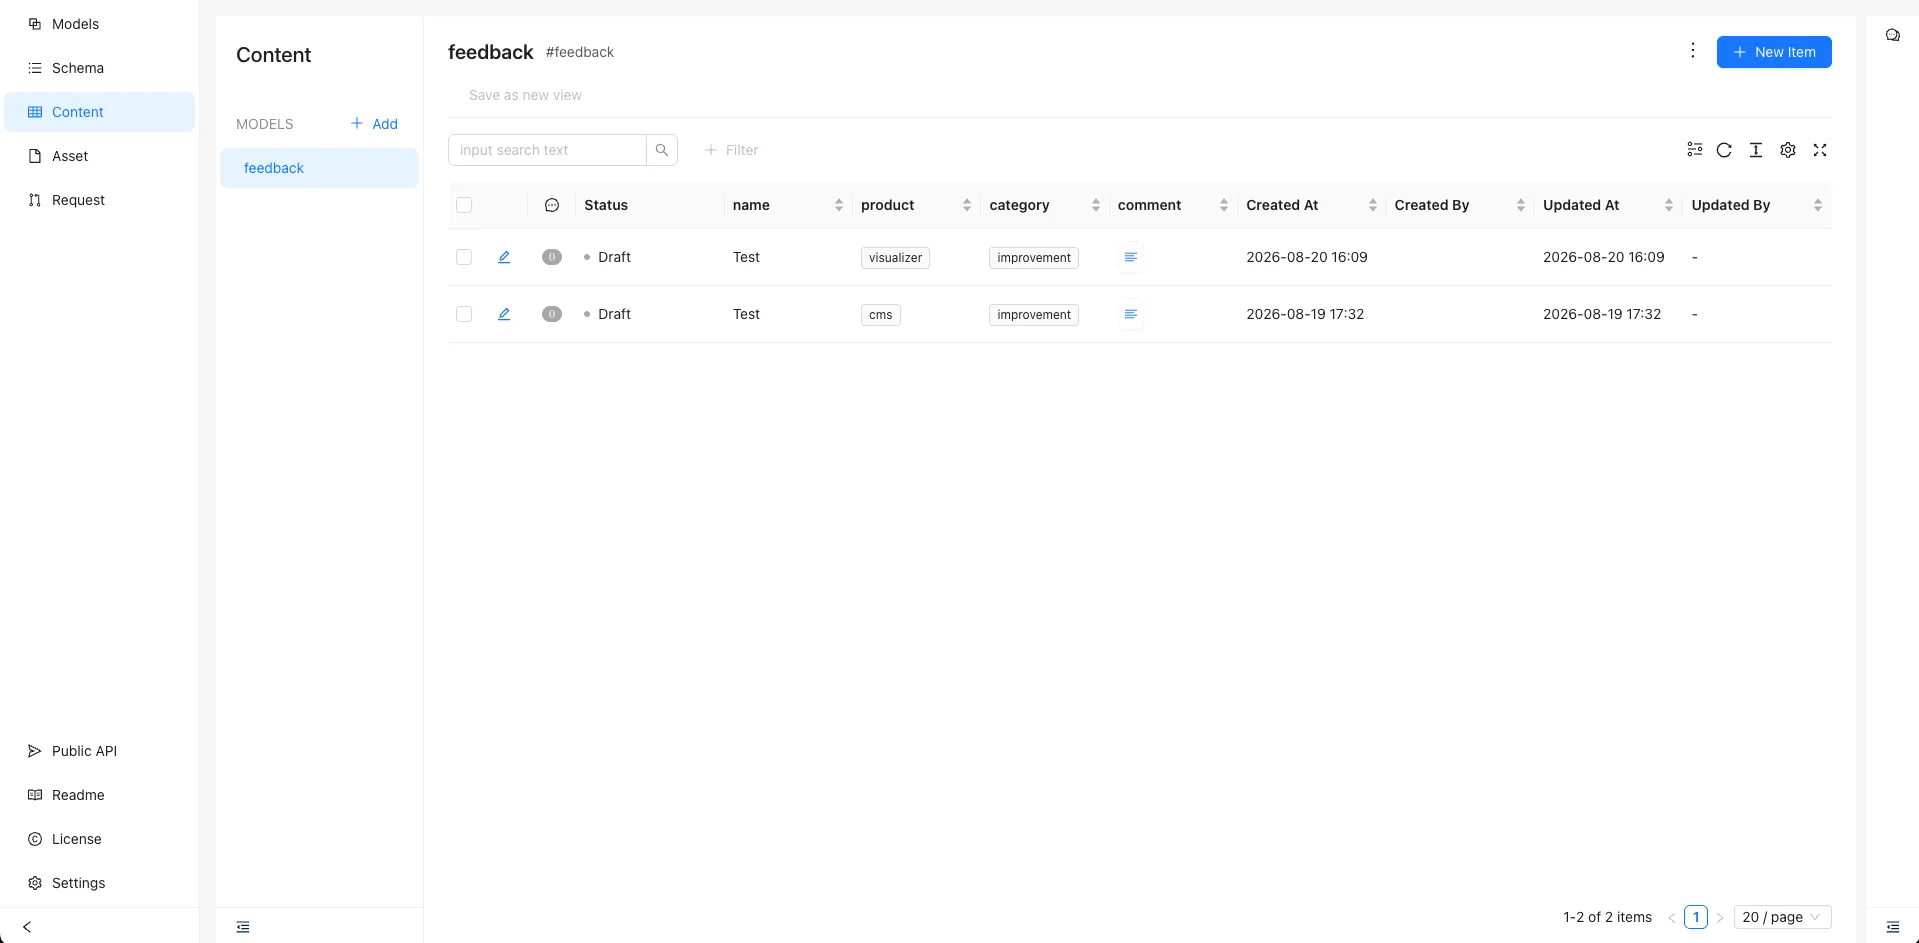
Re:Earth CMS の管理画面を開き、作成したモデルのアイテム一覧を確認する — 投稿したフィードバックが 下書き状態で登録されていることを確認する
-
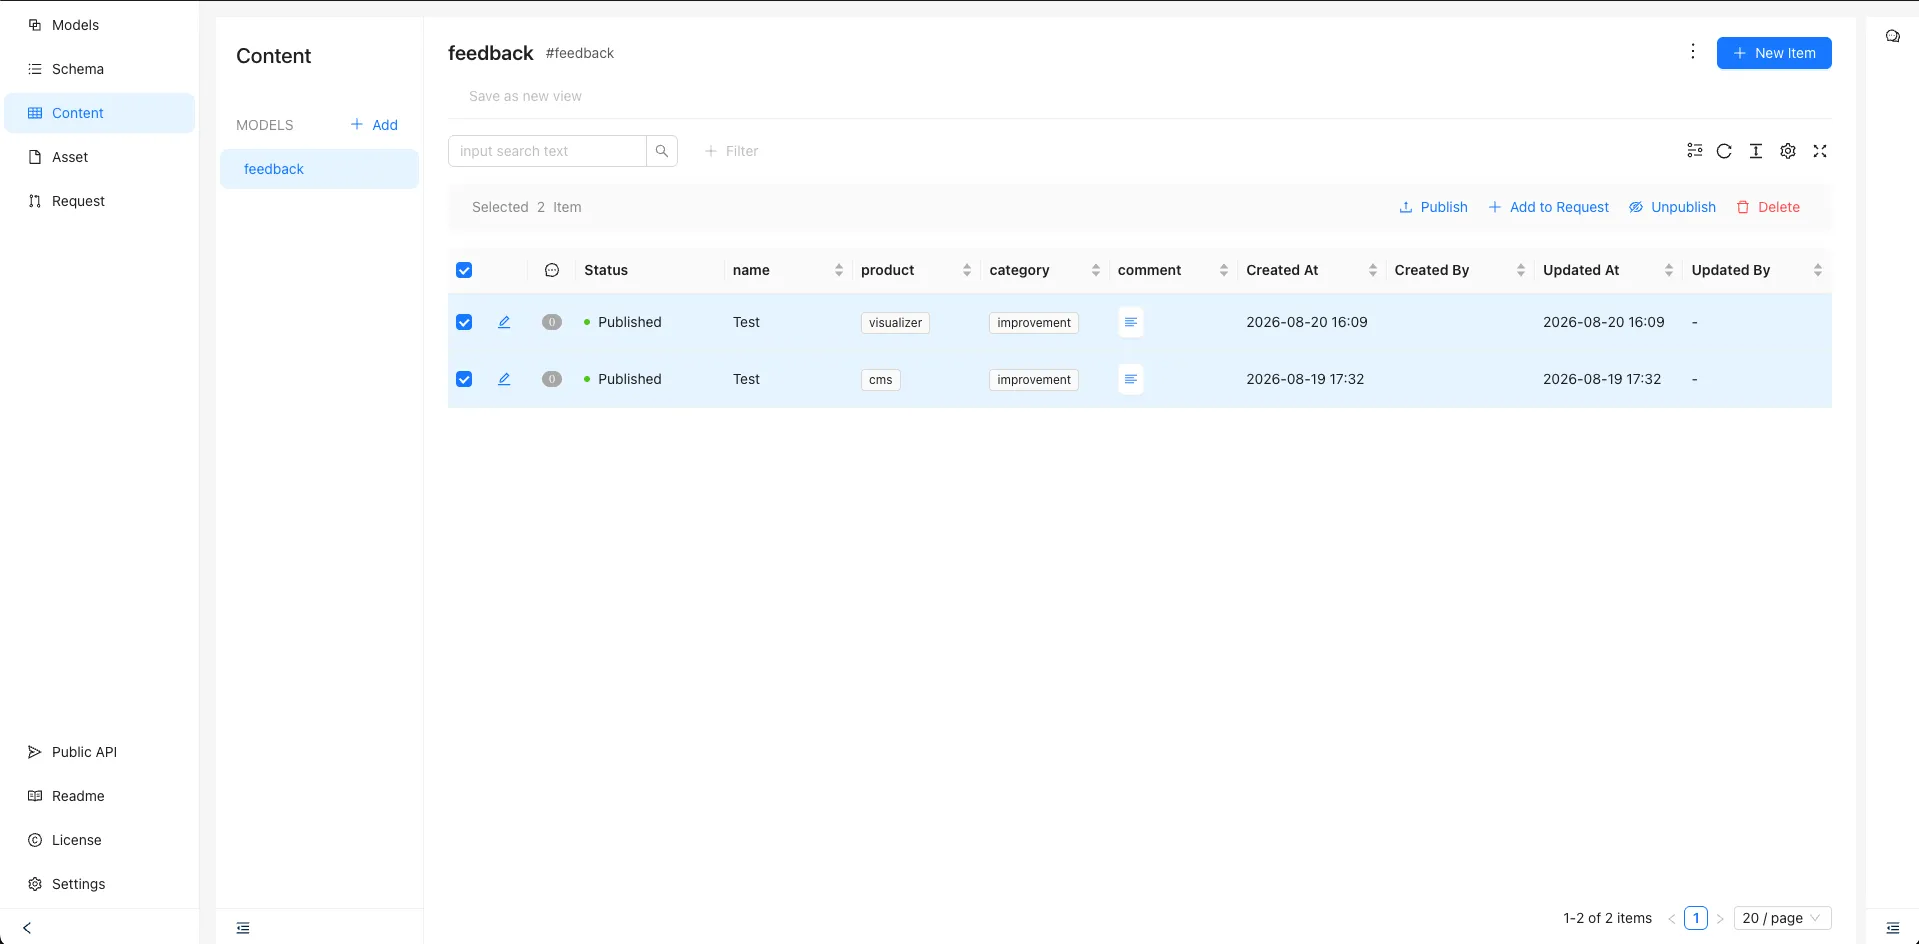
アイテムを選択し、Publish をクリックして公開する
-
アプリに戻り、All Feedback タブを開く — 公開したフィードバックが一覧に表示されることを確認する
トラブルシューティング
Section titled “トラブルシューティング”送信したフィードバックが一覧に表示されない
投稿されたフィードバックはデフォルトで 下書き状態で保存されます。CMS の管理画面でアイテムを公開すると一覧に反映されます。
送信時に 400 Bad Request が返る
product と category フィールドの値が、CMS のモデルで定義した選択肢と完全に一致しているか確認してください(例: Visualizer ではなく visualizer)。
429 Too Many Requests が返る
パブリックAPI にはレートリミットがあります。短時間に大量のリクエストを送信すると発生します。しばらく待ってから再試行してください。
一覧に「Failed to load feedback」と表示される
プロジェクトのパブリックAPI が有効になっているか、URL のモデルキーが正しいかを確認してください。
完了チェックリスト
Section titled “完了チェックリスト”- Submit タブからフィードバックを送信できる
- CMS の Content 画面で、送信したフィードバックが下書き状態のアイテムとして確認できる
- CMS の管理画面からアイテムを公開できる
- All Feedback タブに、公開したフィードバックが一覧表示される