Table Block
The Table Block allows you to add a table within an Info Box.
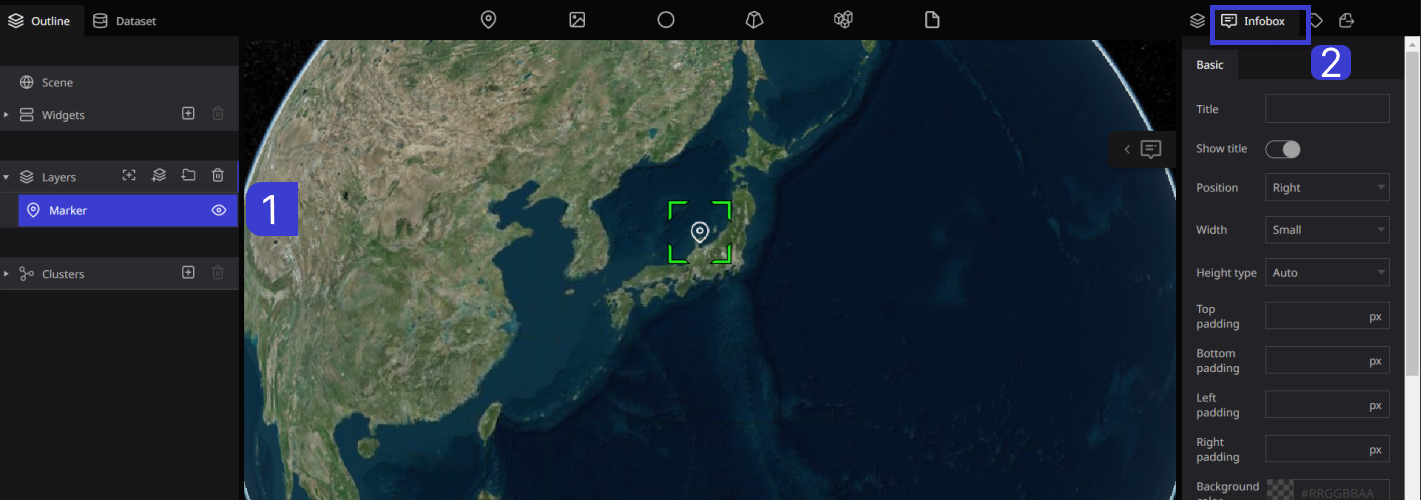
Step1. Choose the desired layer from the left panel to set the text.
Step 2. Select the Info Box tab from the right panel.
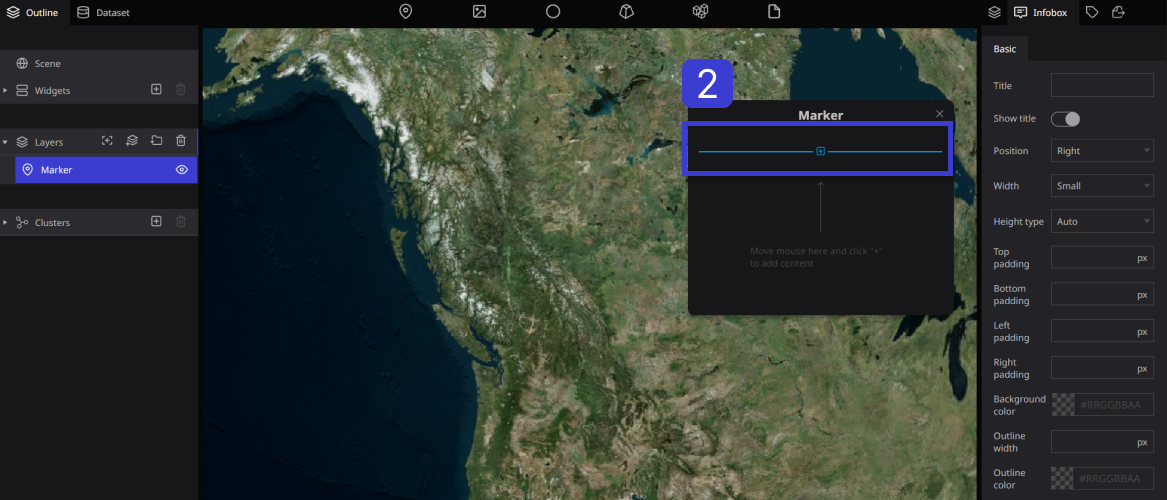
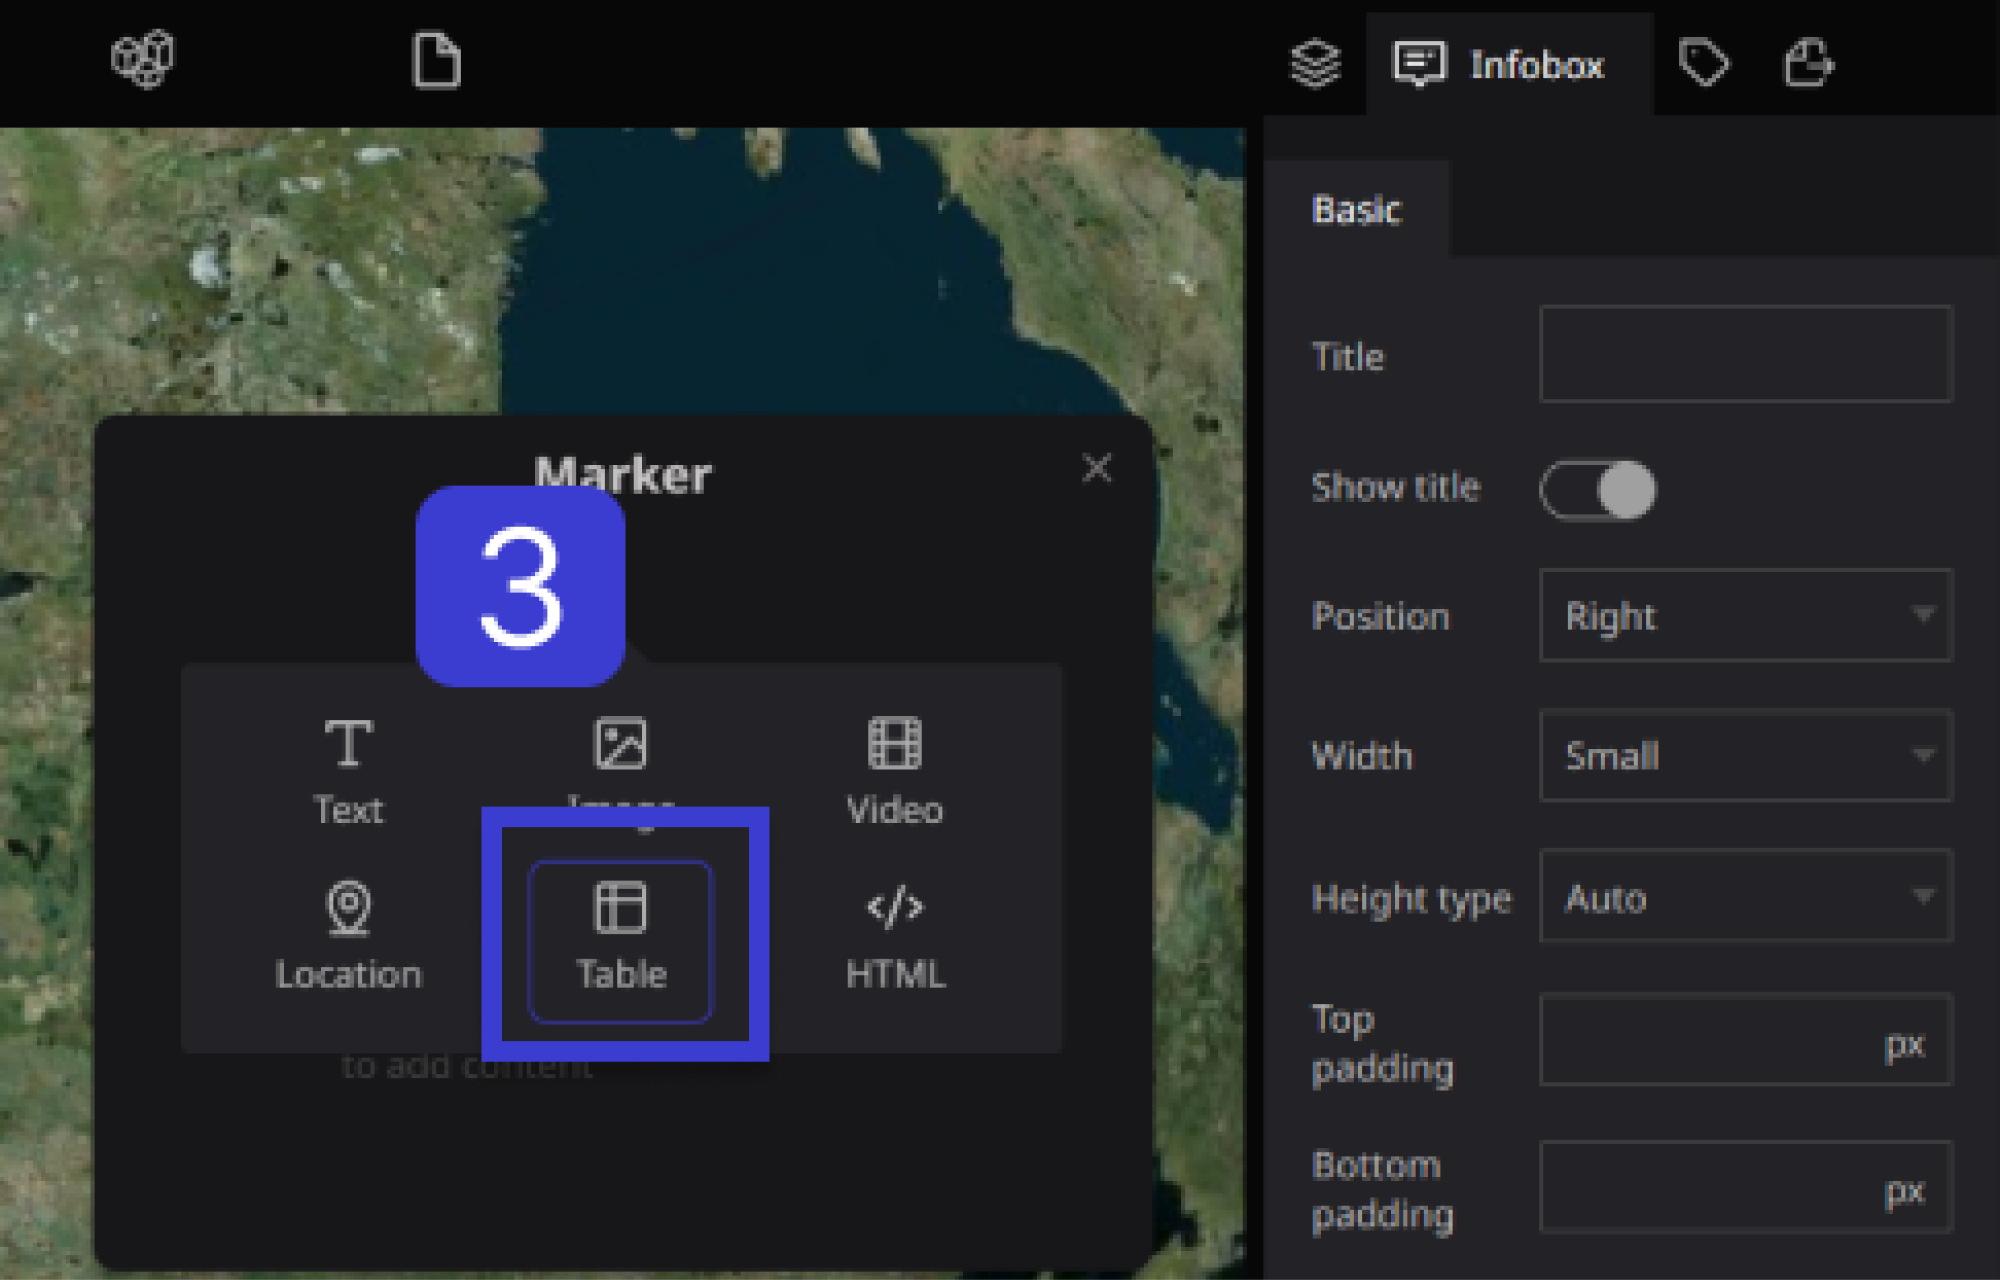
Step 3. When you place the cursor inside the Infobox, a plus sign (+) will appear. Click on the plus sign and select "Table".
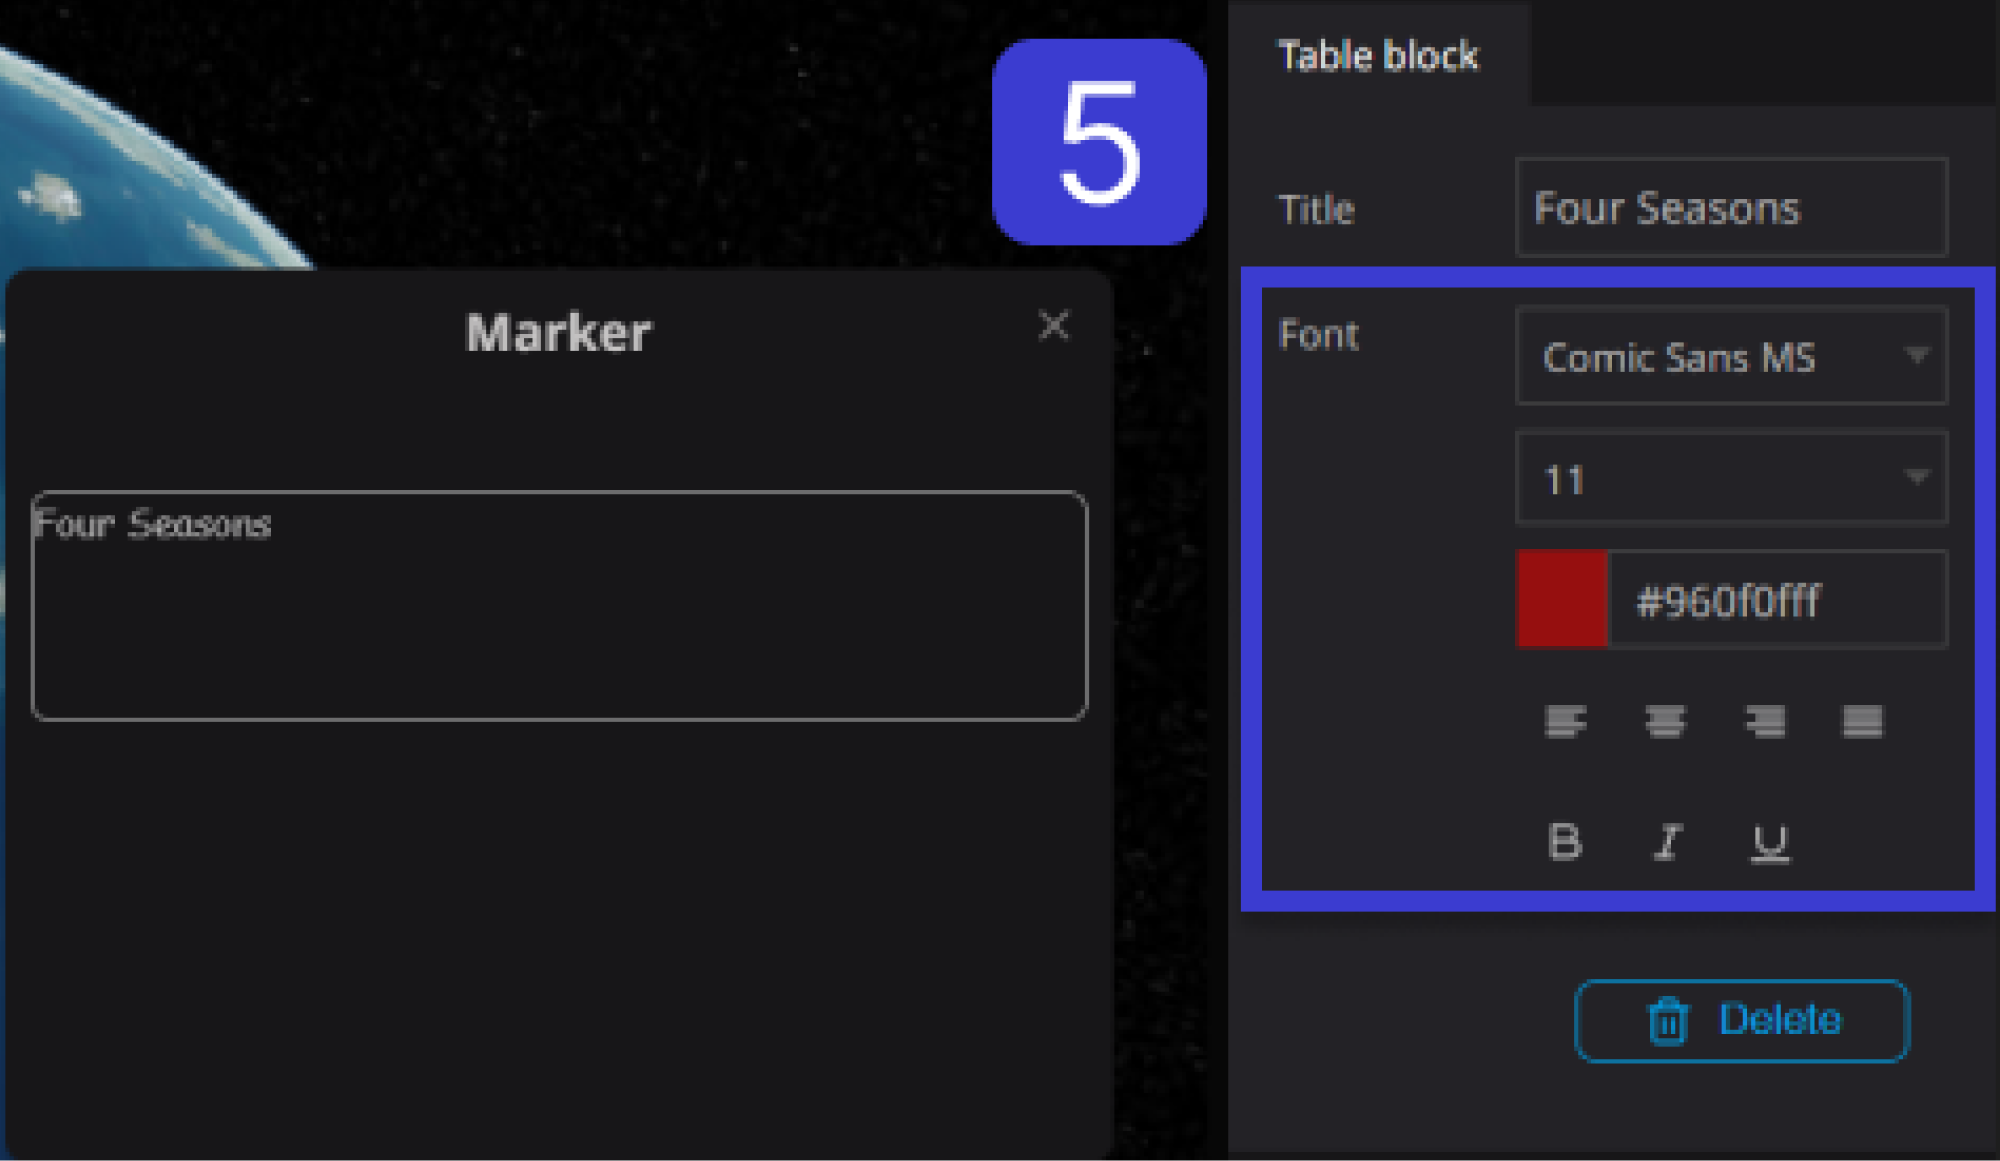
Step 4. When you enter text in the title, the title will be displayed in the table block.
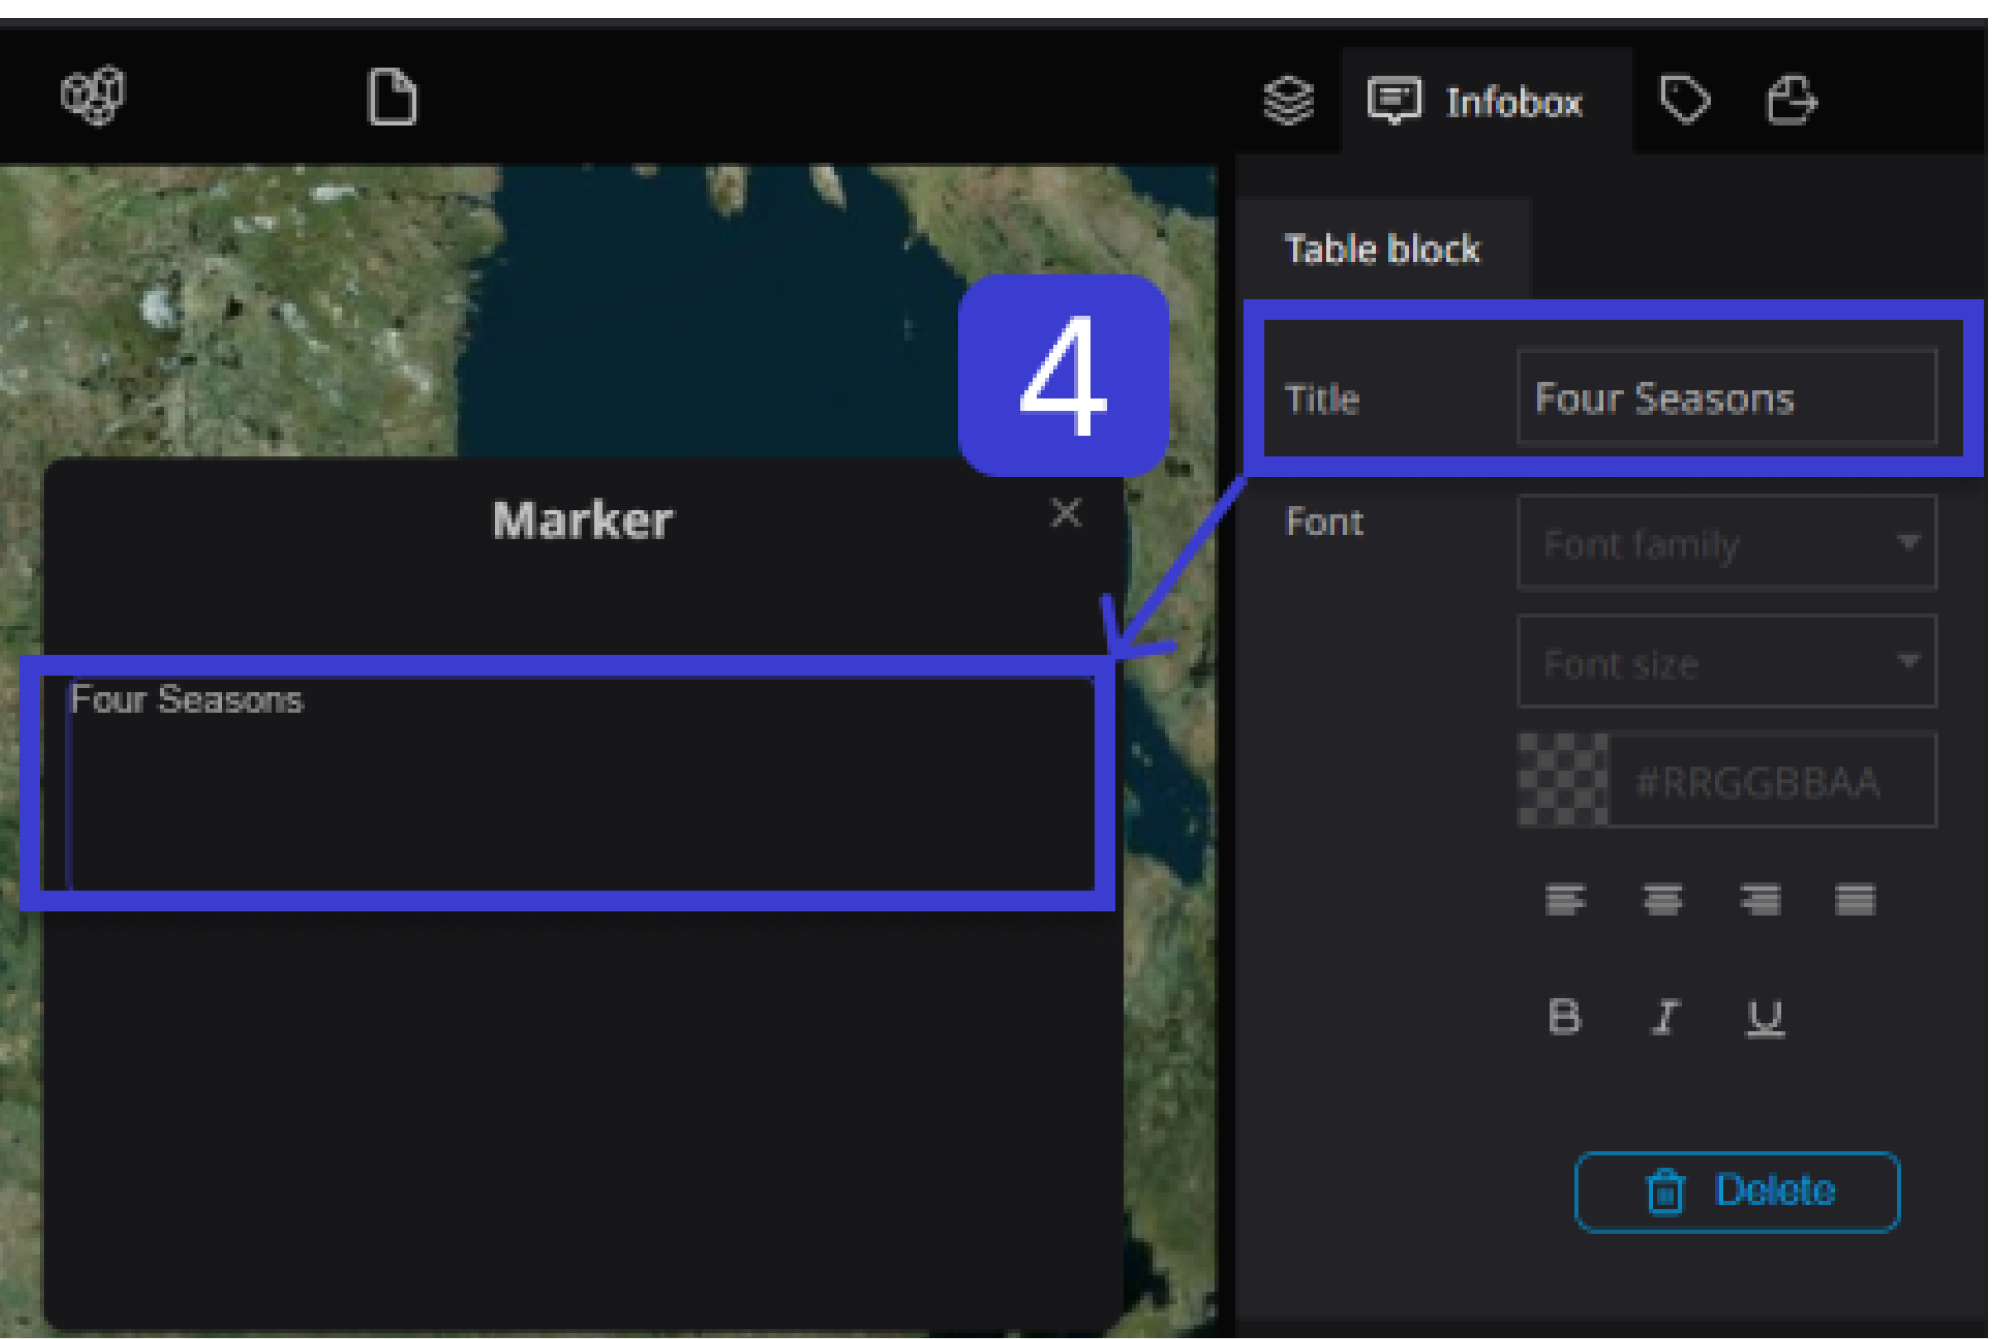
Step 5. You can set the text font, size, color, alignment, and bold within the font in the list.
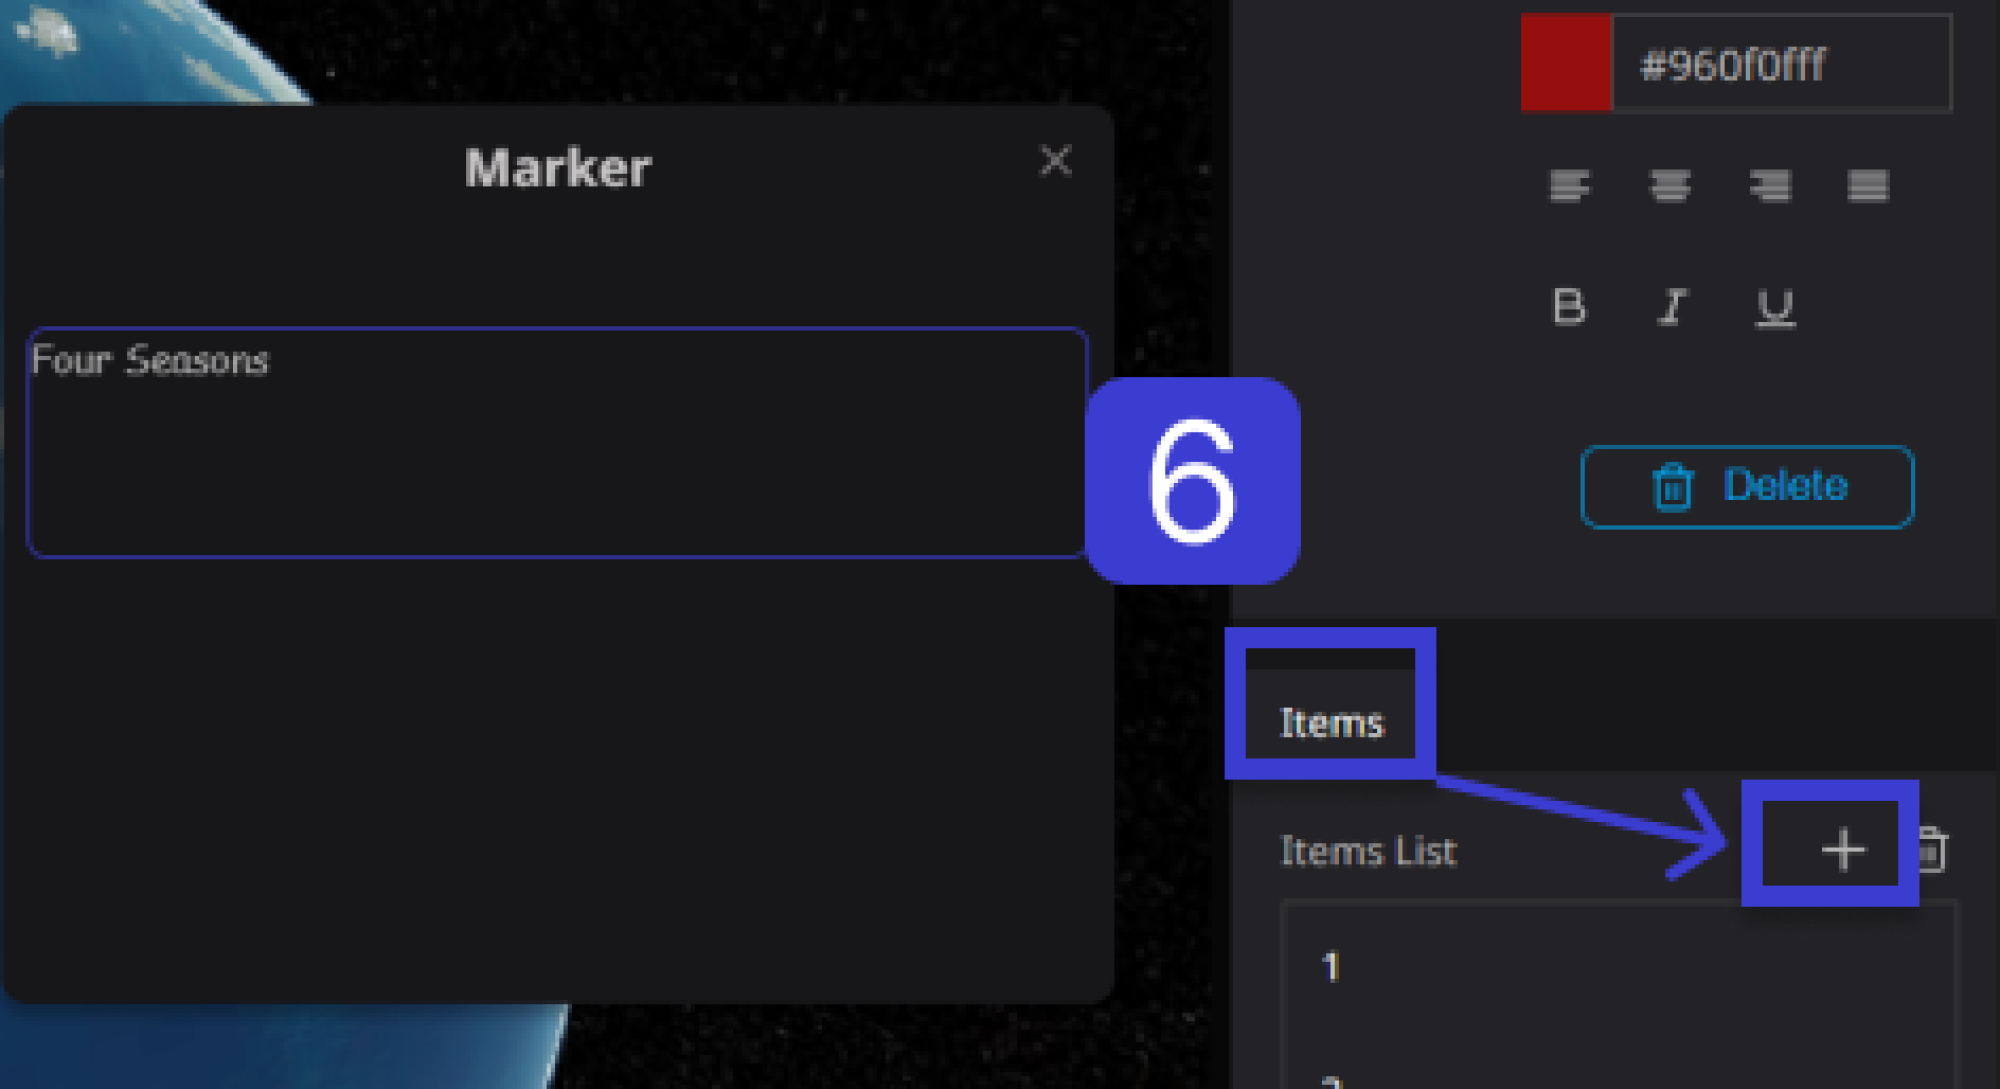
Step 6. To add a list to the item list, simply click the "+" button located on the right side of the item.
You can add multiple lists by clicking the "+" button for each list you want to add.
7.To create a list table inside an item, first select the relevant list, and then perform the following settings:
A: Enter text in the title. (e.g. January)
B: Select either "String" or "Number" for the type. (e.g. String)
C: Enter data (text). (e.g. Spring)
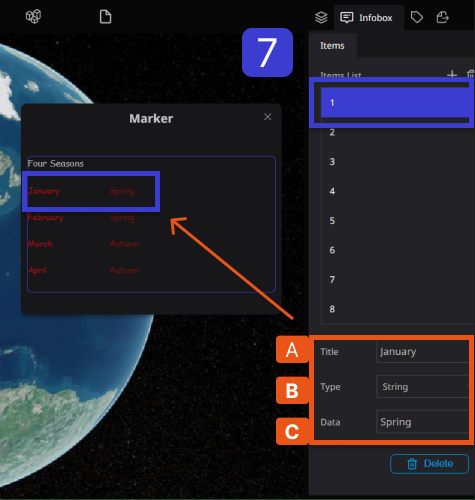
Then it will be displayed like this.