Image Block
The Image Block is a component within an Infobox used for adding photos or images. It enhances the visual appeal of the Infobox and makes it more engaging.
Step 1. To set the text for a specific layer, choose the desired layer from the left panel.
Step 2. Choose the Infobox tab on the right panel.
-f9a98d326f1b292645363de813eb7e3c.png)
Step 3. Click on “Create Infobox”.
-a2f86b6374cd156b5f3fff6b8d997c06.png)
Step 4. When the cursor is placed in the Infobox, a “+” sign appears and click on it.
_(1)-c767112feac75b1126e296e69e2f02a9.png)
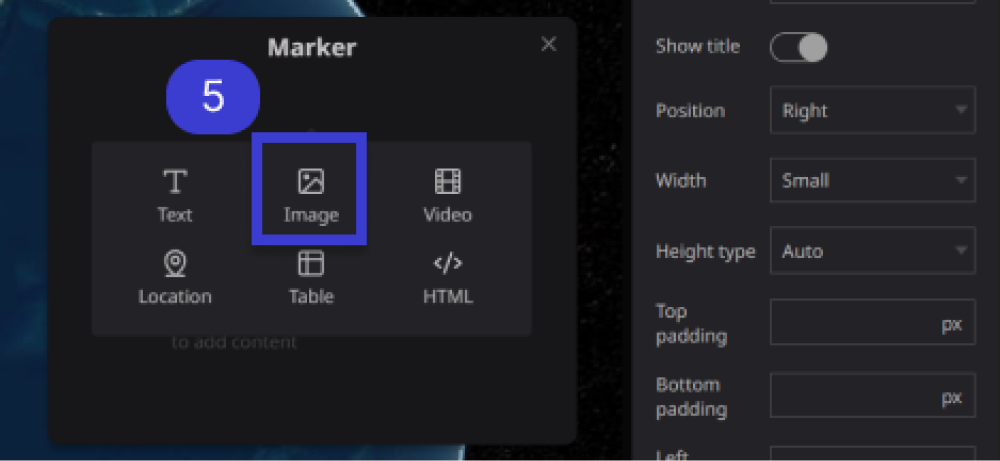
Step 5. After clicking plus sign and click on "Image” Icon.
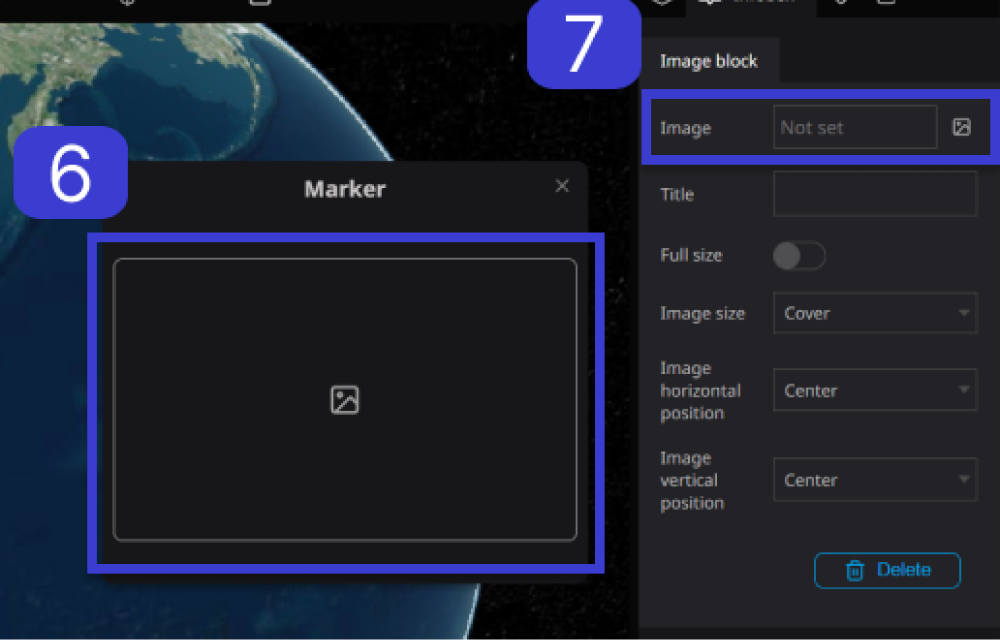
Step 6. Click on the “Image” Icon in the left panel.
Step 7. Then click on the “Image” box in the right panel.
Step 8. Select the option to add an image from the available assets or insert an image using a URL.
-013ffe42eb6f911de815b47331b6f2e5.png)
-401b2e733ba2f325c5246143868b7001.png)
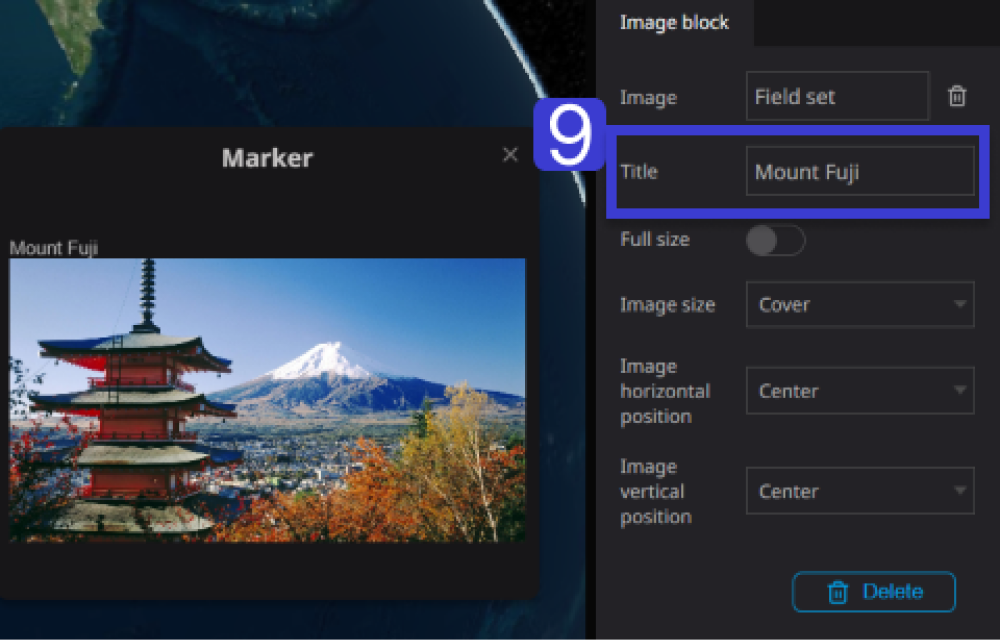
Step 9: If you wish to include a title, enter the desired text in the provided field and add it. (Example: Mount Fuji)
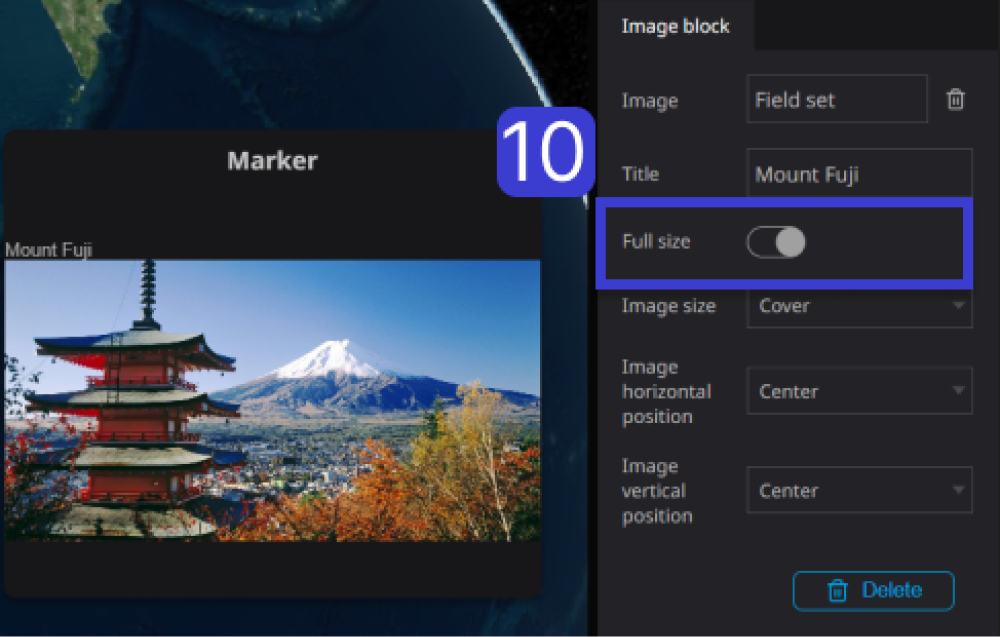
Step 10. Turning on “Full size” will spread the image to fill the Infobox.。
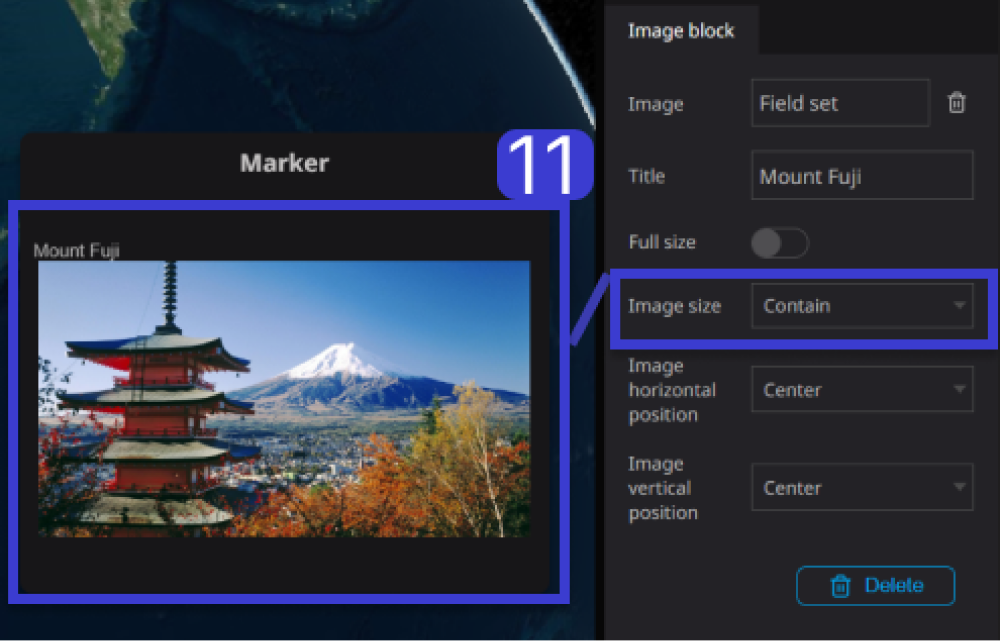
Step 11. To adjust the image display, choose "Cover/Contain" for the image size
Cover: The image is displayed with the center portion enlarged.

Contain: The image is automatically adjusted to fit and display the entire image.
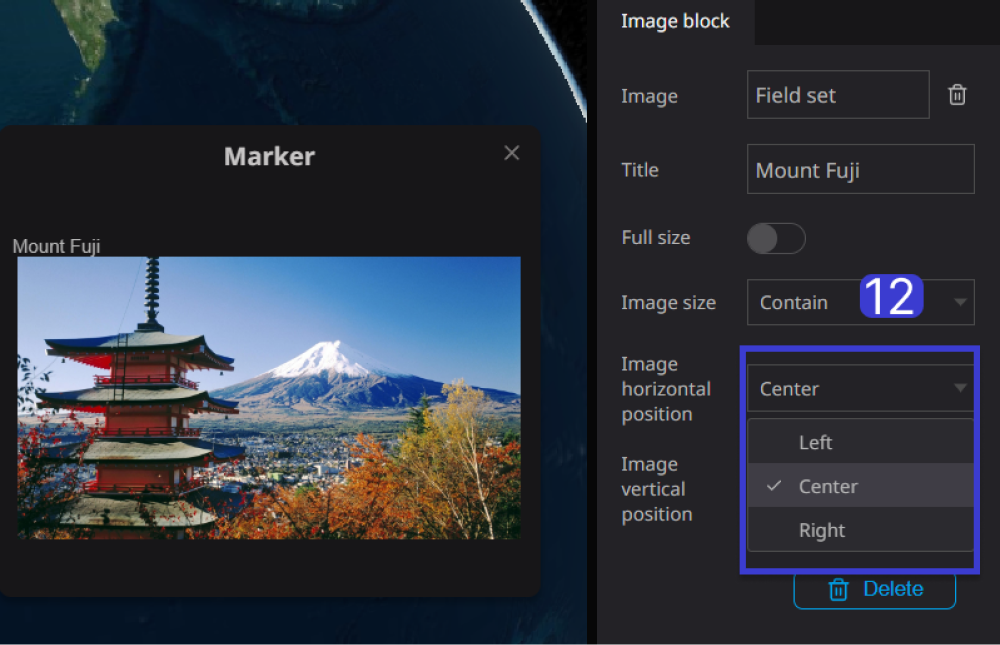
Step 12: You can adjust the horizontal position of the image to the left, center, or right.
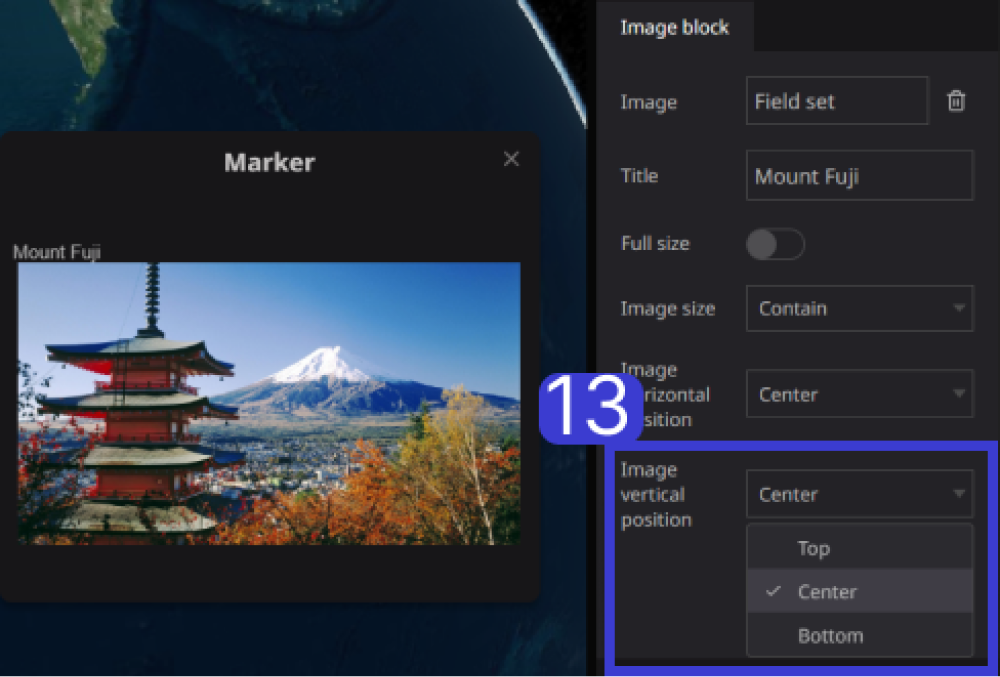
Step 13. The vertical position can be adjusted to top, center, or bottom of the image.