Creating a infobox for layer
Once you have placed a marker on the map, you want to present more information about that marker, and infobox this is just the tool that you need.
Creating infobox
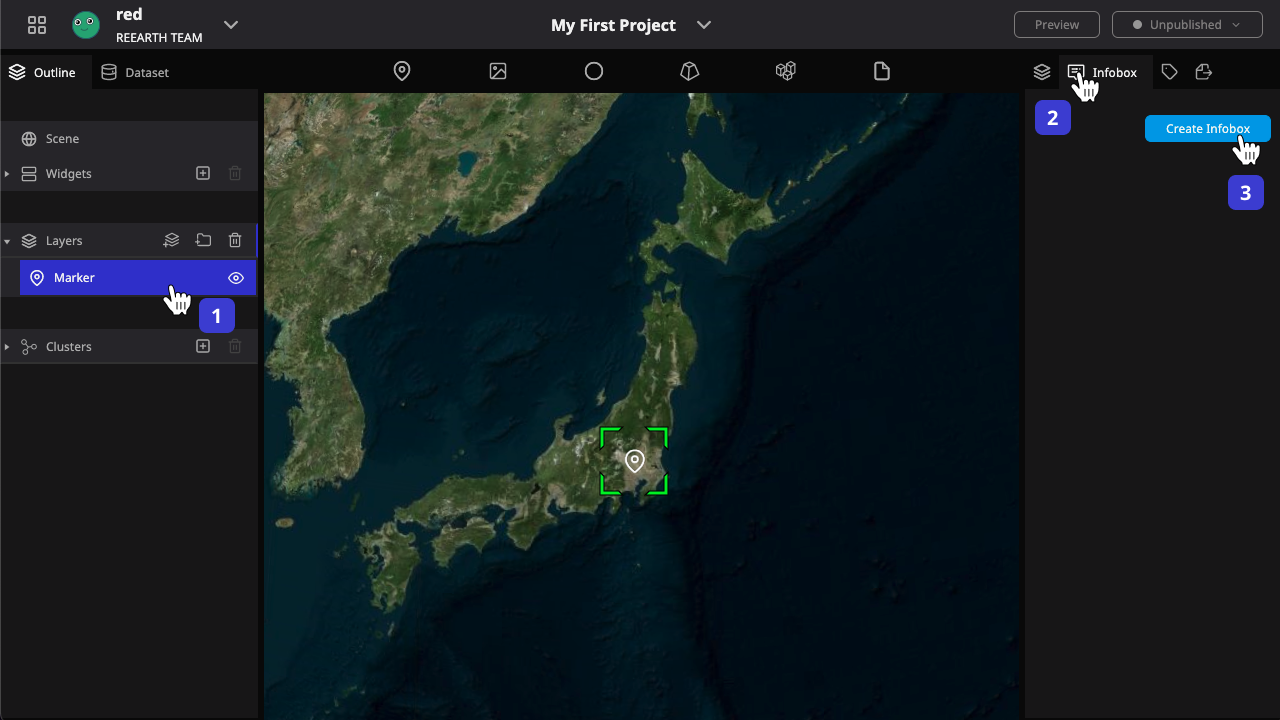
- Select layer
- Select the infobox tag
- Click on the create infobox button to create an infobox
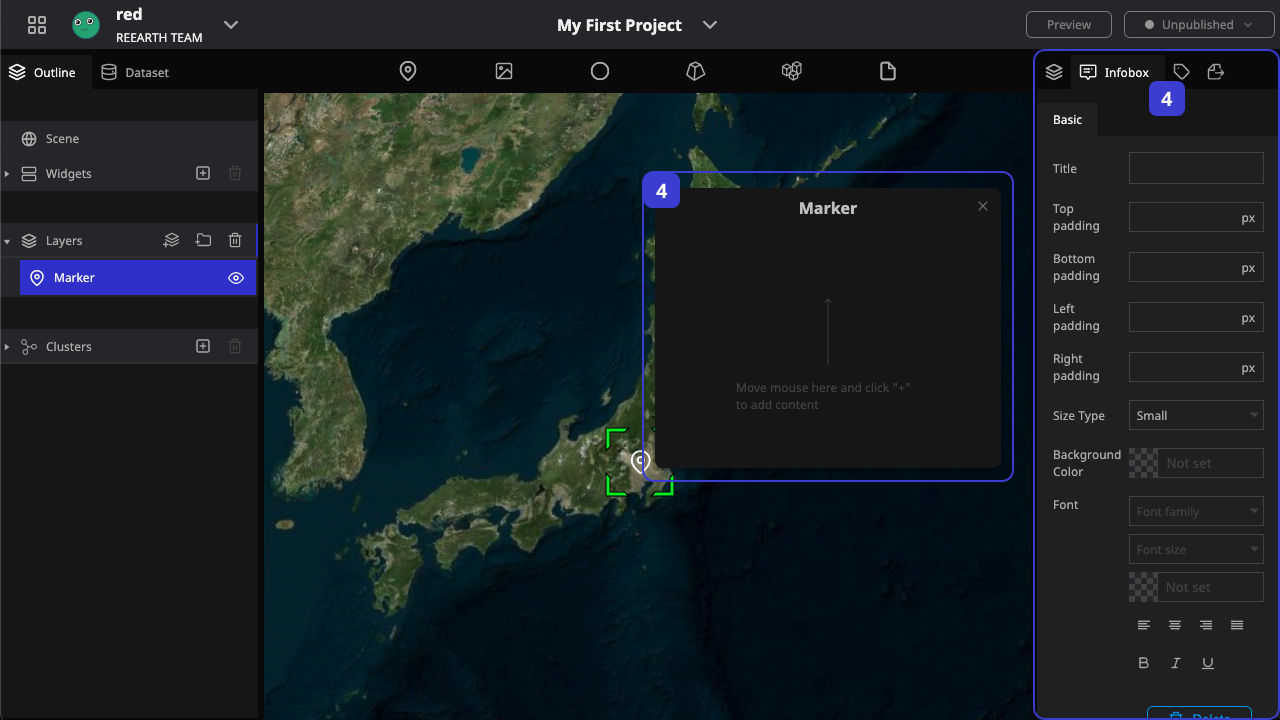
- The new infobox will appear on the screen, and some adjustable parameters about the infobox are provided on the right side
Try adjusting the different infobox parameters and see how it will react.
Adding block
Now we have an empty infobox, and when we want to add information to it, we need to create block. Here we will create a Text Block as an example.
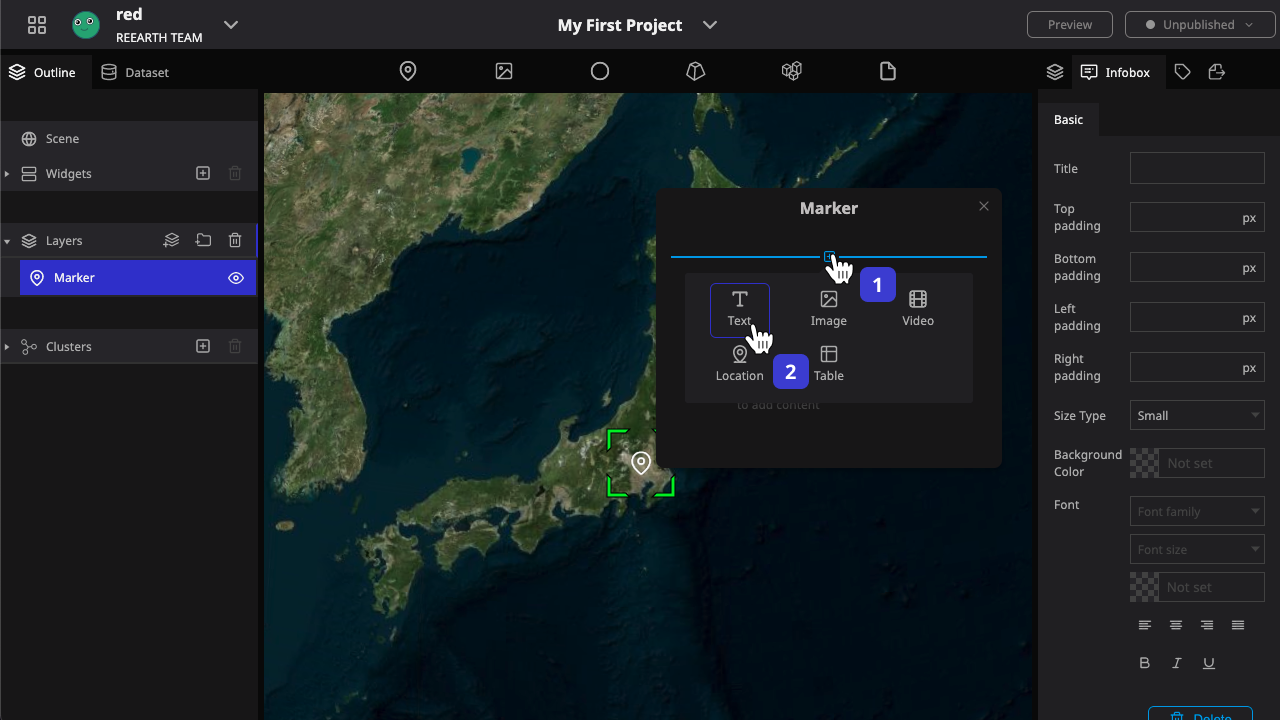
- Move your mouse to infobox, and the add button will be shown. Click the add button, the menu of block will be shown
- Select Text Block in the menu
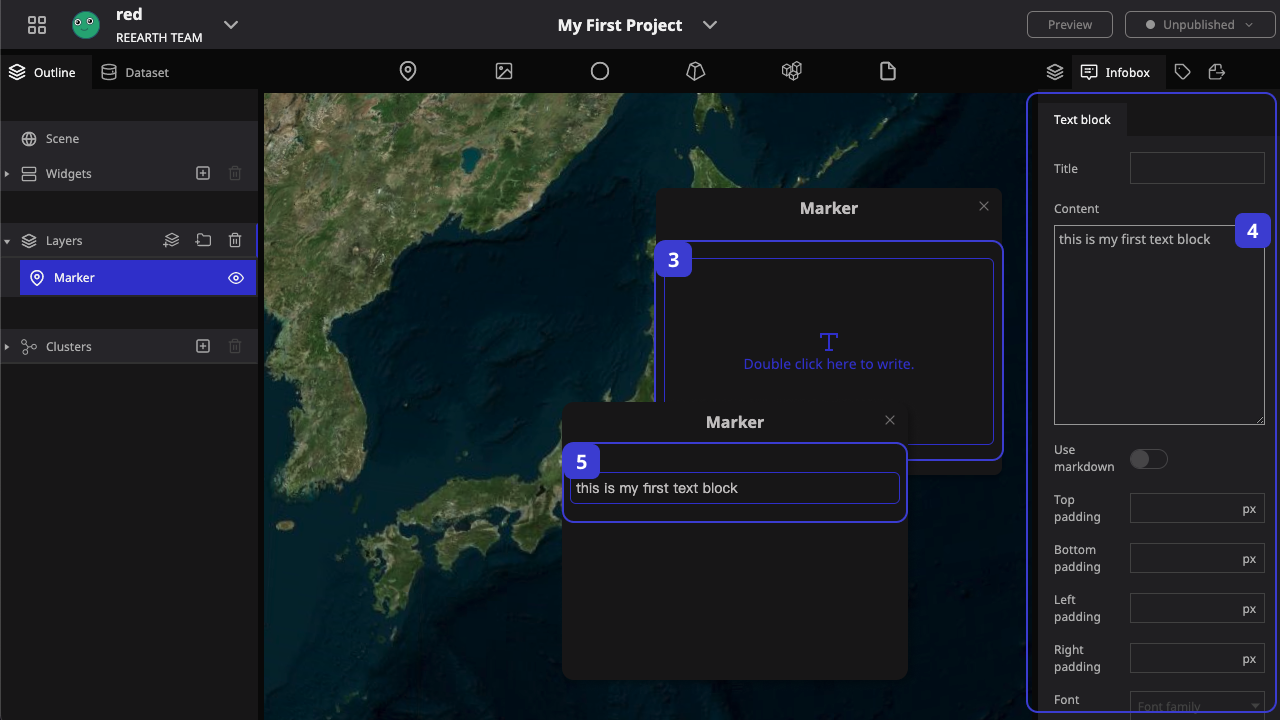
- You can see the new Text Block, select it
- The parameters on the right side will be changed accordingly to the adjustment parameters of the current block, here we add text content to this block
- After the input is complete, click on the blank space, you can see the content will be presented
Text Block has various other parameters, adjust them to see what changes will happen.
Also try other types of blocks to see what they do and what information they can add to the infobox.
In Re:Earth, we are adding information to different layers through infobox. See the section on infobox for more details on how to do this.