(
type: T,
callback: (...args: EventType[T]) => void
): void
```
#### パラメータ
[Section titled “パラメータ”](#パラメータ-1)
* **type**: 登録を解除するイベントタイプ
* **callback**: `on` で登録した関数
#### 使用例
[Section titled “使用例”](#使用例-1)
```javascript
// コールバック関数を定義する
const handleClose = () => {
console.log("Popup was closed");
};
// イベントリスナーを登録する
reearth.popup.on("close", handleClose);
// リスニングを停止する場合
reearth.popup.off("close", handleClose);
```
## イベントタイプ
[Section titled “イベントタイプ”](#イベントタイプ)
Re:Earth Visualizer の各コンポーネントには独自のイベントタイプがあります。特定のイベントの詳細については、各コンポーネントのドキュメントを参照してください。
# reearth.extension
> `reearth.extension` の API リファレンスです。
**`reearth.extension`** 名前空間は、アクティブなプラグイン拡張の機能とプロパティへのアクセスを提供します。ウィジェット、ブロック、または `reearth` 環境内の他の拡張インスタンスなど、異なるコンポーネント間の通信メソッドを含みます。
## プロパティ
[Section titled “プロパティ”](#プロパティ)
### block
[Section titled “block”](#block)
`block` プロパティは、プラグインのストーリーブロックまたはインフォボックスブロックへのアクセスを提供します。ブロックにはメタデータ、プラグインの詳細、プロパティが含まれ、インフォボックスブロックの場合は関連レイヤも含まれます。このプロパティは `reearth` 環境内のコンテンツブロックを操作する際に有用です。
注意
このプロパティは、`storyBlock` または `infoboxBlock` タイプの拡張内で実行された場合のみ利用可能です。
#### 構文
[Section titled “構文”](#構文)
```ts
reearth.extension.block?: PluginStoryBlock | (PluginInfoboxBlock & { layer?: Layer });
```
#### 戻り値
[Section titled “戻り値”](#戻り値)
**型** `PluginStoryBlock | (PluginInfoboxBlock & { layer?: Layer });`
メタデータ、プラグインの詳細、プロパティを含むプラグインブロックオブジェクトです。インフォボックスブロックの場合は、関連レイヤも含まれます。
**`PluginStoryBlock`**: プラグイン内でナラティブやシーケンスを作成するために特別に設計されたコンテンツブロックであるストーリーブロックを表します。
ノート
`PluginStoryBlock` に含まれるオプションの詳細については、[PluginStoryBlock](#pluginstoryblock) セクションを参照してください。
**`PluginInfoboxBlock`**: 関連レイヤを含む場合があるインフォボックスブロックを表します。
ノート
`PluginInfoboxBlock` に含まれるオプションの詳細については、[PluginInfoboxBlock](#plugininfoboxblock) セクションを参照してください。
**`layer?: Layer`**: インフォボックスブロックに関連付けられたレイヤを表します。メタデータ、データソースの詳細、表示設定を含みます。
ノート
`Layer` に含まれるオプションの詳細については、[Layer](#layer) セクションを参照してください。
#### 使用例
[Section titled “使用例”](#使用例)
```javascript
// 例 1: ストーリーブロックの詳細を取得する
const block = reearth.extension.block;
if (block && block.extensionType === "storyBlock") {
console.log("Story Block ID:", block.id);
console.log("Plugin ID:", block.pluginId);
console.log("Block Name:", block.name);
}
// 例 2: インフォボックスブロックに関連付けられたレイヤにアクセスする
const block = reearth.extension.block;
if (block && block.extensionType === "infoboxBlock" && block.layer) {
const layer = block.layer;
console.log(`Layer ID: ${layer.id}`);
console.log(`Layer Title: ${layer.title}`);
console.log(`Layer Type: ${layer.type}`);
}
```
### widget
[Section titled “widget”](#widget)
`widget` プロパティは、プラグインのウィジェットに関する情報(ID、レイアウト、表示設定など)へのアクセスを提供します。ウィジェットは `reearth` 環境内で動的に配置およびスタイル設定できる UI コンポーネントです。
注意
このプロパティは、`widget` タイプの拡張内で実行された場合のみ利用可能です。
#### 構文
[Section titled “構文”](#構文-1)
```ts
reearth.extension.widget?: Widget;
```
#### 戻り値
[Section titled “戻り値”](#戻り値-1)
**型** `Widget`
ノート
`Widget` の詳細については、[Widget](#widget-1) セクションを参照してください。
#### 使用例
[Section titled “使用例”](#使用例-1)
```javascript
// ウィジェットの詳細を確認してログ出力する
const widget = reearth.extension.widget;
if (widget) {
console.log("Widget ID:", widget.id);
console.log("Plugin ID:", widget.pluginId);
console.log("Extension ID:", widget.extensionId);
console.log("Property ID:", widget.propertyId);
console.log("Extended Horizontally:", widget.extended?.horizontally);
console.log("Extended Vertically:", widget.extended?.vertically);
}
```
### list
[Section titled “list”](#list)
このプロパティは、ウィジェット、ブロック、その他のサポートされているタイプを含む、すべてのプラグイン拡張インスタンスの配列へのアクセスを提供します。各インスタンスには、プラグインと拡張に関するメタデータが含まれます。
#### 構文
[Section titled “構文”](#構文-2)
```ts
reearth.extension.list: PluginExtensionInstance[];
```
#### 戻り値
[Section titled “戻り値”](#戻り値-2)
**型** `PluginExtensionInstance[];`
`list` 配列の各エントリは、プラグイン拡張のインスタンスを表します。
ノート
`PluginExtensionInstance` に含まれるオプションの詳細については、[PluginExtensionInstance](#pluginextensioninstance) セクションを参照してください。
#### 使用例
[Section titled “使用例”](#使用例-2)
```javascript
// 例 1: すべての拡張インスタンスとそのメタデータをログ出力する
const extensionInstances = reearth.extension.list;
extensionInstances.forEach((instance) => {
console.log("Extension Instance ID:", instance.id);
console.log("Plugin ID:", instance.pluginId);
console.log("Name:", instance.name);
console.log("Extension ID:", instance.extensionId);
console.log("Type:", instance.extensionType);
console.log("Run Times:", instance.runTimes ?? "Not Available");
});
// 例 2: ウィジェット拡張のみをフィルタリングしてログ出力する
const widgets = reearth.extension.list.filter(
(instance) => instance.extensionType === "widget"
);
console.log("Widget Extensions:");
widgets.forEach((widget) => {
console.log(`- ${widget.name} (ID: ${widget.id})`);
});
```
## メソッド
[Section titled “メソッド”](#メソッド)
### postMessage
[Section titled “postMessage”](#postmessage)
このメソッドにより、プラグイン拡張は一意の ID を指定して特定のウィジェット、ブロック、または他の拡張インスタンスにメッセージを送信できます。この機能はプラグイン内のコンポーネント間通信を実現するために有用です。
#### 構文
[Section titled “構文”](#構文-3)
```ts
reearth.extension.postMessage(id: string, message: any) => void;
```
#### パラメータ
[Section titled “パラメータ”](#パラメータ)
##### `id`
[Section titled “id”](#id)
**型**: `string`
メッセージの送信先となるターゲットインスタンスの拡張 ID です。
##### `message`
[Section titled “message”](#message)
**型**: `any`
送信するメッセージです。
#### 戻り値:
[Section titled “戻り値:”](#戻り値-3)
なし(void)。このメソッドは値を返さずに処理を実行します。
#### 使用例
[Section titled “使用例”](#使用例-3)
```javascript
// "my-widget-name" という名前のウィジェットにメッセージを送信する
const extensionInstances = reearth.extension.list;
const targetWidgetId = extensionInstances.find(
(extension) => extension.name === "my-widget-name"
)?.id;
if (targetWidgetId) {
reearth.extension.postMessage(targetWidgetId, {
action: "update",
data: { key: "value" },
});
}
```
## イベント
[Section titled “イベント”](#イベント)
ノート
共通のイベントメソッド(`on`、`off`)の詳細については、[イベント](/ja/developer/plugin/api-reference/events) ページを参照してください。
### message
[Section titled “message”](#message-1)
`message` イベントは、拡張に対してメッセージが送信されるたびにトリガーされます。このイベントは\*\*現在の拡張の UI(またはモーダル、ポップアップ)\*\*からのメッセージを受信するために使用されます。
#### 構文
[Section titled “構文”](#構文-4)
```ts
reearth.extension.on("message", (message: unknown) => void): void;
```
#### 使用例
[Section titled “使用例”](#使用例-4)
```javascript
reearth.extension.on("message", (message) => {
console.log("Received message:", message);
});
```
### extensionMessage
[Section titled “extensionMessage”](#extensionmessage)
`extensionMessage` イベントは、**別の拡張インスタンス**からメッセージが送信されたときにトリガーされます。データペイロードと送信者の ID を含む追加のコンテキストを提供します。
#### 構文
[Section titled “構文”](#構文-5)
```ts
reearth.extension.on("extensionMessage", (props: ExtensionMessage) => void): void;
```
#### 使用例
[Section titled “使用例”](#使用例-5)
```javascript
reearth.extension.on("extensionMessage", (props) => {
console.log("Message from:", props.sender);
console.log("Message data:", props.data);
});
```
## 型定義
[Section titled “型定義”](#型定義)
### PluginStoryBlock
[Section titled “PluginStoryBlock”](#pluginstoryblock)
```javascript
type PluginStoryBlock = Omit<
StoryBlock,
"propertyForPluginAPI" | "propertyItemsForPluginBlock"
>;
type StoryBlock = {
id: string;
name?: string | null;
pluginId: string;
extensionId: string;
extensionType?: "storyBlock";
propertyId?: string;
property?: any;
propertyForPluginAPI?: any;
propertyItemsForPluginBlock?: Item[];
};
```
**`id: string;`**: ストーリーブロックの一意の識別子です。複数のブロックを扱う際に各ブロックを区別するために必要です。
**`name?: string | null;`**: ストーリーブロックの名前です。省略可能で、指定されない場合は `null` になることがあります。
**`pluginId: string;`**: このストーリーブロックが属するプラグインの一意の ID です。ブロックを親プラグインに関連付けるために使用します。
**`extensionId: string;`**: このブロックを作成したプラグイン拡張の一意の ID です。プラグイン内でブロックのソースを追跡するために有用です。
**`extensionType?: "storyBlock";`**: 拡張のタイプを `"storyBlock"` として指定します。このプロパティにより、`infoboxBlock` などの他のブロックタイプと区別できます。
**`propertyId?: string;`**: ブロックの設定や他の場所に保存されたメタデータにリンクする省略可能なプロパティ ID です。
**`property?: any;`**: ブロックに関連付けられたカスタムプロパティです。
### PluginInfoboxBlock
[Section titled “PluginInfoboxBlock”](#plugininfoboxblock)
```javascript
type PluginInfoboxBlock = Omit<
InfoboxBlock,
"propertyForPluginAPI" | "propertyItemsForPluginBlock"
>;
type InfoboxBlock = {
id: string;
name?: string;
pluginId?: string;
extensionId?: string;
extensionType?: "infoboxBlock";
propertyId?: string;
property?: P;
propertyForPluginAPI?: any;
propertyItemsForPluginBlock?: Item[];
};
```
**`id: string;`**: インフォボックスブロックの一意の識別子です。各ブロックを容易に識別できるようにします。
**`name?: string;`**: インフォボックスブロックの省略可能な名前です。インフォボックスのラベルやタイトルを表すことがあります。
**`pluginId?: string;`**: このインフォボックスブロックが属するプラグインの一意の ID です。省略可能で、常に存在するとは限りません。
**`extensionId: string;`**: このインフォボックスブロックを作成したプラグイン拡張の一意の ID です。その出所を識別するために使用します。
**`extensionType?: "infoboxBlock";`**: 拡張のタイプを `"infoboxBlock"` として指定します。処理するブロックのタイプを判別するために重要なプロパティです。
**`propertyId?: string;`**: ブロックの設定やメタデータにリンクする省略可能なプロパティ ID です。`PluginStoryBlock` と同様に、動的なプロパティ管理を可能にします。
**`property?: P;`**: ブロックに関連付けられたカスタムプロパティを表します。型はジェネリックパラメータ `P` によって決定され、プラグインの特定のニーズに合わせて動的に適応できます。
### Layer
[Section titled “Layer”](#layer)
```javascript
type Layer = {
id: string; // A unique identifier for the layer.
title?: string;
visible?: boolean; // Flag indicating whether the layer is visible by default. Default is true
infobox?: Infobox; // An infobox that can display additional interactive or informational content
type: "simple";
data?: {
type:
| "geojson"
| "3dtiles"
| "osm-buildings"
| "google-photorealistic"
| "czml"
| "csv"
| "wms"
| "mvt"
| "kml"
| "gpx"
| "shapefile"
| "gtfs"
| "gml"
| "georss"
| "gltf"
| "tiles"
| "tms"
| "heatMap";
url?: string; // URL of data source
value?: any;
layers?: string | string[];
jsonProperties?: string[];
isSketchLayer?: boolean;
updateInterval?: number; // milliseconds
parameters?: Record;
idProperty?: string;
time?: {
property?: string;
interval?: number; // milliseconds
updateClockOnLoad?: boolean;
};
csv?: {
idColumn?: string | number;
latColumn?: string | number;
lngColumn?: string | number;
heightColumn?: string | number;
noHeader?: boolean;
disableTypeConversion?: boolean;
};
geojson?: {
useAsResource?: boolean;
};
};
properties?: any;
defines?: Record;
events?: Events;
layerStyleId?: string;
marker?: MarkerAppearance;
polyline?: PolylineAppearance;
polygon?: PolygonAppearance;
model?: ModelAppearance;
"3dtiles"?: Cesium3DTilesAppearance;
};
```
### Widget
[Section titled “Widget”](#widget-1)
```javascript
type Widget = {
readonly id: string;
readonly pluginId?: string;
readonly extensionId?: string;
readonly property?: unknown;
readonly propertyId?: string;
readonly extended?: {
horizontally: boolean;
vertically: boolean;
};
readonly layout?: WidgetLayout;
};
```
**`id: string;`**: ウィジェットの一意の識別子です。
**`pluginId?: string;`**:(省略可能)このウィジェットを所有するプラグインの ID です。ウィジェットがどのプラグインに属するかを識別するために有用です。
**`extensionId?: string;`**:(省略可能)ウィジェットを作成したプラグイン拡張の ID です。同じプラグインの異なる拡張によって作成されたウィジェットを区別するために使用できます。
**`property?: unknown;`**:(省略可能)ウィジェットに関連付けられたカスタムプロパティです。プロパティの正確な構造は、特定のプラグインの実装に依存します。
**`propertyId?: string;`**:(省略可能)ウィジェットの設定またはメタデータの一意の識別子です。外部設定や保存されたプロパティへのリンクに使用します。
**`extended?: { horizontally: boolean; vertically: boolean };`**:(省略可能)ウィジェットが特定の方向に拡張されているかどうかを示します。このプロパティはウィジェットのレイアウトと動作を判断するために有用です。
* `horizontally: boolean`: ウィジェットが水平方向に拡張されている場合は `true`、そうでない場合は `false`。
* `vertically: boolean`: ウィジェットが垂直方向に拡張されている場合は `true`、そうでない場合は `false`。
このプロパティは省略可能で、常に存在するとは限りません。省略された場合、ウィジェットはいずれの方向にも拡張されません。
**`layout?: WidgetLayout;`**:(省略可能)Reearth UI 内でのウィジェットの位置と配置を指定します。以下の [WidgetLayout](#widgetlayout) の定義を参照してください。
### WidgetLayout
[Section titled “WidgetLayout”](#widgetlayout)
```javascript
type WidgetLayout = {
location: WidgetLocation;
align?: WidgetAlignment;
};
```
`WidgetLayout` 型は、Reearth インターフェース内でウィジェットがどのように配置されるかを定義します。
**`location: WidgetLocation;`**: インターフェース内でのウィジェットの正確な位置を指定します。詳細については [WidgetLocation](#widgetlocation) を参照してください。
**`align?: WidgetAlignment;`**:(省略可能)ウィジェットのエリア内での配置方法を決定します。指定しない場合はデフォルトの配置になります。詳細については [WidgetAlignment](#widgetalignment) を参照してください。
### WidgetLocation
[Section titled “WidgetLocation”](#widgetlocation)
```javascript
type WidgetLocation = {
zone: "inner" | "outer";
section: "left" | "center" | "right";
area: "top" | "middle" | "bottom";
};
```
`WidgetLocation` 型は、`reearth` インターフェース内でのウィジェットの階層的な位置を定義します。UI ゾーンに対するウィジェットの配置位置を記述します。
**`zone: "inner" | "outer";`**: ウィジェットが配置される UI ゾーンを指定します:
* `"inner"`: ウィジェットがメインコンテンツエリア内にあることを示します。
* `"outer"`: ウィジェットが周辺 UI(例: サイドバー、ヘッダー)にあることを示します。
**`section: "left" | "center" | "right";`**: ゾーン内のセクションを示します:
* `"left"`: 左セクション。
* `"center"`: 中央セクション。
* `"right"`: 右セクション。
**`area: "top" | "middle" | "bottom";`**: セクション内の垂直エリアを定義します:
* `"top"`: セクションの上部。
* `"middle"`: セクションの中央。
* `"bottom"`: セクションの下部。
### WidgetAlignment
[Section titled “WidgetAlignment”](#widgetalignment)
```javascript
type WidgetAlignment = "start" | "centered" | "end";
```
`WidgetAlignment` 型は、ウィジェットがそのエリア内でどのように整列されるかを指定します。
**`"start";`**: ウィジェットをエリアの先頭(例: 左上隅)に整列させます。
**`"centered";`**: ウィジェットをエリアの中央に配置します。
**`"end";`**: ウィジェットをエリアの末尾(例: 右下隅)に整列させます。
### PluginExtensionInstance
[Section titled “PluginExtensionInstance”](#pluginextensioninstance)
```javascript
type PluginExtensionInstance = {
readonly id: string;
readonly pluginId: string;
readonly name: string;
readonly extensionId: string;
readonly extensionType: "widget" | "block" | "infoboxBlock" | "storyBlock";
};
```
**`id: string;`**: 拡張インスタンスの一意の識別子です。この ID は `reearth` 環境内でインスタンスを参照するために使用されます。
**`pluginId: string;`**: 拡張インスタンスが属するプラグインの一意の ID です。インスタンスを親プラグインにリンクします。
**`name: string;`**: 拡張インスタンスの名前です。通常、インスタンスを識別するための人が読める名前です。
**`extensionId: string;`**: インスタンスを作成したプラグイン拡張の一意の ID です。同じプラグイン内の拡張を区別するために使用します。
**`extensionType: "widget" | "block" | "infoboxBlock" | "storyBlock";`**: インスタンスが表す拡張のタイプです。指定可能な値は以下の通りです:
* `"widget"`: ウィジェット拡張。
* `"infoboxBlock"`: インフォボックスブロック拡張。
* `"storyBlock"`: ストーリーブロック拡張。
# reearth.layers
> `reearth.layers` の API リファレンスです。
**`reearth.layers`** 名前空間は、reearth シーン内のレイヤを管理・操作するためのメソッド群を提供します。プラグイン開発者はこれらのメソッドを使用して、レイヤのプログラム的な追加・検索・変更・削除を行うことができます。
## プロパティ
[Section titled “プロパティ”](#プロパティ)
### layers
[Section titled “layers”](#layers)
このプロパティは、**`reearth`** シーンに現在存在するすべてのレイヤのリストを提供します。プラグイン開発者はこれを使用して、必要に応じてレイヤへのアクセスや操作を行うことができます。このプロパティは **`LazyLayer`** オブジェクトの配列を返し、各オブジェクトはシーン内の個別のレイヤを表します。
#### 構文
[Section titled “構文”](#構文)
```ts
reearth.layers.layers: LazyLayer[];
```
#### 戻り値
[Section titled “戻り値”](#戻り値)
**Type** `LazyLayer[]`
各要素がシーン内の個別のレイヤを表す **`LazyLayer`** オブジェクトの配列です。
ノート
**`LazyLayer`** オブジェクトはレイヤの軽量な表現形式です。プロパティへのアクセスは必要に応じて明示的に行う必要があります。 LazyLayer 型の詳細については、[LazyLayer 型](#lazylayer-%E5%9E%8B) セクションを参照してください。
### overridden
[Section titled “overridden”](#overridden)
これは省略可能なプロパティで、`reearth` シーン内でプロパティがオーバーライドされたレイヤを提供します。このメソッドを使用することで、レイヤのオーバーライド状態を確認できます。ユーザー操作、アプリケーション状態の変化、または外部データの更新に応じてレイヤプロパティを調整する必要がある場合に特に有用です。
#### 構文
[Section titled “構文”](#構文-1)
```ts
reearth.layers.overridden: OverriddenLayer[];
```
#### 戻り値
[Section titled “戻り値”](#戻り値-1)
**Type** `Omit`
`Layer` 型定義から `type` と `children` を除いた型です。
#### 使用例
[Section titled “使用例”](#使用例)
```javascript
// Check if there are any overridden properties defined
if (reearth.layers.overridden) {
console.log("Overridden properties are defined.");
// Iterate through the overridden properties and log each one
for (const layer of reearth.layers.overridden) {
console.log(`Layer ID: ${layer.id}, Overridden Properties:`, layer);
}
} else {
console.log("No overridden properties are defined.");
}
```
### selected
[Section titled “selected”](#selected)
これは `reearth` プロジェクト内で現在選択されているレイヤを表します。レイヤが選択されている場合は `ComputedLayer` オブジェクトを保持し、選択されていない場合は `undefined` となる省略可能なプロパティです。このプロパティを使用することで、選択中のレイヤの詳細に直接アクセスでき、特定のレイヤデータの照会、プロパティの変更、または UI コンポーネントへの追加情報の表示など、ユーザーの選択に依存した操作を容易に行うことができます。
#### 構文
[Section titled “構文”](#構文-2)
```ts
reearth.layers.selected?: computedLayer;
```
#### 戻り値
[Section titled “戻り値”](#戻り値-2)
**Type** `ComputedLayer`
すべての処理が完了した後に得られるレイヤで、元の地理データと処理済みの地理データの両方、および適用・評価済みのスタイルと状態を含みます。
ノート
**`ComputedLayer`** オブジェクトはレイヤの軽量な表現形式です。プロパティへのアクセスは必要に応じて明示的に行う必要があります。 ComputedLayer 型の詳細については、[ComputedLayer 型](#computedlayer-%E5%9E%8B) セクションを参照してください。
#### 使用例
[Section titled “使用例”](#使用例-1)
```javascript
// Check if there is a selected layer and log its details
if (reearth.layers.selected) {
console.log("Selected Layer ID:", reearth.layers.selected.id);
console.log("Selected Layer Title:", reearth.layers.selected.layer?.title);
} else {
console.log("No layer is currently selected.");
}
```
### selectedFeature
[Section titled “selectedFeature”](#selectedfeature)
これは `reearth` プロジェクト内で現在選択されているフィーチャーを表します。フィーチャーが選択されている場合は `feature` オブジェクトを保持し、選択されていない場合は `undefined` となる省略可能なプロパティです。このプロパティを使用することで、選択中のフィーチャーの詳細に直接アクセスでき、特定のフィーチャーデータの照会やプラグイン拡張への追加情報の表示など、ユーザーの選択に依存した操作を容易に行うことができます。
#### 構文
[Section titled “構文”](#構文-3)
```ts
reearth.layers.selectedFeature?: computedFeature;
```
#### 戻り値
[Section titled “戻り値”](#戻り値-3)
**Type** `ComputedFeature`
すべての最終評価済みプロパティとスタイルが適用された、単一の地理的フィーチャー(点、線、ポリゴン等)です。
ノート
ComputedFeature 型の詳細については、[ComputedFeature 型](#computedfeature-%E5%9E%8B) セクションを参照してください。
#### 使用例
[Section titled “使用例”](#使用例-2)
```javascript
// Check if there is a selected feature and log its details
if (reearth.layers.selectedFeature) {
console.log("Selected Feature ID:", reearth.layers.selectedFeature.id);
} else {
console.log("No Feature is currently selected.");
}
```
## メソッド
[Section titled “メソッド”](#メソッド)
### add
[Section titled “add”](#add)
このメソッドは、**`reearth`** シーンに新しいレイヤを追加するために使用します。画像、データ表現、インタラクティブウィジェットなどの追加コンテンツレイヤでシーンを動的に拡張するために欠かせないメソッドです。主な引数として **`Layer`** オブジェクトを受け取り、追加するレイヤの特性とプロパティを定義します。
#### 構文
[Section titled “構文”](#構文-4)
```ts
reearth.layers.add: (layer: Layer) => string | undefined;
```
#### パラメータ
[Section titled “パラメータ”](#パラメータ)
##### `layer`
[Section titled “layer”](#layer)
**Type**: `Layer`
レイヤの作成と管理に必要なすべてのデータとメタデータを含むオブジェクトです。シーンに追加するレイヤの特性とプロパティを定義します。
ノート
Layer 型およびレイヤアピアランス型の詳細については、[Layer 型](#layer-%E5%9E%8B) および [レイヤアピアランス型](#%E3%83%AC%E3%82%A4%E3%83%A4%E3%82%A2%E3%83%94%E3%82%A2%E3%83%A9%E3%83%B3%E3%82%B9%E5%9E%8B) セクションを参照してください。
#### 戻り値
[Section titled “戻り値”](#戻り値-4)
**Type** `string | undefined`
操作が成功した場合、新しく追加されたレイヤの一意の識別子 `id` を返します。この識別子は以降の操作や照会に使用できます。操作が失敗した場合は `undefined` を返します。
#### 使用例
[Section titled “使用例”](#使用例-3)
* マーカーの追加
```javascript
const newLayerId = reearth.layers.add({
type: "simple",
data: {
type: "geojson",
value: {
type: "FeatureCollection",
features: [
{
type: "Feature",
properties: {},
geometry: {
coordinates: [139.97422779688281, 35.74642872517698],
type: "Point",
},
},
],
},
},
// marker property is required to indicate that the layer needs a marker appearance
marker: {},
});
if (newLayerId) {
console.log("Layer added successfully with ID:", newLayerId);
} else {
console.log("Failed to add layer.");
}
```
* ポリラインの追加
```javascript
const newLayerId = reearth.layers.add({
type: "simple",
data: {
type: "geojson",
value: {
type: "FeatureCollection",
features: [
{
type: "Feature",
properties: {},
geometry: {
coordinates: [
[139.93007825346956, 35.81332779614391],
[139.8105822019014, 35.730789521095986],
],
type: "LineString",
},
},
],
},
},
// polyline property is required to indicate that the layer needs a polyline appearance
polyline: {},
});
if (newLayerId) {
console.log("Layer added successfully with ID:", newLayerId);
} else {
console.log("Failed to add layer.");
}
```
* ポリゴンの追加
```javascript
const newLayerId = reearth.layers.add({
type: "simple",
data: {
type: "geojson",
value: {
type: "FeatureCollection",
features: [
{
type: "Feature",
properties: {},
geometry: {
coordinates: [
[
[139.56560369329821, 35.859787461762906],
[139.56560369329821, 35.586320662892106],
[139.73648312259508, 35.586320662892106],
[139.73648312259508, 35.859787461762906],
[139.56560369329821, 35.859787461762906],
],
],
type: "Polygon",
},
},
],
},
},
// polygon property is required to indicate that the layer needs a polygon appearance
polygon: {},
});
if (newLayerId) {
console.log("Layer added successfully with ID:", newLayerId);
} else {
console.log("Failed to add layer.");
}
```
* 3D モデルの追加
```javascript
const model3D = {
type: "simple",
data: {
type: "geojson",
value: {
type: "Feature",
geometry: {
type: "Point",
coordinates: [139.6917, 35.6895],
},
},
},
model: {
url: "https://api.visualizer.test.reearth.dev/assets/01j90myth0wy2kq5agry8rh4fd.gltf", // 'Re:Earth' logo from asset
heightReference: "relative",
heading: 270,
pitch: 0,
roll: 0,
scale: 100,
silhouette: true,
silhouetteColor: "red",
},
};
reearth.layers.add(model3D);
```
* 3dtiles の追加
```javascript
// Define a 3D tile. This is a 3D tile of Chiyoda yard building in Tokyo. The co-ordinates are Latitude: 35.69393005 Longitude: 139.75371138.
const tile3d = {
type: "simple",
data: {
type: "3dtiles",
url: "https://plateau.geospatial.jp/main/data/3d-tiles/bldg/13100_tokyo/13101_chiyoda-ku/notexture/tileset.json",
},
"3dtiles": {
show: true,
color: {
expression: {
conditions: [
["${_zmax} > 100", "color('red')"],
["true", "color('green')"],
],
},
},
edgeWidth: 10,
edgeColor: "#ffffff",
selectedFeatureColor: "blue",
},
};
reearth.layers.add(tile3d);
```
### find
[Section titled “find”](#find)
このメソッドは、カスタム検索関数を適用して Reearth シーン内のレイヤを効率的に検索します。特定の属性、プロパティ、または条件など、動的に定義された基準を満たすレイヤを特定する際に有用です。各レイヤを評価するコールバック関数を受け取り、指定された条件を満たすレイヤに対して `true` を返します。これにより、シーンの特定部分を対象とした精密な操作や分析が可能となり、レイヤ管理の柔軟性と制御性が向上します。
#### 構文
[Section titled “構文”](#構文-5)
```ts
reearth.layers.find: (
fn: (layer: LazyLayer, index: number) => boolean,
) => LazyLayer | undefined
```
#### パラメータ
[Section titled “パラメータ”](#パラメータ-1)
##### `fn`
[Section titled “fn”](#fn)
**Type**: `(layer: LazyLayer, index: number) => boolean`
シーン内の各レイヤを評価するためのコールバック関数です。この関数は以下の引数を受け取ります。
* **`layer: LazyLayer`**: レイヤのすべてのデータを含むオブジェクト。
* **`index: number`**: 現在のレイヤのインデックス。
#### 戻り値
[Section titled “戻り値”](#戻り値-5)
**Type** `LazyLayer | undefined`
指定されたテスト関数を満たす最初の **`LazyLayer`** オブジェクトを返します。条件を満たすレイヤが存在しない場合は **`undefined`** を返します。
#### 使用例
[Section titled “使用例”](#使用例-4)
```javascript
//1. Define a search function to find the first visible layer
const searchFunction = (layer, index) => {
return layer.isVisible === true;
};
// Use the find method to locate the first visible layer
const foundLayer = reearth.layers.find(searchFunction);
// Log the result or handle the case where no layer is found
if (foundLayer) {
console.log(`Found visible layer with ID: ${foundLayer.id}`);
} else {
console.log("No visible layer found.");
}
//2. Search for the first layer that is a 3D Tiles with the title "Re:Earth" and assign it to a variable.
reearth.layers.find(
(layer) => layer.data.type === "3dtiles" && layer.title === "Re:Earth"
);
```
### findAll
[Section titled “findAll”](#findall)
このメソッドは、プロジェクト内のすべてのレイヤを対象に包括的な検索を実行し、指定された条件に一致するレイヤの配列を返します。プロジェクト内の各レイヤに適用するコールバック関数を受け取ります。
#### 構文
[Section titled “構文”](#構文-6)
```ts
reearth.layers.findAll: (layer: LazyLayer, index: number) => boolean) => LazyLayer[]
```
#### パラメータ
[Section titled “パラメータ”](#パラメータ-2)
##### `layer`
[Section titled “layer”](#layer-1)
**Type** `LazyLayer`
レイヤの作成と管理に必要なすべてのデータとメタデータを含むオブジェクトです。
##### `index`
[Section titled “index”](#index)
**Type** `number`
階層内における現在のレイヤのインデックスです。
#### 戻り値
[Section titled “戻り値”](#戻り値-6)
**Type** `LazyLayer[]`
コールバック関数で指定された条件を満たす `LazyLayer` オブジェクトの配列を返します。条件を満たすレイヤが存在しない場合は空の配列を返します。
#### 使用例
[Section titled “使用例”](#使用例-5)
```javascript
//1. Define a search function to find all layers with a specific visibility setting
const searchVisibleLayers = (layer) => layer.isVisible;
// Use the findAll method to get all visible layers
const visibleLayers = reearth.layers.findAll(searchVisibleLayers);
// Output the IDs of the found layers
console.log(
"Visible layers found:",
visibleLayers.map((layer) => layer.id)
);
//2. Filter out layers where the type is "GeoJSON" and the title is exactly "sample".
let filteredLayers = reearth.layers.findAll(
(layer) => layer.data.type === "geojson" && layer.title === "sample"
);
// Log the array of filtered layers to the console. This array contains all layers that meet the specified conditions.
console.log("filteredLayers: ", filteredLayers);
```
### findById
[Section titled “findById”](#findbyid)
このメソッドは、一意の識別子(ID)に基づいて特定のレイヤオブジェクトを取得するために設計されています。ID が既知のレイヤに直接アクセスする際に欠かせないメソッドで、プロパティの編集、表示のオン/オフ切り替え、またはレイヤ固有データの分析などを効率的かつ精密に行うことができます。レイヤ階層全体を検索・反復する必要なく、個別のレイヤへの直接アクセスを可能にします。検索対象のレイヤ ID を表す単一の文字列パラメータを受け取ります。
#### 構文
[Section titled “構文”](#構文-7)
```ts
reearth.layers.findById: (layerId: string) => LazyLayer | undefined;
```
#### パラメータ
[Section titled “パラメータ”](#パラメータ-3)
##### `layerId`
[Section titled “layerId”](#layerid)
**Type** `string`
シーン内で検索対象となるレイヤの一意の識別子です。
#### 戻り値
[Section titled “戻り値”](#戻り値-7)
**Type** `LazyLayer | undefined`
指定された ID を持つレイヤが見つかった場合、その `LazyLayer` オブジェクトを返します。一致するレイヤが存在しない場合は `undefined` を返します。
#### 使用例
[Section titled “使用例”](#使用例-6)
```javascript
// Define the layer ID you are searching for
const targetLayerId = "01j1rx8xhxsk2wdydew3m8hr6q";
// Attempt to find the layer by its ID
const layer = reearth.layers.findById(targetLayerId);
// Check if the layer was found and log the result or handle it accordingly
if (layer) {
console.log(`Layer found: ${layer.title}`);
} else {
console.log("No layer found with the specified ID:", targetLayerId);
}
```
### findByIds
[Section titled “findByIds”](#findbyids)
このメソッドは、レイヤ ID の配列に基づいて `reearth` シーンから複数のレイヤを同時に取得します。プロパティの一括更新、エフェクトの適用、グループ表示の管理など、複数の特定レイヤを同時に操作する必要があるアプリケーションに特に有用です。文字列引数のスプレッドを受け取り(各引数がレイヤ ID を表します)、各要素が `Layer` オブジェクトまたは `undefined` に対応する配列を返します。
#### 構文
[Section titled “構文”](#構文-8)
```ts
reearth.layers.findByIds: (...layerIds: string[]) => (LazyLayer | undefined)[];
```
#### パラメータ
[Section titled “パラメータ”](#パラメータ-4)
##### `...layerIds`
[Section titled “...layerIds”](#layerids)
**Type** `...string[]`
取得するレイヤの一意の識別子を表すレイヤ ID の配列です。1つまたは複数の ID を柔軟に入力できます。
使用時は配列を複数の引数としてスプレッドする必要があります。
#### 戻り値
[Section titled “戻り値”](#戻り値-8)
**Type** `(LazyLayer | undefined)[]`
各入力 ID に対応する `LazyLayer` オブジェクトまたは `undefined` を含む配列を返します。シーン内に ID に対応するレイヤが存在するかどうかに応じて値が決まります。返される配列の各位置は入力リストの ID の位置に直接対応しており、順序の一貫性が保たれます。指定した ID を持つレイヤが存在しない場合、その位置に `undefined` が返されます。
#### 使用例
[Section titled “使用例”](#使用例-7)
```javascript
// Define an array of layer IDs to be searched
const layerIds = ["01j1rx8xhxsk2wdydew3m8hr6q", "01j90ed9m6bxagb6bvfg4sk49q"];
// Retrieve the layers by their IDs
const layers = reearth.layers.findByIds(...layerIds);
// Process the results, handling both found and not found cases
layers?.forEach((layer, index) => {
if (layer) {
console.log(`Layer found: ID = ${layer.id}, Title = ${layer.title}`);
} else {
console.log(`No layer found for ID: ${layerIds[index]}`);
}
});
```
### findFeatureById
[Section titled “findFeatureById”](#findfeaturebyid)
このメソッドは、フィーチャー ID に関連するフィーチャーを取得する手段を提供します。レイヤ ID とフィーチャー ID を受け取り、指定されたレイヤ ID とフィーチャー ID に一致する `Feature` オブジェクトを返します。
#### 構文
[Section titled “構文”](#構文-9)
```ts
reearth.layers.findFeatureById: (layerId: string, featureId: string) => Feature | undefined;
```
#### パラメータ
[Section titled “パラメータ”](#パラメータ-5)
##### `layerId`
[Section titled “layerId”](#layerid-1)
**Type** `string`
シーン内で検索対象となるレイヤの一意の識別子です。
##### `featureId`
[Section titled “featureId”](#featureid)
**Type** `string`
レイヤ内のフィーチャーの一意の識別子です。
#### 戻り値
[Section titled “戻り値”](#戻り値-9)
**Type** `Feature | undefined`
指定されたレイヤ内で指定された ID を持つフィーチャーが見つかった場合、その `Feature` オブジェクトを返します。一致するフィーチャーが存在しない場合は `undefined` を返します。
ノート
Feature 型の詳細については、[Feature 型](#feature-%E5%9E%8B) セクションを参照してください。
#### 使用例
[Section titled “使用例”](#使用例-8)
```javascript
// Define the layer ID and feature ID you are searching for
const targetLayerId = "01j90ed9m6bxagb6bvfg4sk49q";
const targetFeatureId = "6167fcb5-9564-4c8e-a4d3-d0b419f54ec6";
// Attempt to find the layer by its ID
const feature = reearth.layers.findFeatureById(targetLayerId, targetFeatureId);
// Check if the feature was found and log the result or handle it accordingly
if (feature) {
console.log(`feature found: ${feature.type}`);
} else {
console.log("No feature found with the specified ID:", targetFeatureId);
}
```
### findFeaturesByIds
[Section titled “findFeaturesByIds”](#findfeaturesbyids)
このメソッドは、1つ以上の指定されたフィーチャー ID でラベル付けされたすべてのフィーチャーを取得するために設計されています。単一のレイヤ ID と複数のフィーチャー ID を受け取り、指定されたレイヤ ID とフィーチャー ID に一致する `Feature` オブジェクトの配列を返します。
#### 構文
[Section titled “構文”](#構文-10)
```ts
reearth.layers.findFeaturesByIds: (layerId: string, featureId: string[]) => Feature[] | undefined;
```
#### パラメータ
[Section titled “パラメータ”](#パラメータ-6)
##### `layerId`
[Section titled “layerId”](#layerid-2)
**Type** `string`
シーン内で検索対象となるレイヤの一意の識別子です。
##### `featureId`
[Section titled “featureId”](#featureid-1)
**Type** `string[]`
レイヤ内のフィーチャーの一意の識別子です。1つまたは複数の ID を柔軟に入力できます。
#### 戻り値
[Section titled “戻り値”](#戻り値-10)
**Type** `(Feature[] | underined)`
指定されたレイヤ内で見つかったフィーチャー ID を持つ `Feature` オブジェクトの配列を返します。一致するフィーチャーが存在しない場合は `undefined` を返します。
#### 使用例
[Section titled “使用例”](#使用例-9)
```javascript
// Define an array of layer IDs to be searched
const layerId = "01j90ed9m6bxagb6bvfg4sk49q";
const featureIds = [
"6167fcb5-9564-4c8e-a4d3-d0b419f54ec6",
"abae3164-f8b3-42bb-b194-0379ecc4c653",
];
// Retrieve the layers by their IDs
const features = reearth.layers.findFeaturesByIds(layerId, featureIds);
// Process the results, handling both found and not found cases
features.forEach((feature, index) => {
if (feature) {
console.log(`Feature found: ID = ${feature.id}, Type = ${feature.type}`);
} else {
console.log(`No Feature found for ID: ${feature[index]}`);
}
});
```
### hide
[Section titled “hide”](#hide)
このメソッドは、提供されたレイヤ ID の配列に基づいて1つ以上のレイヤを非表示にするために設計されています。文字列引数のスプレッドを受け取り(各引数がレイヤの一意の識別子を表します)、呼び出されると指定された各レイヤの表示状態を `false` に設定し、プロジェクト内のビューから効果的に非表示にします。特定の条件やユーザー操作に基づいて、エンドユーザーに表示される要素を動的に制御するために特に有用です。
#### 構文
[Section titled “構文”](#構文-11)
```ts
reearth.layers.hide : (...layerIds: string[]) => void
```
#### パラメータ
[Section titled “パラメータ”](#パラメータ-7)
##### `...layerIds`
[Section titled “...layerIds”](#layerids-1)
**Type** `...string[]`
非表示にするレイヤの ID をそれぞれ表す文字列のスプレッドパラメータです。
#### 戻り値
[Section titled “戻り値”](#戻り値-11)
**Type** `なし(void)`
このメソッドは値を返しません。
#### 使用例
[Section titled “使用例”](#使用例-10)
```javascript
// Define the IDs of layers to be hidden
const layerIdsToHide = [
"01j1rx8xhxsk2wdydew3m8hr6q",
"01j90ed9m6bxagb6bvfg4sk49q",
];
// Hide the specified layers in the Reearth scene
reearth.layers.hide(...layerIdsToHide);
```
### show
[Section titled “show”](#show)
このメソッドは、`reearth` シーン内の指定されたレイヤの表示状態を `true` に設定するために使用します。ユーザーに表示するレイヤをプログラム的に制御でき、マップまたはシーン上のさまざまなデータセット、フィーチャー、またはグラフィック要素の表示を管理するための重要なツールです。ユーザー操作、アプリケーション状態、または特定の条件に基づいてレイヤを動的に表示・非表示にするシナリオに特に有用です。
#### 構文
[Section titled “構文”](#構文-12)
```ts
reearth.layers.show: (...layerId: string[]) => void;
```
#### パラメータ
[Section titled “パラメータ”](#パラメータ-8)
##### `...layerIds`
[Section titled “...layerIds”](#layerids-2)
**Type** `...string[]`
表示するレイヤの ID をそれぞれ表す文字列のスプレッドパラメータです。
#### 戻り値
[Section titled “戻り値”](#戻り値-12)
**Type** `なし(void)`
このメソッドは値を返しません。
#### 使用例
[Section titled “使用例”](#使用例-11)
```javascript
// Define the IDs of layers to be shown
const layerIdsToShow = [
"01j1rx8xhxsk2wdydew3m8hr6q",
"01j90ed9m6bxagb6bvfg4sk49q",
];
// Show the specified layers in the Reearth scene
reearth.layers.show(...layerIdsToShow);
```
### delete
[Section titled “delete”](#delete)
このメソッドは、`reearth` シーン内の指定されたレイヤを削除するために使用します。Plugin API によって追加された一時的なレイヤのみを削除します。レイヤの ID を主な引数として受け取ります。
#### 構文
[Section titled “構文”](#構文-13)
```ts
reearth.layers.delete: (...layerId: string[]) => void;
```
#### パラメータ
[Section titled “パラメータ”](#パラメータ-9)
##### `...layerIds`
[Section titled “...layerIds”](#layerids-3)
**Type** `...string[]`
削除するレイヤの ID をそれぞれ表す文字列のスプレッドパラメータです。
#### 戻り値
[Section titled “戻り値”](#戻り値-13)
**Type** `なし(void)`
このメソッドは値を返しません。
#### 使用例
[Section titled “使用例”](#使用例-12)
```javascript
// Define the IDs of layers to be deleted
const layerIdsToDelete = [
"ed5cade3-4049-4626-a4c6-4e84baaef987",
"0cdc12f8-4096-4a3c-84fa-0cc984130559",
];
// Show the specified layers in the Reearth scene
reearth.layers.delete(...layerIdsToDelete);
```
### override
[Section titled “override”](#override)
このメソッドは、ID によって指定されたレイヤのプロパティを動的にオーバーライドします。レイヤプロパティを変更することができます。表示状態、色、またはレイヤ構造で定義されたカスタム属性など、レイヤプロパティをオンザフライで変更できます。この動的な操作は、元のレイヤ設定を永続的に変更することなく、ユーザー操作、データ更新、またはその他のアプリケーションロジックに応じてレイヤ属性を変化させる必要があるレスポンシブなアプリケーションに不可欠です。レイヤの ID と部分的なレイヤオブジェクトの2つのパラメータを受け取ります。
#### 構文
[Section titled “構文”](#構文-14)
```ts
reearth.layers.override: (layerId: string, properties: Partial) => void;
```
#### パラメータ
[Section titled “パラメータ”](#パラメータ-10)
##### `layerId`
[Section titled “layerId”](#layerid-3)
**Type** `string`
プロパティをオーバーライドするレイヤの一意の識別子です。
##### `properties`
[Section titled “properties”](#properties)
**Type** `Partial`
Layer 型のいずれかのプロパティを省略可能な形で含むことができるオブジェクトです。
#### 戻り値
[Section titled “戻り値”](#戻り値-14)
**Type** `なし(void)`
このメソッドは入力パラメータを必要とせず、値を返さずに処理を実行します。
#### 使用例
[Section titled “使用例”](#使用例-13)
```javascript
// add a sample layer
const sampleLayer = {
type: "simple",
data: {
type: "geojson",
value: {
type: "Feature",
geometry: {
type: "Point",
coordinates: [139.6917, 35.6895],
},
},
},
marker: {
style: "image",
imageSize: 1,
imageColor: "blue",
},
};
const layerId = reearth.layers.add(sampleLayer);
// Example to modify the style
// We should hav a big red marker instead of a small blue one
reearth.layers.override(layerId, {
marker: {
imageSize: 5,
imageColor: "red",
},
});
```
### select
[Section titled “select”](#select)
このメソッドは、`reearth` シーン内の特定のレイヤをプログラム的に選択するために使用します。
#### 構文
[Section titled “構文”](#構文-15)
```ts
reearth.layers.select: (layerId?: string) => void;
```
#### パラメータ
[Section titled “パラメータ”](#パラメータ-11)
##### `layerId`
[Section titled “layerId”](#layerid-4)
**Type** `string`
選択するレイヤの一意の識別子です。
#### 戻り値
[Section titled “戻り値”](#戻り値-15)
**Type** `なし(void)`
このメソッドは入力パラメータを必要とせず、値を返さずに処理を実行します。
#### 使用例
[Section titled “使用例”](#使用例-14)
```javascript
// Select a layer by ID
reearth.layers.select("01j1rx8xhxsk2wdydew3m8hr6q");
```
### selectFeature
[Section titled “selectFeature”](#selectfeature)
このメソッドは、`reearth` シーン内の特定のフィーチャーをプログラム的に選択するために使用します。特定のフィーチャーをハイライトまたはフォーカスするために不可欠で、インフォボックスやその他のコンテキスト情報の表示など、追加の UI 要素やアクションをトリガーすることができます。
#### 構文
[Section titled “構文”](#構文-16)
```ts
reearth.layers.selectFeature: (layerId?: string, featureId?: string) => void;
```
#### パラメータ
[Section titled “パラメータ”](#パラメータ-12)
##### `layerId`
[Section titled “layerId”](#layerid-5)
**Type** `string`
選択するレイヤの一意の識別子です。
##### `featureId`
[Section titled “featureId”](#featureid-2)
**Type** `string`
レイヤ内のフィーチャーの一意の識別子です。
#### 戻り値
[Section titled “戻り値”](#戻り値-16)
**Type** `なし(void)`
このメソッドは入力パラメータを必要とせず、値を返さずに処理を実行します。
#### 使用例
[Section titled “使用例”](#使用例-15)
```javascript
// Layer ID and feature ID to be selected
const layerId = "01j90ed9m6bxagb6bvfg4sk49q";
const featureId = "6167fcb5-9564-4c8e-a4d3-d0b419f54ec6";
// Select the layer
reearth.layers.selectFeature(layerId, featureId);
```
### selectFeatures
[Section titled “selectFeatures”](#selectfeatures)
このメソッドは、`reearth` シーン内の特定の複数フィーチャーをプログラム的に選択するために使用します。特定のフィーチャーをハイライトまたはフォーカスするために不可欠で、インフォボックスやその他のコンテキスト情報の表示など、追加の UI 要素やアクションをトリガーすることができます。
#### 構文
[Section titled “構文”](#構文-17)
```ts
reearth.layers.selectFeatures: (targets: { layerId?: string; featureId?: string[] }[]) => void;
```
#### パラメータ
[Section titled “パラメータ”](#パラメータ-13)
##### `targets`
[Section titled “targets”](#targets)
**Type** `{ layerId?: string; featureId?: string[] }[]`
* **`layerId: string`**: 選択するレイヤの一意の識別子。
* **`featureId: string[]`**: 各要素がフィーチャーの ID を表す文字列の配列。
#### 戻り値
[Section titled “戻り値”](#戻り値-17)
**Type** `なし(void)`
このメソッドは入力パラメータを必要とせず、値を返さずに処理を実行します。
#### 使用例
[Section titled “使用例”](#使用例-16)
```javascript
// add a sample layer
const chiyodaLayerId = reearth.layers.add({
type: "simple",
data: {
type: "3dtiles",
url: "https://assets.cms.plateau.reearth.io/assets/ca/ee4cb0-9ce4-4f6c-bca1-9c7623e84cb1/13100_tokyo23-ku_2022_3dtiles_1_1_op_bldg_13101_chiyoda-ku_lod2_no_texture/tileset.json",
},
["3dtiles"]: {
selectedFeatureColor: "red",
},
});
const chuoLayerId = reearth.layers.add({
type: "simple",
data: {
type: "3dtiles",
url: "https://assets.cms.plateau.reearth.io/assets/4a/30f295-cd07-46b0-b0ab-4a4b1b3af06b/13100_tokyo23-ku_2022_3dtiles_1_1_op_bldg_13102_chuo-ku_lod2_no_texture/tileset.json",
},
["3dtiles"]: {
selectedFeatureColor: "red",
},
});
// NOTE: After 3dtiles been loaded, we can use this to select features
// Select features by layer IDs and feature IDs
reearth.layers.selectFeatures([
{
layerId: chiyodaLayerId,
featureId: [
"f9f2275bcf13a9674ba81473bc129ed6",
"b9a4fd90ca6112eccd43bfffd4aeb2fe",
],
},
{
layerId: chuoLayerId,
featureId: [
"acf77feceabce515700a47021bfe63dc",
"4dcf088a80f1eaaf73b1f356f7446298",
],
},
]);
```
## イベント
[Section titled “イベント”](#イベント)
ノート
共通イベントメソッド(`on`、`off`)の詳細については、[イベント](/ja/developer/plugin/api-reference/events) ページを参照してください。
### select
[Section titled “select”](#select-1)
このイベントは、`reearth` シーン内でレイヤが選択されたときにトリガーされます。レイヤ選択イベントを監視し、カスタムアクションや動作で応答する手段を提供します。
#### 構文
[Section titled “構文”](#構文-18)
```ts
reearth.layers.on('select', (selection: LayerSelection) => void)
```
#### パラメータ
[Section titled “パラメータ”](#パラメータ-14)
##### selection
[Section titled “selection”](#selection)
**Type** `LayerSelection:[layerId: string | undefined, featureId: string | undefined]`
* **`layerId: string | undefined`**: 選択されたレイヤの一意の識別子。
* **`featureId: string | undefined`**: 選択されたフィーチャーの一意の識別子。
#### 使用例
[Section titled “使用例”](#使用例-17)
```javascript
const layerId = reearth.layers.add({
type: "simple",
data: {
type: "geojson",
value: {
type: "FeatureCollection",
features: [
{
type: "Feature",
properties: {},
geometry: {
coordinates: [139.97422779688281, 35.74642872517698],
type: "Point",
},
},
],
},
},
marker: {},
});
reearth.camera.lookAt({
lat: 35.74642872517698,
lng: 139.97422779688281,
height: 1000,
});
reearth.layers.on("select", (layerId, featureId) => {
console.log(
`Layer selection: Layer ID: ${layerId}, Feature ID: ${featureId}`
);
});
```
## 型定義
[Section titled “型定義”](#型定義)
### Layer 型
[Section titled “Layer 型”](#layer-型)
レイヤの作成と管理に必要なすべてのデータとメタデータを含むオブジェクトです。
```javascript
type Layer = {
id: string; // A unique identifier for the layer.
title?: string;
visible?: boolean; // Flag indicating whether the layer is visible by default. Default is true
infobox?: Infobox; // An infobox that can display additional interactive or informational content
type: "simple";
data?: {
type:
| "geojson"
| "3dtiles"
| "osm-buildings"
| "reearth-buildings"
| "google-photorealistic"
| "czml"
| "csv"
| "wms"
| "mvt"
| "kml"
| "gpx"
| "shapefile"
| "gtfs"
| "gml"
| "georss"
| "gltf"
| "tiles"
| "tms"
| "heatMap";
url?: string; // URL of data source
value?: any;
layers?: string | string[];
jsonProperties?: string[];
isSketchLayer?: boolean;
updateInterval?: number; // milliseconds
parameters?: Record;
idProperty?: string;
time?: {
property?: string;
interval?: number; // milliseconds
updateClockOnLoad?: boolean;
};
csv?: {
idColumn?: string | number;
latColumn?: string | number;
lngColumn?: string | number;
heightColumn?: string | number;
noHeader?: boolean;
disableTypeConversion?: boolean;
};
geojson?: {
useAsResource?: boolean;
};
};
properties?: any;
defines?: Record;
events?: Events;
layerStyleId?: string;
marker?: MarkerAppearance;
polyline?: PolylineAppearance;
polygon?: PolygonAppearance;
model?: ModelAppearance;
"3dtiles"?: Cesium3DTilesAppearance;
};
```
### LazyLayer 型
[Section titled “LazyLayer 型”](#lazylayer-型)
レイヤの軽量な表現形式です。
```javascript
type LazyLayer = Readonly & {
computed?: Readonly;
isTempLayer?: boolean;
pluginId?: string;
extensionId?: string;
property?: any;
propertyId?: string;
isVisible?: boolean;
};
```
### ComputedLayer 型
[Section titled “ComputedLayer 型”](#computedlayer-型)
すべての処理が完了した後に得られるレイヤで、元の地理データと処理済みの地理データの両方、および適用・評価済みのスタイルと状態を含みます。
```javascript
type ComputedLayer = {
id: string;
status: "fetching" | "ready";
layer: Layer;
originalFeatures: Feature[];
features: ComputedFeature[];
properties?: any;
};
```
### レイヤアピアランス型
[Section titled “レイヤアピアランス型”](#レイヤアピアランス型)
各レイヤタイプのプロパティです。
* Marker
```javascript
type MarkerAppearance = {
show?: boolean;
height?: number;
heightReference?: "none" | "clamp" | "relative";
style?: "none" | "point" | "image";
pointSize?: number;
pointColor?: string;
pointOutlineColor?: string;
pointOutlineWidth?: number;
image?: string;
imageSize?: number;
imageSizeInMeters?: boolean;
imageHorizontalOrigin?: "left" | "center" | "right";
imageVerticalOrigin?: "top" | "center" | "baseline" | "bottom";
imageColor?: string;
imageCrop?: "none" | "rounded" | "circle";
imageShadow?: boolean;
imageShadowColor?: string;
imageShadowBlur?: number;
imageShadowPositionX?: number;
imageShadowPositionY?: number;
label?: boolean;
labelText?: string;
labelPosition?:
| "left"
| "right"
| "top"
| "bottom"
| "lefttop"
| "leftbottom"
| "righttop"
| "rightbottom";
labelTypography?: {
fontFamily?: string;
fontSize?: number;
fontWeight?: number;
color?: string;
italic?: boolean;
underline?: boolean;
};
labelBackground?: boolean;
labelBackgroundColor?: string;
labelBackgroundPaddingHorizontal?: number;
labelBackgroundPaddingVertical?: number;
extrude?: boolean;
near?: number; //The unit is meter
far?: number; //The unit is meter
hideIndicator?: boolean;
selectedFeatureColor?: string; // This doesn't support expression
};
```
* Polyline
```javascript
type PolylineAppearance = {
show?: boolean;
clampToGround?: boolean;
strokeColor?: string;
strokeWidth?: number;
shadows?: "disabled" | "enabled" | "cast_only" | "receive_only";
near?: number;
far?: number;
classificationType?: "both" | "terrain" | "3dtiles";
hideIndicator?: boolean;
selectedFeatureColor?: string; // This doesn't support expression
};
```
* Polygon
```javascript
type PolygonAppearance = {
show?: boolean;
fill?: boolean;
fillColor?: string;
stroke?: boolean;
strokeColor?: string;
strokeWidth?: number;
heightReference?: "none" | "clamp" | "relative";
shadows?: "disabled" | "enabled" | "cast_only" | "receive_only";
near?: number;
far?: number;
extrudedHeight?: number;
classificationType?: "both" | "terrain" | "3dtiles";
hideIndicator?: boolean;
selectedFeatureColor?: string; // This doesn't support expression
};
```
* Model
```javascript
type ModelAppearance = {
show?: boolean;
url?: string;
heightReference?: "none" | "clamp" | "relative";
heading?: number;
pitch?: number;
roll?: number;
scale?: number;
maximumScale?: number;
minimumPixelSize?: number;
animation?: boolean;
shadows?: "disabled" | "enabled" | "cast_only" | "receive_only";
colorBlend?: "none" | "highlight" | "replace" | "mix";
color?: string;
colorBlendAmount?: number;
lightColor?: string;
near?: number;
far?: number;
pbr?: boolean;
imageBasedLightIntensity?: number;
};
```
* 3dtiles
```javascript
type Cesium3DTilesAppearance = {
show?: boolean;
color?: string;
styleUrl?: string; // url of style json file
shadows?: "disabled" | "enabled" | "cast_only" | "receive_only";
colorBlendMode?: "highlight" | "replace" | "mix" | "default";
selectedFeatureColor?: string; // This doesn't support expression
tileset?: string;
pbr?: boolean; // physically-based rendering
showWireframe?: boolean;
showBoundingVolume?: boolean;
};
```
### Feature 型
[Section titled “Feature 型”](#feature-型)
フィーチャーの作成と管理に必要なすべてのデータとメタデータを含むオブジェクトです。
```javascript
type Feature = {
type: "feature" | "computedFeature";
id: string; // feature ID
geometry?: Geometry;
interval?: [start: Date, end?: Date];
properties?: any;
// Map engine specific information.
metaData?: {
description?: string;
};
range?: DataRange;
};
```
### ComputedFeature 型
[Section titled “ComputedFeature 型”](#computedfeature-型)
すべての最終評価済みプロパティとスタイルが適用された、単一の地理的フィーチャー(点、線、ポリゴン等)です。
```javascript
type ComputedFeature = {
type: "computedFeature";
id: string; // feature ID
geometry?: Geometry;
interval?: [start: Date, end?: Date];
properties?: any;
// Map engine specific information.
metaData?: {
description?: string;
};
range?: DataRange;
// AppearanceTypes
marker?: MarkerAppearance;
polyline?: PolylineAppearance;
polygon?: PolygonAppearance;
model?: ModelAppearance;
"3dtiles"?: Cesium3DTilesAppearance;
};
```
# reearth.modal
> `reearth.modal` の API リファレンスです。
**`reearth.modal`** 名前空間は、`reearth` 内のモーダルダイアログコンポーネントの構造と機能を定義します。
## メソッド
[Section titled “メソッド”](#メソッド)
### show
[Section titled “show”](#show)
このメソッドは、**`reearth`** 内でカスタマイズ可能な HTML コンテンツを持つモーダルウィンドウを表示します。開発者はモーダルのサイズ・背景・モーダル外クリック時の動作を定義できます。
#### 構文
[Section titled “構文”](#構文)
```ts
reearth.modal.show: (
html: string,
options?: Options
) => void;
```
#### パラメータ
[Section titled “パラメータ”](#パラメータ)
##### `html`
[Section titled “html”](#html)
**型**: `string`
モーダル内に表示する HTML コンテンツの文字列です。
##### `options`
[Section titled “options”](#options)
**省略可能**
モーダルの外観と動作をカスタマイズするオブジェクトです。
**型**:
```ts
type Options = {
width?: number | string;
height?: number | string;
background?: string;
clickBgToClose?: boolean;
};
```
* **`width?: number | string;`**: モーダルの幅を指定します。指定しない場合はデフォルトの幅が使用されます。
* **`height?: number | string;`**: モーダルの高さを指定します。省略するとデフォルトの高さが適用されます。
* **`background?: string;`**: モーダルの背景色または CSS 値を指定します(例: `"#fff"`、`"rgba(0, 0, 0, 0.5)"`)。
* **`clickBgToClose?: boolean;`**: モーダルの背景をクリックしたときにモーダルを閉じるかどうかを設定します。`true` にするとこの機能が有効になります。デフォルトは `false` です。
#### 戻り値:
[Section titled “戻り値:”](#戻り値)
なし(void)。このメソッドは値を返さずに処理を実行します。
#### 使用例
[Section titled “使用例”](#使用例)
```javascript
// 使用例 1: カスタム HTML コンテンツを含むモーダルを表示する
reearth.modal.show("Welcome to Reearth!
", {
width: 400,
height: 300,
background: "rgba(0, 0, 0, 0.5)",
clickBgToClose: true,
});
// 使用例 2: 大きめの固定サイズとソリッドな背景でモーダルを表示する
reearth.modal.show(
"Important Information
Details about the project...
",
{
width: 600,
height: 400,
background: "#f8f8f8",
clickBgToClose: false,
}
);
```
### postMessage
[Section titled “postMessage”](#postmessage)
このメソッドは、モーダルウィンドウと **`reearth`** の他の部分との間、またはモーダル内のコンポーネント間の通信を可能にします。モーダル内のユーザー操作を reearth に通知したり、他のコンポーネントにデータや処理を要求したりするなど、さまざまな用途に利用できます。
#### 構文
[Section titled “構文”](#構文-1)
```ts
reearth.modal.postMessage: (message: any) => void;
```
#### パラメータ
[Section titled “パラメータ”](#パラメータ-1)
##### `message`
[Section titled “message”](#message)
**型**: `any`
モーダルに送信するメッセージです。
#### 戻り値:
[Section titled “戻り値:”](#戻り値-1)
なし(void)。このメソッドは値を返さずに処理を実行します。
#### 使用例
[Section titled “使用例”](#使用例-1)
```javascript
// 使用例 1: シンプルなテキストメッセージを送信する
reearth.modal.postMessage("Hello, Re:Earth!");
// 使用例 2: Reearth アプリケーションにシンプルな文字列メッセージを送信する
reearth.modal.postMessage("User clicked the button!");
// 使用例 3: オブジェクトメッセージを送信する
reearth.modal.postMessage({ message: "greeting" });
// 使用例 4: ユーザーデータを含むオブジェクトを送信する
reearth.modal.postMessage({
eventType: "userAction",
details: {
action: "submit",
userId: 12345,
},
});
```
### update
[Section titled “update”](#update)
このメソッドは、**`reearth`** 内で現在開いているモーダルの外観と動作を変更します。モーダルのサイズ・背景色・クリックで閉じる動作などのプロパティを動的に調整できます。
#### 構文
[Section titled “構文”](#構文-2)
```ts
reearth.modal.update: (options: Options) => void;
```
#### パラメータ
[Section titled “パラメータ”](#パラメータ-2)
##### `options`
[Section titled “options”](#options-1)
モーダルの外観と動作を更新するプロパティを含むオブジェクトです。
**型**:
```ts
type Options = {
width?: number | string;
height?: number | string;
background?: string;
clickBgToClose?: boolean;
};
```
* **`width?: number | string;`**: モーダルの新しい幅を設定します。
* **`height?: number | string;`**: モーダルの新しい高さを設定します。
* **`background?: string;`**: モーダルの新しい背景を設定します。
* **`clickBgToClose?: boolean;`**: モーダル外をクリックしたときに閉じるかどうかを設定します。`true` にするとユーザーが背景をクリックしたときにモーダルが閉じます。`false` にすると背景クリックでモーダルが閉じなくなります。
#### 戻り値:
[Section titled “戻り値:”](#戻り値-2)
なし(void)。このメソッドは値を返さずに処理を実行します。
#### 使用例
[Section titled “使用例”](#使用例-2)
```javascript
// 使用例 1: 幅 300px・高さ 400px・ライトブルーの背景にリサイズする
reearth.modal.update({
width: 300,
height: 400,
background: "#ADD8E6",
clickBgToClose: true,
});
// 使用例 2: カスタム背景色・大きめのサイズに更新し、クリックで閉じる機能を無効にする
reearth.modal.update({
width: 600,
height: 450,
background: "rgba(0, 128, 128, 0.8)",
clickBgToClose: false, // 背景クリックによるモーダルのクローズを防止
});
// 使用例 3: 背景クリックでモーダルを閉じられるようにする
reearth.modal.update({
clickBgToClose: true,
});
// 使用例 4: 他のプロパティを維持したままモーダルの幅のみ 300px に変更する
reearth.modal.update({
width: 300,
});
```
### close
[Section titled “close”](#close)
このメソッドは、開いているモーダルを閉じるために使用します。タスクの完了・論理的な条件・その他のユーザー操作に基づいてモーダルを非表示にできます。パラメータは不要です。
#### 構文
[Section titled “構文”](#構文-3)
```ts
reearth.modal.close: () => void
```
#### パラメータ
[Section titled “パラメータ”](#パラメータ-3)
なし
#### 戻り値:
[Section titled “戻り値:”](#戻り値-3)
なし(void)。このメソッドは値を返さずに処理を実行します。
#### 使用例
[Section titled “使用例”](#使用例-3)
```ts
// 現在開いているモーダルを閉じる
reearth.modal.close();
```
## イベント
[Section titled “イベント”](#イベント)
ノート
共通イベントメソッド(`on`・`off`)の詳細については、[Events](/ja/developer/plugin/api-reference/events) ページを参照してください。
### close
[Section titled “close”](#close-1)
close イベントは、**`reearth`** 内のモーダルが閉じられたときに発火します。このイベントを利用することで、モーダルが閉じられた際にリソースの解放・データの保存・UI の更新といった処理を実行できます。提供するオプションに応じて、リスナーを一度だけ実行するか繰り返し実行するかを設定できます。
#### 構文
[Section titled “構文”](#構文-4)
```ts
reearth.modal.on("close", () => void): void;
```
#### 使用例
[Section titled “使用例”](#使用例-4)
```javascript
reearth.modal.on("close", () => {
console.log("The Modal was closed.");
});
```
# reearth.popup
> `reearth.popup` の API リファレンスです。
**`reearth.popup`** 名前空間は、`reearth` 内のポップアップダイアログコンポーネントの構造と機能を定義します。
## メソッド
[Section titled “メソッド”](#メソッド)
### show
[Section titled “show”](#show)
show メソッドは、拡張ウィジェットまたはブロックを基準とした指定位置に、カスタム HTML コンテンツを含むポップアップを表示します。ポップアップの外観・位置・オフセットを設定できるため、さまざまな UI ニーズに柔軟に対応できます。
#### 構文
[Section titled “構文”](#構文)
```ts
reearth.popup.show: (
html: string,
options?: Options
) => void;
```
#### パラメータ
[Section titled “パラメータ”](#パラメータ)
##### `html`
[Section titled “html”](#html)
**型**: `string`
ポップアップ内に表示する HTML コンテンツの文字列です。
##### `options`
[Section titled “options”](#options)
**省略可能**
ポップアップの外観と配置をカスタマイズするプロパティを持つオブジェクトです。
**型**:
```ts
type Options = {
width?: number | string;
height?: number | string;
position?: PopupPosition;
offset?: PopupOffset;
};
```
* **`width?: number | string;`**: ポップアップの幅を指定します。
* **`height?: number | string;`**: ポップアップの高さを指定します。
* **`position?: PopupPosition;`**: 基準点または要素に対するポップアップの表示位置を指定します。
ノート
PopupPosition に含まれるオプションの詳細については、[PopupPosition](#popupposition) セクションを参照してください。
* **`offset?: PopupOffset`**: ポップアップの配置位置からの追加間隔またはオフセットを定義します。
ノート
PopupOffset に含まれるオプションの詳細については、[PopupOffset](#popupoffset) セクションを参照してください。
#### 戻り値:
[Section titled “戻り値:”](#戻り値)
なし(void)。このメソッドは値を返さずに処理を実行します。
#### 使用例
[Section titled “使用例”](#使用例)
```javascript
// 使用例 1. シンプルな通知ポップアップを表示する
reearth.popup.show(`
You have successfully updated your profile.
`, {
// ポップアップの幅を 300 ピクセルに設定
width: 300,
// ポップアップの高さを 100 ピクセルに設定
height: 100,
// 基準要素またはビューポートの下端右側にポップアップを配置
position: "bottom-end",
// メイン軸とクロス軸に対して特定のオフセットでポップアップの位置を調整
offset: 10, // ターゲットから 10px のオフセットを設定
});
// 使用例 2. カスタム HTML・幅・両軸のオフセット調整を含むポップアップを表示する
reearth.popup.show(`
Custom Popup Content
`, {
width: "300px",
height: "150px",
position: "top-start", // ターゲットの左上にポップアップを配置
offset: {
// 細かな配置調整のためのオフセットオブジェクト
mainAxis: 15, // メイン軸に沿って 15px オフセット
crossAxis: 10, // クロス軸に沿って 10px オフセット
alignmentAxis: null, // アライメント調整なし
},
});
// 使用例 3. デフォルトのサイズと位置でポップアップを表示する
reearth.popup.show("Simple Popup
");
```
### postMessage
[Section titled “postMessage”](#postmessage)
このメソッドは、ポップアップの iframe にメッセージを送信する機能を提供します。ポップアップが拡張スクリプトから情報を取得する必要があるシナリオでの通信に役立ちます。
#### 構文
[Section titled “構文”](#構文-1)
```ts
reearth.popup.postMessage: (message: any) => void;
```
#### パラメータ
[Section titled “パラメータ”](#パラメータ-1)
##### `message`
[Section titled “message”](#message)
**型**: `any`
送信するメッセージです。
#### 戻り値:
[Section titled “戻り値:”](#戻り値-1)
なし(void)。このメソッドは値を返さずに処理を実行します。
#### 使用例
[Section titled “使用例”](#使用例-1)
```javascript
// 使用例 1. ポップアップからシンプルな文字列メッセージを送信する
reearth.popup.postMessage("Popup completed its task");
// 使用例 2. ユーザー操作の詳細を含むオブジェクトを送信する
const userData = {
action: "submit",
details: { name: "John Doe", email: "john@example.com" },
};
reearth.popup.postMessage(userData);
```
### update
[Section titled “update”](#update)
このメソッドを使用すると、ポップアップ iframe の外観と位置を変更できます。ポップアップを再作成することなく、幅・高さ・位置・オフセットなどのプロパティを動的に調整できます。
#### 構文
[Section titled “構文”](#構文-2)
```ts
reearth.popup.update: (options: Options) => void;
```
#### パラメータ
[Section titled “パラメータ”](#パラメータ-2)
##### `options`
[Section titled “options”](#options-1)
ポップアップのサイズ・位置・オフセットを更新するプロパティを含むオブジェクトです。
**型**:
```ts
type Options = {
width?: number | string;
height?: number | string;
position?: PopupPosition;
offset?: PopupOffset;
};
```
* **`width?: number | string;`**: ポップアップの新しい幅を設定します。
* **`height?: number | string;`**: ポップアップの新しい高さを設定します。
* **`position?: PopupPosition;`**: 基準点または要素に対するポップアップの新しい表示位置を指定します。
ノート
PopupPosition に含まれるオプションの詳細については、[PopupPosition](#popupposition) セクションを参照してください。
* **`offset?: PopupOffset;`**: ポップアップの配置位置からの間隔またはオフセットを調整します。
ノート
PopupOffset に含まれるオプションの詳細については、[PopupOffset](#popupoffset) セクションを参照してください。
#### 戻り値:
[Section titled “戻り値:”](#戻り値-2)
なし(void)。このメソッドは値を返さずに処理を実行します。
#### 使用例
[Section titled “使用例”](#使用例-2)
```javascript
// 使用例 1. 両軸に対して特定のオフセット調整を加えてポップアップを更新する
reearth.popup.update({
width: "250px",
height: "100px",
position: "bottom", // ターゲットの下に配置
offset: {
// 詳細な調整のためのオフセットオブジェクト
mainAxis: 10, // メイン軸でターゲットから 10px オフセット
crossAxis: 5, // クロス軸に沿って 5px オフセット
},
});
// 使用例 2. 新しいコンテンツや UI レイアウト変更に合わせてオフセットを調整する
reearth.popup.update({
offset: { mainAxis: 25, crossAxis: 15 }, // メイン軸とクロス軸の両方のオフセットを調整
// 幅・高さ・位置は更新せず、オフセットのみ変更
});
// 使用例 3. 他のプロパティを維持したままポップアップの高さを調整する
reearth.popup.update({
height: 200, // 高さを 200px に設定
});
```
### close
[Section titled “close”](#close)
このメソッドは、現在表示中のポップアップをプログラムから閉じるシンプルな手段を提供します。タスクの完了・論理的な条件・その他のユーザー操作に基づいてポップアップを非表示にできます。
#### 構文
[Section titled “構文”](#構文-3)
```ts
reearth.popup.close: () => void
```
#### パラメータ
[Section titled “パラメータ”](#パラメータ-3)
なし
#### 戻り値:
[Section titled “戻り値:”](#戻り値-3)
なし(void)。このメソッドは値を返さずに処理を実行します。
#### 使用例
[Section titled “使用例”](#使用例-3)
```ts
// 現在開いているポップアップを閉じる
reearth.popup.close();
```
## イベント
[Section titled “イベント”](#イベント)
ノート
共通イベントメソッド(`on`・`off`)の詳細については、[Events](/ja/developer/plugin/api-reference/events) ページを参照してください。
### close
[Section titled “close”](#close-1)
close イベントは、**`reearth`** 内のポップアップが閉じられたときに発火します。このイベントを利用することで、ポップアップが非表示になった際にリソースの解放・UI の更新・他コンポーネントへの通知といった特定の処理を実行できます。
#### 構文
[Section titled “構文”](#構文-4)
```ts
reearth.popup.on("close", () => void): void;
```
#### 使用例
[Section titled “使用例”](#使用例-4)
```javascript
reearth.popup.on("close", () => {
console.log("The Popup was closed.");
});
```
## 型定義
[Section titled “型定義”](#型定義)
### PopupPosition
[Section titled “PopupPosition”](#popupposition)
`PopupPosition` 型は、ターゲット要素に対してポップアップを表示する位置を制御します。拡張ウィジェットまたはブロックの上・下・左右に配置するための各種オプションと、アライメント調整(start・center・end)のオプションを提供します。
```javascript
type PopupPosition =
| "top"
| "top-start"
| "top-end"
| "right"
| "right-start"
| "right-end"
| "bottom"
| "bottom-start"
| "bottom-end"
| "left"
| "left-start"
| "left-end";
```
**`top`**: ターゲットの真上にポップアップを配置します。
**`top-start`**: ターゲットの左上にポップアップを揃えます。
**`top-end`**: ターゲットの上かつ右側にポップアップを揃えます。
**`right`**: ターゲットの真右にポップアップを揃えます。
**`right-start`**: ターゲットの右側かつ上端にポップアップを揃えます。
**`right-end`**: ターゲットの右側かつ下端にポップアップを揃えます。
**`bottom`**: ターゲットの真下にポップアップを配置します。
**`bottom-start`**: ターゲットの下かつ左側にポップアップを揃えます。
**`bottom-end`**: ターゲットの下かつ右側にポップアップを揃えます。
**`left`**: ターゲットの真左にポップアップを配置します。
**`left-start`**: ターゲットの左側かつ上端にポップアップを揃えます。
**`left-end`**: ターゲットの左側かつ下端にポップアップを揃えます。
### PopupOffset
[Section titled “PopupOffset”](#popupoffset)
`PopupOffset` 型を使用すると、拡張ウィジェットまたはブロックからのポップアップの距離を制御できます。メイン軸に沿ったオフセットを調整する数値と、メイン軸・クロス軸・アライメント軸など各軸を細かく制御するオブジェクトの 2 種類の指定方法があります。
```javascript
type PopupOffset =
| number
| {
mainAxis?: number;
crossAxis?: number;
alignmentAxis?: number | null;
};
```
#### オプション
[Section titled “オプション”](#オプション)
###### 数値
[Section titled “数値”](#数値)
* 単一の数値を指定すると、ポップアップがメイン軸に沿ってターゲットに近づく方向または遠ざかる方向にシフトします。
* 使用例: 10 を指定すると、ポップアップがメイン軸に沿って 10 ピクセルシフトします。
###### オブジェクト
[Section titled “オブジェクト”](#オブジェクト)
以下のプロパティを持つ細かな制御が可能なオブジェクトです。
**`mainAxis?: number`**: ターゲットからのポップアップの距離をメイン軸に沿って調整します。正の値はポップアップをターゲットから遠ざけ、負の値は近づけます。
**`crossAxis?: number`**: メイン軸に垂直なクロス軸に沿ってポップアップの距離を調整します。正の値はポップアップを一方向に、負の値は逆方向に移動させます(方向は向きに依存します)。
**`alignmentAxis?: number | null`**: `crossAxis` と同じ軸ですが、アライメントが指定された配置にのみ適用され、`end` アライメントを反転させます。数値を設定すると `crossAxis` の値を上書きします。正の値はフローティング要素をアライメントされた辺の反対側の辺の方向に移動させ、負の値はその逆方向に移動させます。
# reearth.sketch
> reearth.sketch の API リファレンスです。
Re:Earth Visualizer には強力なスケッチ機能が搭載されており、ユーザーはカスタムのマーカー、ポリライン、ポリゴンなどをマップ上に直接動的に描画できます。この機能は、プラグイン API の `reearth.sketch` を通じてアクセスできます。
## プロパティ
[Section titled “プロパティ”](#プロパティ)
### tool
[Section titled “tool”](#tool)
現在のスケッチツールを取得します。
#### 構文
[Section titled “構文”](#構文)
```ts
reearth.sketch.tool: SketchType;
```
#### 戻り値
[Section titled “戻り値”](#戻り値)
**型** `SketchType = | "marker" | "polyline" | "circle" | "rectangle" | "polygon" | "extrudedCircle" | "extrudedRectangle" | "extrudedPolygon"`
### options
[Section titled “options”](#options)
現在のスケッチオプションを取得します。
#### 構文
[Section titled “構文”](#構文-1)
```ts
reearth.sketch.options: SketchOptions;
```
#### 戻り値
[Section titled “戻り値”](#戻り値-1)
**型**
```ts
type SketchOptions = {
color?: string;
appearance?: SketchAppearance;
dataOnly?: boolean;
disableShadow?: boolean;
rightClickToAbort?: boolean;
autoResetInteractionMode?: boolean;
};
```
* **color:** スケッチジオメトリの基本色を指定します。
* **appearance:** 描画完了後にスケッチジオメトリに適用されるスタイルを定義します。
* **dataOnly:** `true` に設定すると、描画後にマップへ新しいレイヤが追加されません。デフォルト: `false`(注意: Re:Earth Visualizer エディター内ではこのオプションは `true` に設定されます)。
* **disableShadow:** 描画されたジオメトリに影を表示するかどうかを設定します。デフォルト: `false`。
* **rightClickToAbort:** 右クリックで現在の描画を中止できるようにします。デフォルト: `true`(注意: Re:Earth Visualizer エディター内ではこのオプションは `false` に設定されます)。
* **autoResetInteractionMode:** 描画完了後にビューアのインタラクションモードを自動的にデフォルトにリセットします。デフォルト: `true`。
ノート
SketchAppearance は LayerAppearance の部分的な実装です。詳細については、[レイヤアピアランス型](/ja/developer/plugin/api-reference/layers/#%E3%83%AC%E3%82%A4%E3%83%A4%E3%82%A2%E3%83%94%E3%82%A2%E3%83%A9%E3%83%B3%E3%82%B9%E5%9E%8B) を参照してください。
## メソッド
[Section titled “メソッド”](#メソッド)
### setTool
[Section titled “setTool”](#settool)
スケッチツールを特定のタイプに設定します。`undefined` を指定するとスケッチモードを終了します。
#### 構文
[Section titled “構文”](#構文-2)
```ts
reearth.sketch.setTool: (type: SketchType | undefined) => void;
```
#### パラメータ
[Section titled “パラメータ”](#パラメータ)
##### type
[Section titled “type”](#type)
**型** `SketchType | undefined`
#### 戻り値
[Section titled “戻り値”](#戻り値-2)
なし(void)。このメソッドは値を返しません。
### overrideOptions
[Section titled “overrideOptions”](#overrideoptions)
現在のスケッチオプションを上書きします。
#### 構文
[Section titled “構文”](#構文-3)
```ts
reearth.sketch.overrideOptions: (options: SketchOptions) => void;
```
#### パラメータ
[Section titled “パラメータ”](#パラメータ-1)
##### options
[Section titled “options”](#options-1)
**型** `SketchOptions`
#### 戻り値
[Section titled “戻り値”](#戻り値-3)
なし(void)。このメソッドは値を返しません。
## イベント
[Section titled “イベント”](#イベント)
ノート
共通のイベントメソッド(`on`、`off`)の詳細については、[イベント](/ja/developer/plugin/api-reference/events) ページを参照してください。
### create
[Section titled “create”](#create)
このイベントは、スケッチ描画が正常に完了したときにトリガーされます。
#### 構文
[Section titled “構文”](#構文-4)
```ts
reearth.sketch.on("create", (prop: SketchEventProps) => void);
```
#### パラメータ
[Section titled “パラメータ”](#パラメータ-2)
##### prop
[Section titled “prop”](#prop)
**型**
```ts
type SketchEventProps = {
layerId?: string;
featureId?: string;
feature?: SketchFeature;
};
```
* **layerId:** スケッチレイヤの ID です。`dataOnly` オプションが有効な場合、このプロパティは利用できません。
* **featureId:** スケッチフィーチャーの ID です。`dataOnly` オプションが有効な場合も利用できません。
* **feature:** `properties` に `id`、`type`、`positions`、`extrudedHeight` を含む `GeoJSON` オブジェクトです。
#### 使用例
[Section titled “使用例”](#使用例)
```ts
reearth.sketch.setTool("polygon");
reearth.sketch.on("create", (props) => {
console.log(`New sketch feature created:`, props);
});
```
### toolChange
[Section titled “toolChange”](#toolchange)
このイベントは、スケッチツールが変更されたときにトリガーされます。
#### 構文
[Section titled “構文”](#構文-5)
```ts
reearth.sketch.on("toolChange", (type: SketchType | undefined) => void);
```
#### パラメータ
[Section titled “パラメータ”](#パラメータ-3)
##### type
[Section titled “type”](#type-1)
**型** `SketchType | undefined`
#### 使用例
[Section titled “使用例”](#使用例-1)
```ts
reearth.sketch.on("toolChange", (tool) => {
console.log(`Sketch tool changed:`, tool);
});
// イベントを確認するために非同期で以下を実行してください:
reearth.sketch.setTool("polygon");
reearth.sketch.setTool(undefined);
```
# reearth.timeline
> `reearth.timeline` の API リファレンスです。
**`reearth.timeline`** 名前空間は、`reearth` 環境でタイムライン機能を管理・操作するためのメソッドとプロパティを提供します。時間ベースのデータやアニメーションを制御・監視・同期する必要があるシナリオ向けに設計されています。
## プロパティ
[Section titled “プロパティ”](#プロパティ)
### startTime
[Section titled “startTime”](#starttime)
startTime プロパティは、`reearth` 環境におけるタイムラインの開始点を表します。タイムラインが開始する時刻を定義するオプションの Date オブジェクトです。このプロパティは、プラグインが時間固有のデータやアニメーションを扱う必要がある場合に便利です。
#### 構文
[Section titled “構文”](#構文)
```ts
reearth.timeline.startTime?: Date;
```
###### `Date`
[Section titled “Date”](#date)
タイムラインの開始時刻を表す JavaScript Date オブジェクトです。startTime が定義されていない場合、タイムラインの開始時刻は関係ないか、動的に決定されます。
#### 使用例
[Section titled “使用例”](#使用例)
```javascript
// 使用例: タイムラインの開始時刻を確認してログに出力する
if (reearth.timeline.startTime) {
console.log("Timeline Start Time:", reearth.timeline.startTime.toISOString());
} else {
console.log("Timeline Start Time is not set.");
}
```
### stopTime
[Section titled “stopTime”](#stoptime)
stopTime プロパティは、`reearth` 環境におけるタイムラインの終了点を表します。タイムラインが停止する時刻を定義するオプションの Date オブジェクトです。このプロパティは、プラグイン内で時間制限のあるデータやアニメーションを管理する際に便利です。
#### 構文
[Section titled “構文”](#構文-1)
```ts
reearth.timeline.stopTime?: Date;
```
###### `Date`
[Section titled “Date”](#date-1)
タイムラインの停止時刻を表す JavaScript Date オブジェクトです。stopTime が定義されていない場合、タイムラインに固定の終了点がないか、動的に決定されることを示している場合があります。
#### 使用例
[Section titled “使用例”](#使用例-1)
```javascript
// 使用例: タイムラインの停止時刻を確認してログに出力する
if (reearth.timeline.stopTime) {
console.log("Timeline Stop Time:", reearth.timeline.stopTime.toISOString());
} else {
console.log("Timeline Stop Time is not set.");
}
```
### currentTime
[Section titled “currentTime”](#currenttime)
currentTime プロパティは、`reearth` 環境におけるタイムライン上の現在時刻を表します。タイムラインが進行するにつれて更新されるオプションの Date オブジェクトです。このプロパティは、プラグインのイベントやデータビジュアライゼーションをタイムラインの現在位置と同期させる際に便利です。
#### 構文
[Section titled “構文”](#構文-2)
```ts
reearth.timeline.currentTime?: Date;
```
###### `Date`
[Section titled “Date”](#date-2)
タイムライン上の現在時刻を表す JavaScript Date オブジェクトです。currentTime が定義されていない場合、タイムラインが初期化されていないか、現在非アクティブであることを示している場合があります。
#### 使用例
[Section titled “使用例”](#使用例-2)
```javascript
// 使用例: タイムラインの現在時刻を確認してログに出力する
if (reearth.timeline.currentTime) {
console.log(
"Current Timeline Time:",
reearth.timeline.currentTime.toISOString()
);
} else {
console.log("Current Timeline Time is not set.");
}
```
### isPlaying
[Section titled “isPlaying”](#isplaying)
このプロパティは、タイムラインが現在再生中かどうかを示します。タイムラインの再生状態を反映するブール値です。このプロパティは、タイムラインのアニメーションやイベントを制御・監視する際に便利です。
#### 構文
[Section titled “構文”](#構文-3)
```ts
reearth.timeline.isPlaying?: boolean;
```
**型** `boolean`
* `true`:タイムラインは現在再生中です。
* `false`:タイムラインは一時停止中です。
`isPlaying` が定義されていない場合、タイムラインが初期化されていないことを示している場合があります。
#### 使用例
[Section titled “使用例”](#使用例-3)
```javascript
// 使用例 1: タイムラインが再生中か一時停止中かをログに出力する
if (reearth.timeline.isPlaying === true) {
console.log("The timeline is currently playing.");
} else if (reearth.timeline.isPlaying === false) {
console.log("The timeline is paused.");
} else {
console.log("The timeline state is not set or unavailable.");
}
// 使用例 2: タイムラインが再生中のときにアニメーションをトリガーする
if (reearth.timeline.isPlaying) {
console.log("Playing animation linked to the timeline...");
}
// 使用例 3: タイムラインの再生状態をトグルする
if (reearth.timeline.isPlaying) {
reearth.timeline.pause?.();
} else {
reearth.timeline.play?.();
}
```
### speed
[Section titled “speed”](#speed)
speed プロパティは、`reearth` 環境におけるタイムラインの再生速度を表します。タイムラインがリアルタイムに対してどれだけ速く進行するかを決定する数値です。このプロパティは、タイムラインに紐づいたアニメーションやデータ更新のペースを制御する際に便利です。
#### 構文
[Section titled “構文”](#構文-4)
```ts
reearth.timeline.speed?: number;
```
**型** `number`
タイムラインの再生速度を表す数値です。例:`1.0`:リアルタイム再生、`>1.0`:リアルタイムより速い、`<1.0`:リアルタイムより遅い。speed が定義されていない場合、タイムラインの再生速度が設定または初期化されていないことを示している場合があります。
#### 使用例
[Section titled “使用例”](#使用例-4)
```javascript
// 使用例 1: タイムラインの現在の再生速度をログに出力する
if (reearth.timeline.speed !== undefined) {
console.log("Timeline Playback Speed:", reearth.timeline.speed);
} else {
console.log("Timeline speed is not set.");
}
// 使用例 2: タイムラインの再生速度を2倍に上げる
reearth.timeline.setSpeed(2.0);
console.log("Playback speed set to:", reearth.timeline.speed);
```
### stepType
[Section titled “stepType”](#steptype)
このプロパティは、タイムラインが時間を進行させるステップの種類を定義します。タイムラインが可変レート(時間に比例)で進むか、固定間隔で進むかを決定します。タイムラインに紐づいたデータやアニメーションの更新方法を制御する際に便利です。
#### 構文
[Section titled “構文”](#構文-5)
```ts
reearth.timeline.stepType?: "rate" | "fixed";
```
**型** `rate`
タイムラインは可変レートで進行します。タイムラインは継続的に進み、進行速度は speed プロパティによって決定されます。
**型** `fixed`
タイムラインは固定時間間隔(例:毎秒、毎分、毎時)で進行します。この種類は、離散的なステップや均等間隔の更新を持つタイムラインに最適です。
stepType が定義されていない場合、デフォルトのステップ種類はプラグインの設定または Reearth 環境によって異なる場合があります。
#### 使用例
[Section titled “使用例”](#使用例-5)
```javascript
// 使用例 1: タイムラインのステップ種類をログに出力する
if (reearth.timeline.stepType) {
console.log("Timeline Step Type:", reearth.timeline.stepType);
} else {
console.log("Timeline step type is not set.");
}
// 使用例 2: 連続進行のためにステップ種類を 'rate' に設定する
reearth.timeline.setStepType("rate");
console.log("Timeline step type set to 'rate'.");
// 使用例 3: 離散ステップのためにステップ種類を 'fixed' に設定する
reearth.timeline.setStepType("fixed");
console.log("Timeline step type set to 'fixed'.");
```
### rangeType
[Section titled “rangeType”](#rangetype)
rangeType プロパティは、タイムラインが時間進行の範囲をどのように扱うかを定義します。タイムラインが定義された startTime と stopTime を超えて拡張できるか、特定の範囲内に制限されるかを決定します。このプロパティは、タイムラインに紐づいたアニメーションやイベントの動作を制御するために重要です。
#### 構文
[Section titled “構文”](#構文-6)
```ts
reearth.timeline.rangeType?: "unbounded" | "clamped" | "bounced";
```
**型** `unbounded`
タイムラインは定義された startTime と stopTime を超えて拡張できます。境界を超えても無制限に進行できます。この種類は、継続的なアニメーションやデータ更新に便利です。
**型** `clamped`
タイムラインは startTime と stopTime の範囲内に制限されます。開始時刻より前や停止時刻より後には進行できません。この種類は、時間制限のあるアニメーションやイベントに便利です。
**型** `bounced`
タイムラインは startTime と stopTime の間で「バウンス」し、ループのような効果を生み出します。タイムラインが終端に達すると方向を逆転させ、開始点に向かって戻ります。この種類は、継続的なアニメーションやサイクルを作成する際に便利です。
rangeType が定義されていない場合、動作はタイムラインの設定にデフォルトするか、制限なしのままになる場合があります。
#### 使用例
[Section titled “使用例”](#使用例-6)
```javascript
// 使用例 1: タイムラインの範囲種類をログに出力する
if (reearth.timeline.rangeType) {
console.log("Timeline Range Type:", reearth.timeline.rangeType);
} else {
console.log("Timeline range type is not set.");
}
// 使用例 2: タイムラインを無制限に進行させる
reearth.timeline.setRangeType("unbounded");
console.log("Timeline range type set to 'unbounded'.");
// 使用例 3: タイムラインを開始・停止時刻内に制限する
reearth.timeline.setRangeType("clamped");
console.log("Timeline range type set to 'clamped'.");
// 使用例 4: タイムラインのバウンス動作を有効にする
reearth.timeline.setRangeType("bounced");
console.log("Timeline range type set to 'bounced'.");
```
## メソッド
[Section titled “メソッド”](#メソッド)
### tick
[Section titled “tick”](#tick)
tick メソッドは、タイムラインの現在のティック値を Date オブジェクトとして取得します。このメソッドは、アニメーションやプラグイン固有のイベントをタイムラインの進行と同期させる際に便利です。
#### 構文
[Section titled “構文”](#構文-7)
```ts
reearth.timeline.tick?: () => Date | undefined;
```
#### 戻り値:
[Section titled “戻り値:”](#戻り値)
**型** `Date | undefined`
* `"Date"`:タイムライン上の現在のティック値を Date オブジェクトとして表します。
* `"undefined"`:タイムラインが初期化されていないか非アクティブの場合、メソッドは undefined を返します。
#### 使用例
[Section titled “使用例”](#使用例-7)
```javascript
// 使用例: 現在のティック値を取得してログに出力する
const tickValue = reearth.timeline.tick?.();
if (tickValue) {
console.log("Current Tick Value:", tickValue.toISOString());
} else {
console.log("Timeline tick is not set or the timeline is inactive.");
}
```
### play
[Section titled “play”](#play)
play メソッドは、タイムラインの再生を開始します。タイムラインが現在の状態から範囲を進行し始めるようにトリガーするために使用します。このメソッドは、アニメーション、時間ベースのデータビジュアライゼーション、またはユーザーによるタイムライン操作のシナリオに便利です。
#### 構文
[Section titled “構文”](#構文-8)
```ts
reearth.timeline.play?: () => void;
```
#### 戻り値:
[Section titled “戻り値:”](#戻り値-1)
なし `(void)`。このメソッドは値を返さずに操作を実行します。
#### 使用例
[Section titled “使用例”](#使用例-8)
```javascript
// 使用例: タイムラインを再生する
if (reearth.timeline.play) {
reearth.timeline.play();
console.log("Timeline playback started.");
} else {
console.log("The play method is not available.");
}
```
### pause
[Section titled “pause”](#pause)
pause メソッドは、現在位置をリセットせずにタイムラインの再生を停止します。このメソッドは、タイムラインに紐づいたアニメーションや時間ベースの処理を一時的に停止し、後で同じ位置から再開できるようにする際に便利です。
#### 構文
[Section titled “構文”](#構文-9)
```ts
reearth.timeline.pause?: () => void;
```
#### 戻り値:
[Section titled “戻り値:”](#戻り値-2)
なし `(void)`。このメソッドは値を返さずに操作を実行します。
#### 使用例
[Section titled “使用例”](#使用例-9)
```javascript
// 使用例: タイムラインを一時停止する
if (reearth.timeline.pause) {
reearth.timeline.pause();
console.log("Timeline playback paused.");
} else {
console.log("The pause method is not available.");
}
```
### setTime
[Section titled “setTime”](#settime)
このメソッドを使用すると、タイムラインの開始・停止・現在時刻を設定できます。このメソッドは、アニメーションの同期や時間ベースのデータビジュアライゼーションの調整など、タイムラインの範囲と位置を動的に制御する際に便利です。
#### 構文
[Section titled “構文”](#構文-10)
```ts
reearth.timeline.setTime?: (time: Options) => void;
```
#### パラメータ
[Section titled “パラメータ”](#パラメータ)
##### `time`
[Section titled “time”](#time)
setTime メソッドの time オブジェクトを使用すると、タイムラインの3つの重要なポイントを定義できます。
**型**:
```ts
type Options = {
start: Date | string;
stop: Date | string;
current: Date | string;
};
```
* **`start: Date | string;`**:タイムラインの開始点を定義します。
* **`stop: Date | string;`**:タイムラインの終了点を定義します。
* **`current: Date | string;`**:タイムライン上の現在の時点を定義します。
#### 戻り値:
[Section titled “戻り値:”](#戻り値-3)
なし `(void)`。このメソッドは値を返さずに操作を実行します。
#### 使用例
[Section titled “使用例”](#使用例-10)
```javascript
// 使用例: カスタムタイムライン時刻を設定する
if (reearth.timeline.setTime) {
reearth.timeline.setTime({
start: new Date("2023-01-01T00:00:00Z"),
stop: new Date("2023-12-31T23:59:59Z"),
current: new Date("2023-06-01T12:00:00Z"),
});
console.log("Timeline times set successfully.");
} else {
console.log("The setTime method is not available.");
}
```
### setSpeed
[Section titled “setSpeed”](#setspeed)
このメソッドを使用すると、タイムラインの再生速度を動的に調整できます。このメソッドは、タイムラインが範囲をどれだけ速く進行するかを制御し、アニメーションや時間ベースのデータビジュアライゼーションに柔軟性を提供します。
#### 構文
[Section titled “構文”](#構文-11)
```ts
reearth.timeline.setSpeed?: (speed: number) => void;
```
#### パラメータ
[Section titled “パラメータ”](#パラメータ-1)
##### `speed`
[Section titled “speed”](#speed-1)
**型**: `number`
タイムラインの再生速度を表す数値です。`1.0`:リアルタイム再生、`>1.0`:リアルタイムより速い(例:2.0 で2倍速)、`<1.0`:リアルタイムより遅い(例:0.5 で半速)。
#### 戻り値:
[Section titled “戻り値:”](#戻り値-4)
なし `(void)`。このメソッドは値を返さずに操作を実行します。
#### 使用例
[Section titled “使用例”](#使用例-11)
```javascript
// 使用例 1: 再生速度をリアルタイム(1.0)に設定する
if (reearth.timeline.setSpeed) {
reearth.timeline.setSpeed(1.0);
console.log("Timeline speed set to real-time (1.0).");
} else {
console.log("The setSpeed method is not available.");
}
// 使用例 2: ユーザー入力からタイムライン速度を動的に調整する
const userSelectedSpeed = 3.0; // ユーザー入力の例
if (reearth.timeline.setSpeed) {
reearth.timeline.setSpeed(userSelectedSpeed);
console.log(`Timeline speed dynamically set to ${userSelectedSpeed}.`);
} else {
console.log("The setSpeed method is unavailable.");
}
```
### setStepType
[Section titled “setStepType”](#setsteptype)
setStepType メソッドを使用すると、タイムラインのステップ動作を動的に調整できます。タイムラインが可変レート(rate)で進むか、固定間隔(fixed)で進むかを制御します。アニメーションやデータ更新など、タイムラインの時間進行処理をカスタマイズする際に便利です。
#### 構文
[Section titled “構文”](#構文-12)
```ts
reearth.timeline.setStepType?: (stepType: "rate" | "fixed") => void;
```
#### パラメータ
[Section titled “パラメータ”](#パラメータ-2)
##### `stepType`
[Section titled “stepType”](#steptype-1)
ステップ動作を指定します。
**型**: `"rate" | "fixed"`
* **`rate`**:タイムラインは時間に比例した可変レートで進行し、通常は再生速度(speed プロパティ)の影響を受けます。
* **`fixed`**:タイムラインは固定時間間隔(例:毎秒、毎分、毎時)で進行します。
#### 戻り値:
[Section titled “戻り値:”](#戻り値-5)
なし `(void)`。このメソッドは値を返さずに操作を実行します。
#### 使用例
[Section titled “使用例”](#使用例-12)
```javascript
// 使用例 1: タイムラインのステップを 'rate' に設定する
if (reearth.timeline.setStepType) {
reearth.timeline.setStepType("rate");
console.log("Timeline step type set to 'rate'.");
} else {
console.log("The setStepType method is not available.");
}
// 使用例 2: タイムラインのステップを 'fixed' に設定する
reearth.timeline.setStepType?.("fixed");
console.log("Timeline step type set to 'fixed'.");
// 使用例 3: データ要件に基づいてタイムラインのステップ種類を動的に設定する
const requiresContinuousUpdates = true;
if (reearth.timeline.setStepType) {
if (requiresContinuousUpdates) {
reearth.timeline.setStepType("rate");
console.log("Timeline step type dynamically set to 'rate'.");
} else {
reearth.timeline.setStepType("fixed");
console.log("Timeline step type dynamically set to 'fixed'.");
}
}
```
### setRangeType
[Section titled “setRangeType”](#setrangetype)
setRangeType メソッドを使用すると、タイムラインが時間進行の範囲をどのように扱うかを動的に定義できます。このメソッドは、タイムラインが定義された startTime と stopTime を超えて拡張できるか、その範囲内に制限されるか、またはループ効果を生み出しながら開始・停止時刻の間で「バウンス」するかを決定します。
#### 構文
[Section titled “構文”](#構文-13)
```ts
reearth.timeline.setRangeType?: (
rangeType: "unbounded" | "clamped" | "bounced"
) => void;
```
#### パラメータ
[Section titled “パラメータ”](#パラメータ-3)
##### `rangeType`
[Section titled “rangeType”](#rangetype-1)
範囲の動作を指定します。
**型**: `"unbounded" | "clamped" | "bounced"`
* **`unbounded`**:タイムラインは startTime と stopTime を超えて無制限に拡張できます。
* **`clamped`**:タイムラインは定義された startTime と stopTime の範囲内に制限されます。
* **`bounced`**:タイムラインは startTime と stopTime の間で「バウンス」し、ループのような効果を生み出します。
#### 戻り値:
[Section titled “戻り値:”](#戻り値-6)
なし `(void)`。このメソッドは値を返さずに操作を実行します。
#### 使用例
[Section titled “使用例”](#使用例-13)
```javascript
// 使用例 1: タイムラインを無制限に進行させる
if (reearth.timeline.setRangeType) {
reearth.timeline.setRangeType("unbounded");
console.log("Timeline range type set to 'unbounded'.");
} else {
console.log("The setRangeType method is not available.");
}
// 使用例 2: タイムラインを定義された範囲内に制限する
reearth.timeline.setRangeType?.("clamped");
console.log("Timeline range type set to 'clamped'.");
// 使用例 3: タイムラインのバウンス動作を有効にする
if (reearth.timeline.setRangeType) {
reearth.timeline.setRangeType("bounced");
console.log("Timeline range type set to 'bounced'.");
}
// 使用例 4: アプリケーションの要件に基づいて範囲種類を動的に設定する
const useInfiniteTimeline = true;
if (reearth.timeline.setRangeType) {
if (useInfiniteTimeline) {
reearth.timeline.setRangeType("unbounded");
console.log("Timeline range type dynamically set to 'unbounded'.");
} else {
reearth.timeline.setRangeType("clamped");
console.log("Timeline range type dynamically set to 'clamped'.");
}
}
```
## イベント
[Section titled “イベント”](#イベント)
ノート
共通のイベントメソッド(`on`、`off`)の詳細については、[イベント](/ja/developer/plugin/api-reference/events) ページを参照してください。
### tick
[Section titled “tick”](#tick-1)
tick イベントは、タイムラインの現在時刻が更新されるたびに発火します。これは通常、タイムラインが進行するか、手動で調整されたときにトリガーされます。
#### 構文
[Section titled “構文”](#構文-14)
```ts
reearth.timeline.on("tick", (event: Date) => void): void;
```
#### パラメータ
[Section titled “パラメータ”](#パラメータ-4)
**event:** Date
tick イベント中のタイムラインの現在時刻を表す JavaScript Date オブジェクトです。
#### 使用例
[Section titled “使用例”](#使用例-14)
```javascript
// タイムラインの現在時刻の各ティックをログに出力する
reearth.timeline.on("tick", (e) => {
console.log("Timeline tick at:", e.toISOString());
});
// 特定のティック値に基づいてアクションを実行する
reearth.timeline.on("tick", (e) => {
const targetTime = new Date("2023-12-25T00:00:00Z");
if (e.getTime() === targetTime.getTime()) {
console.log("Merry Christmas! Timeline reached the target time.");
}
});
```
### commit
[Section titled “commit”](#commit)
commit イベントは、ウィジェット、プラグイン、またはその他のタイムラインブロックからの更新など、アクションによってタイムラインが変更されるたびに発火します。
#### 構文
[Section titled “構文”](#構文-15)
```ts
reearth.timeline.on("commit", (event: TimelineCommitter) => void): void;
```
#### パラメータ
[Section titled “パラメータ”](#パラメータ-5)
**event:** TimelineCommitter
タイムライン変更のソースと追加のメタデータを記述するオブジェクトです。
```ts
type TimelineCommitter = {
source:
| "widgetContext" // ウィジェット操作によるタイムライン変更
| "pluginAPI" // プラグイン API を通じた変更
| "storyTimelineBlock" // ストーリー内のタイムラインブロックによる変更
| "storyPage"; // ストーリーページナビゲーションによってトリガーされた変更
id?: string;
};
```
* **`source: string`**:コミットアクションの起点を指定します。
* **`id?: string`**:コミットのソースに対するオプションの識別子です。
#### 使用例
[Section titled “使用例”](#使用例-15)
```javascript
// タイムラインが変更されたときにコミットのソースと ID をログに出力する
reearth.timeline.on("commit", (e) => {
console.log(`Timeline commit from source: ${e.source}`);
if (e.id) {
console.log(`Commit ID: ${e.id}`);
}
});
// コミットのソースに基づいて特定のアクションを実行する
reearth.timeline.on("commit", (e) => {
if (e.source === "pluginAPI") {
console.log("Timeline updated via Plugin API.");
} else if (e.source === "storyPage") {
console.log("Timeline updated by a story page.");
}
});
```
# reearth.ui
> `reearth.ui` の API リファレンスです。
**`reearth.ui`** 名前空間は、プラグイン拡張(ウィジェットまたはブロック)のユーザーインターフェース要素を管理するための幅広い機能を提供します。
## メソッド
[Section titled “メソッド”](#メソッド)
### show
[Section titled “show”](#show)
このメソッドは、カスタム HTML コンテンツをプラグイン拡張(プラグイン設定に基づくウィジェットまたはブロック)として `reearth` に表示します。iframe の表示状態やサイズを動的に制御でき、iframe を視覚的に表示しないモードにも対応しています。パラメータは 2 つです。表示する HTML コンテンツと、省略可能なオプションオブジェクトです。
#### 構文
[Section titled “構文”](#構文)
```ts
reearth.ui.show: (
html: string,
options?: Options
) => void;
```
#### パラメータ
[Section titled “パラメータ”](#パラメータ)
##### `html`
[Section titled “html”](#html)
**型**: `string`
レンダリングする HTML コンテンツの文字列です。
##### `options`
[Section titled “options”](#options)
**省略可能**
**型**:
```ts
type Options = {
visible?: boolean;
width?: number | string;
height?: number | string;
extended?: boolean;
};
```
* **`visible?: boolean`**: `true` の場合、iframe を表示します。`false` の場合、iframe を非表示にし、プラグインはヘッドレスモードで動作します。デフォルト値は `true` です。
* **`width?: number | string;`**: ウィジェットの iframe の初期幅です。指定しない場合、iframe はコンテンツに合わせて自動リサイズされます。数値を指定した場合はピクセル単位として扱われます。このオプションは水平方向に拡張されていないウィジェットにのみ有効です。
* **`height?: number | string;`**: ウィジェットの iframe の初期高さです。指定しない場合、iframe はコンテンツに合わせて自動リサイズされます。数値を指定した場合はピクセル単位として扱われます。このオプションは垂直方向に拡張されていないウィジェットにのみ有効です。
* **`extended?: boolean;`**: iframe がより広い領域を占有するかどうかを示します。`true` の場合、iframe はコンテナ内の利用可能なスペースを埋めるように拡張されます。このオプションは、ウィジェットアラインシステムの拡張可能エリアに配置されたウィジェットにのみ有効です。
#### 戻り値
[Section titled “戻り値”](#戻り値)
なし(void)。このメソッドは値を返しません。
#### 使用例
[Section titled “使用例”](#使用例)
```javascript
const html = `
Hello world
`;
// HTML UI のみ表示する
reearth.ui.show(html);
// HTML UI を非表示状態で表示する
reearth.ui.show(html, { visible: false });
// 幅と高さを指定して HTML UI を表示する
reearth.ui.show(html, { width: 400, height: 200 });
// 拡張可能エリアで iframe を拡張する
reearth.ui.show(`Extended widget content
`, { extended: true });
```
### postMessage
[Section titled “postMessage”](#postmessage)
このメソッドは、プラグインの UI コンポーネント(iframe)にメッセージを送信します。
#### 構文
[Section titled “構文”](#構文-1)
```ts
reearth.ui.postMessage: (message: any) => void;
```
#### パラメータ
[Section titled “パラメータ”](#パラメータ-1)
##### `message`
[Section titled “message”](#message)
**型**: `any`
message には、構造化クローン可能な任意の型を指定できます。
#### 戻り値
[Section titled “戻り値”](#戻り値-1)
なし(void)。このメソッドは値を返しません。
#### 使用例
[Section titled “使用例”](#使用例-1)
```javascript
//使用例 1: UI iframe にメッセージを送信する
reearth.ui.postMessage("Hello, Re:Earth!");
//使用例 2: オブジェクト形式のメッセージを送信する
reearth.ui.postMessage({ type: "greeting", text: "Hello, World!" });
```
### resize
[Section titled “resize”](#resize)
プラグインが使用する iframe のサイズを調整します。width または height が undefined の場合は自動リサイズされます。数値を指定した場合はピクセル単位として扱われます。パラメータは 3 つです。width、height、および省略可能な extended です。
UI iframe はコンテンツサイズに基づいて自動的にリサイズされます。このメソッドは、iframe のサイズを手動で設定したい場合に便利です。
#### 構文
[Section titled “構文”](#構文-2)
```ts
reearth.ui.resize(
width: string | number | undefined,
height: string | number | undefined,
extended?: boolean | undefined
) => void;
```
#### パラメータ
[Section titled “パラメータ”](#パラメータ-2)
##### `width`
[Section titled “width”](#width)
**型**: `string | number | undefined`
ウィジェットの iframe の幅です。このフィールドは水平方向に拡張されていないウィジェットにのみ有効です。
##### `height`
[Section titled “height”](#height)
**型**: `string | number | undefined`
ウィジェットの iframe の高さです。このフィールドは垂直方向に拡張されていないウィジェットにのみ有効です。
##### `extended?`
[Section titled “extended?”](#extended)
**省略可能**
**型**: `boolean | undefined`
省略可能なパラメータです。iframe を拡張するかどうかを示すブール値です。このオプションは、ウィジェットアラインシステムの拡張可能エリアに配置されたウィジェットにのみ有効です。
* `true`: UI 要素を拡張します。
* `false`: UI 要素を拡張しません。
* `undefined`: 拡張状態を変更しません。
#### 使用例
[Section titled “使用例”](#使用例-2)
```javascript
// 使用例 1: UI を 400px × 300px にリサイズする
reearth.ui.resize(400, 300);
// 使用例 2: サイズを変更せずに UI 要素を拡張する
reearth.ui.resize(undefined, undefined, true);
// 使用例 3: 高さのみ 500px に変更し、他のプロパティは変更しない
reearth.ui.resize(undefined, 500);
```
### close
[Section titled “close”](#close)
このメソッドは、現在の UI ウィジェットを閉じるために使用します。クローズ操作をプログラムからトリガーする手段を提供します。パラメータはありません。
#### 構文
[Section titled “構文”](#構文-3)
```ts
reearth.ui.close: () => void
```
#### パラメータ
[Section titled “パラメータ”](#パラメータ-3)
なし
#### 戻り値
[Section titled “戻り値”](#戻り値-2)
なし(void)。このメソッドは値を返しません。
#### 使用例
[Section titled “使用例”](#使用例-3)
```ts
// 現在の UI ウィジェットを閉じる
reearth.ui.close();
```
## イベント
[Section titled “イベント”](#イベント)
ノート
共通のイベントメソッド(`on`、`off`)の詳細については、[イベント](/ja/developer/plugin/api-reference/events) ページを参照してください。
### update
[Section titled “update”](#update)
update イベントは、UI の状態またはコンテンツが変化するたびにトリガーされます。UI の状態の変化を追跡したり、最新のデータに基づいてコンテンツを更新したりする際に便利です。
#### 構文
[Section titled “構文”](#構文-4)
```ts
reearth.ui.on("update", () => void): void;
```
#### 使用例
[Section titled “使用例”](#使用例-4)
```javascript
reearth.ui.on("update", () => {
console.log("UI updated!");
});
```
### close
[Section titled “close”](#close-1)
close イベントは、UI が閉じられたときにトリガーされます。このイベントは、クリーンアップ処理の実行、データの保存、または UI が非アクティブになったことを他のコンポーネントに通知する際に使用できます。
#### 構文
[Section titled “構文”](#構文-5)
```ts
reearth.ui.on("close", () => void): void;
```
#### 使用例
[Section titled “使用例”](#使用例-5)
```javascript
reearth.ui.on("close", () => {
console.log("The UI was closed.");
});
```
# reearth.viewer
> reearth.viewer
`reearth.viewer` 名前空間は、ビューアと対話するための関数群を提供します。
## プロパティ
[Section titled “プロパティ”](#プロパティ)
### property
[Section titled “property”](#property)
`property` は、グローブ・地形・シーン・タイル・空など、ビューアに関する各種プロパティを提供します。
#### 構文
[Section titled “構文”](#構文)
```ts
reearth.viewer.property: ViewerProperty;
```
#### 戻り値
[Section titled “戻り値”](#戻り値)
**型** `ViewerProperty`
現在、`property` は明示的に設定されたプロパティのみを返します。デフォルト値は含まれません。
ノート
`ViewerProperty` は Re:Earth Core からインポートされています。詳細は [ViewerProperty](https://github.com/reearth/core/blob/alpha/src/Map/types/viewerProperty.ts) を参照してください。
### viewport
[Section titled “viewport”](#viewport)
`viewport` は、マップ領域に関連するプロパティと、現在のビューポート(ページ)の URL クエリパラメータを提供するために設計されています。
#### 構文
[Section titled “構文”](#構文-1)
```ts
reearth.viewer.viewport: Viewport;
```
#### 戻り値
[Section titled “戻り値”](#戻り値-1)
**型**
```ts
type Viewport = {
width: number;
height: number;
isMobile: boolean;
query: Record;
};
```
* **width:** ビューポートの幅です。
* **height:** ビューポートの高さです。
* **isMobile:** ビューポートがモバイルデバイスかどうかを示す真偽値です。bowser のユーザーエージェント検出に基づき判定されます。
* **query:** 現在のページの URL クエリパラメータです。
### env
[Section titled “env”](#env)
`env` は、現在実行中の Re:Earth Visualizer の環境情報を提供します。
#### 構文
[Section titled “構文”](#構文-2)
```ts
reearth.viewer.env: Env;
```
#### 戻り値
[Section titled “戻り値”](#戻り値-2)
**型**
```ts
type Env = {
inEditor: boolean;
isBuilt: boolean;
};
```
`inEditor` と `isBuilt` は、実行されているページやタブによって異なる値を持ちます。プラグインはこれらの値に基づいて動作を切り替えることができます。
| プロパティ | エディタ - マップ/ストーリー/ウィジェットタブ | エディタ - 公開タブ | 公開済みページ |
| -------- | ------------------------- | ----------- | ------- |
| inEditor | true | false | false |
| isBuilt | false | false | true |
### interactionMode
[Section titled “interactionMode”](#interactionmode)
`interactionMode` は、Re:Earth Visualizer におけるビューアのインタラクションモードを管理するプロパティとメソッドの集合を提供します。
#### interactionMode.mode
[Section titled “interactionMode.mode”](#interactionmodemode)
ビューアの現在のインタラクションモードです。
#### 構文
[Section titled “構文”](#構文-3)
```ts
reearth.viewer.interactionMode.mode: InteractionModeType
```
#### 戻り値
[Section titled “戻り値”](#戻り値-3)
**型** `InteractionModeType = "default" | "move" | "selection" | "sketch" | "spatialId"`
* **`default`**: デフォルトのインタラクションモードです。
* **`move`**: 移動インタラクションモードです。このモードでは選択が無効になります。
* **`selection`**: 選択インタラクションモードです。このモードでは移動が無効になります。
* **`sketch`**: スケッチインタラクションモードです。スケッチはこのモードでのみ有効にできます。
* **`spatialId`**: Spatial ID を扱うためのインタラクションモードです。Spatial ID の選択時に使用します。
#### interactionMode.override
[Section titled “interactionMode.override”](#interactionmodeoverride)
ビューアのインタラクションモードを上書きします。
#### 構文
[Section titled “構文”](#構文-4)
```ts
reearth.viewer.interactionMode.override: (
mode: InteractionModeType
) => void;
```
#### パラメータ
[Section titled “パラメータ”](#パラメータ)
##### `mode`
[Section titled “mode”](#mode)
**型**: `InteractionModeType`
設定するインタラクションモードです。
#### 戻り値
[Section titled “戻り値”](#戻り値-4)
なし(void)。このメソッドは値を返しません。
## メソッド
[Section titled “メソッド”](#メソッド)
### overrideProperty
[Section titled “overrideProperty”](#overrideproperty)
`overrideProperty` は、ビューアのプロパティを上書きするために使用します。
#### 構文
[Section titled “構文”](#構文-5)
```ts
reearth.viewer.overrideProperty: (property: ViewerProperty) => void;
```
#### パラメータ
[Section titled “パラメータ”](#パラメータ-1)
##### property
[Section titled “property”](#property-1)
**型** `ViewerProperty`
ノート
`ViewerProperty` は Re:Earth Core からインポートされています。詳細は [ViewerProperty](https://github.com/reearth/core/blob/alpha/src/Map/types/viewerProperty.ts) を参照してください。
#### 戻り値
[Section titled “戻り値”](#戻り値-5)
**型** `void`
このメソッドは戻り値を持ちません。
#### 使用例
[Section titled “使用例”](#使用例)
```javascript
// 地形を有効にする
reearth.viewer.overrideProperty({
terrain: {
enabled: true,
},
});
```
### capture
[Section titled “capture”](#capture)
`capture` 関数は、現在のビューアの画像を生成します。
#### 構文
[Section titled “構文”](#構文-6)
```ts
reearth.viewer.capture: (
type?: string,
encoderOptions?: number
) => string | undefined;
```
#### パラメータ
[Section titled “パラメータ”](#パラメータ-2)
##### type
[Section titled “type”](#type)
**型** `string`(省略可能)
画像フォーマットを示す文字列です。デフォルトのフォーマットは `image/png` であり、指定したフォーマットがサポートされていない場合もこのフォーマットが使用されます。
##### encoderOptions
[Section titled “encoderOptions”](#encoderoptions)
**型** `number`(省略可能)
`image/jpeg` や `image/webp` など非可逆圧縮をサポートするファイルフォーマットで画像を作成する際の画質を表す、0 から 1 の数値です。このオプションを指定しない場合、または値が許容範囲外の場合は、ユーザーエージェントのデフォルト品質値が使用されます。
ノート
このメソッドは内部的に `canvas.toDataURL` を呼び出しています。詳細は [HTMLCanvasElement: toDataURL() method](https://developer.mozilla.org/en-US/docs/Web/API/HTMLCanvasElement/toDataURL) を参照してください。
#### 戻り値
[Section titled “戻り値”](#戻り値-6)
**型** `string | undefined`
リクエストされたデータ URL を含む文字列です。
#### 使用例
[Section titled “使用例”](#使用例-1)
```javascript
// 現在のマップのキャプチャを取得します。
// 返された画像文字列をウィジェット UI に送信してダウンロードをトリガーできます。
console.log(reearth.viewer.capture("image/png"));
```
### open
[Section titled “open”](#open)
`open` メソッドは、URL を新しいタブで開くために使用します。
#### 構文
[Section titled “構文”](#構文-7)
```ts
reearth.viewer.open: (url: string) => void;
```
#### パラメータ
[Section titled “パラメータ”](#パラメータ-3)
##### url
[Section titled “url”](#url)
**型** `string`
新しいタブで開く URL です。
#### 戻り値
[Section titled “戻り値”](#戻り値-7)
**型** `void`
### reload
[Section titled “reload”](#reload)
`reload` メソッドは、現在の Visualizer ページを再読み込みします。
#### 構文
[Section titled “構文”](#構文-8)
```ts
reearth.viewer.reload: () => void;
```
#### 戻り値
[Section titled “戻り値”](#戻り値-8)
**型** `void`
### tools
[Section titled “tools”](#tools)
`tools` モジュールは、グローブおよびシーン周辺のさまざまな計算を行うためのヘルパー関数のコレクションを提供します。
### > getLocationFromScreenCoordinate
[Section titled “> getLocationFromScreenCoordinate”](#-getlocationfromscreencoordinate)
スクリーン座標から地球上の位置を返します。
#### 構文
[Section titled “構文”](#構文-9)
```ts
reearth.viewer.tools.getLocationFromScreenCoordinate: (
x: number,
y: number,
withTerrain?: boolean
) => { lat: number; lng: number; height: number } | undefined;
```
#### パラメータ
[Section titled “パラメータ”](#パラメータ-4)
##### x
[Section titled “x”](#x)
**型** `number`
ビューア上の x ピクセル座標です。
##### y
[Section titled “y”](#y)
**型** `number`
ビューア上の y ピクセル座標です。
##### withTerrain
[Section titled “withTerrain”](#withterrain)
**型** `boolean`(省略可能)
地形の高さを考慮するかどうかを示す真偽値です。デフォルト値は `false` です。
#### 戻り値
[Section titled “戻り値”](#戻り値-9)
**型** `{ lat: number; lng: number; height: number } | undefined`
地球上の位置です。
### > getScreenCoordinateFromPosition
[Section titled “> getScreenCoordinateFromPosition”](#-getscreencoordinatefromposition)
地球上の位置からスクリーン座標を返します。
#### 構文
[Section titled “構文”](#構文-10)
```ts
reearth.viewer.tools.getScreenCoordinateFromPosition: (
position: [x: number, y: number, z: number]
) => [x: number, y: number] | undefined;
```
#### パラメータ
[Section titled “パラメータ”](#パラメータ-5)
##### position
[Section titled “position”](#position)
**型** `[x: number, y: number, z: number]`
地球上の位置(デカルト座標)です。
#### 戻り値
[Section titled “戻り値”](#戻り値-10)
**型** `[x: number, y: number] | undefined`
ビューア上のピクセル座標です。
### > getTerrainHeightAsync
[Section titled “> getTerrainHeightAsync”](#-getterrainheightasync)
指定した位置の地形の高さを返します。これは非同期関数です。
#### 構文
[Section titled “構文”](#構文-11)
```ts
reearth.viewer.tools.getTerrainHeightAsync: (
lng: number,
lat: number
) => Promise;
```
#### パラメータ
[Section titled “パラメータ”](#パラメータ-6)
##### lng
[Section titled “lng”](#lng)
**型** `number`
位置の経度です。
##### lat
[Section titled “lat”](#lat)
**型** `number`
位置の緯度です。
#### 戻り値
[Section titled “戻り値”](#戻り値-11)
**型** `Promise`
指定した位置の地形の高さです。
### > getGlobeHeight
[Section titled “> getGlobeHeight”](#-getglobeheight)
指定した位置の地表の高さを返します。
#### 構文
[Section titled “構文”](#構文-12)
```ts
reearth.viewer.tools.getGlobeHeight: (
lng: number,
lat: number
) => number | undefined;
```
#### パラメータ
[Section titled “パラメータ”](#パラメータ-7)
##### lng
[Section titled “lng”](#lng-1)
**型** `number`
位置の経度です。
##### lat
[Section titled “lat”](#lat-1)
**型** `number`
位置の緯度です。
#### 戻り値
[Section titled “戻り値”](#戻り値-12)
**型** `number | undefined`
指定した位置の地表の高さです。
### > getCurrentLocationAsync
[Section titled “> getCurrentLocationAsync”](#-getcurrentlocationasync)
ユーザーの現在位置を返します。これはブラウザの Geolocation API を使用する非同期関数です。
#### 構文
[Section titled “構文”](#構文-13)
```ts
reearth.viewer.tools.getCurrentLocationAsync: (
options?: Options
) => Promise;
```
#### パラメータ
[Section titled “パラメータ”](#パラメータ-8)
##### options
[Section titled “options”](#options)
**型** `Options`(省略可能)
以下のパラメータを含むオプションオブジェクトです。
* **maximumAge:** キャッシュされた位置情報の最大有効期間(ミリ秒)です。デフォルト値は `0` です。
* **timeout:** 位置情報の取得を待機する最大時間(ミリ秒)です。デフォルト値は `10,000ms` です。
* **enableHighAccuracy:** 高精度の位置情報をリクエストするかどうかです。デフォルト値は `false` です。
ノート
オプションの詳細については [Geolocation.getCurrentPosition()](https://developer.mozilla.org/docs/Web/API/Geolocation/getCurrentPosition) を参照してください。
#### 戻り値
[Section titled “戻り値”](#戻り値-13)
**型** `Promise`
```ts
type Location = {
lat: number;
lng: number;
height: number;
};
```
ユーザーの現在位置です。
### > cartographicToCartesian
[Section titled “> cartographicToCartesian”](#-cartographictocartesian)
地理座標をデカルト座標に変換します。
#### 構文
[Section titled “構文”](#構文-14)
```ts
reearth.viewer.tools.cartographicToCartesian: (
lng: number,
lat: number,
height: number,
options?: { useGlobeEllipsoid?: boolean }
) => [x: number, y: number, z: number] | undefined;
```
#### パラメータ
[Section titled “パラメータ”](#パラメータ-9)
##### lng
[Section titled “lng”](#lng-2)
**型** `number`
位置の経度です。
##### lat
[Section titled “lat”](#lat-2)
**型** `number`
位置の緯度です。
##### height
[Section titled “height”](#height)
**型** `number`
位置の高さです。
##### options
[Section titled “options”](#options-1)
**型** `{ useGlobeEllipsoid?: boolean }`(省略可能)
* **useGlobeEllipsoid:** グローブの楕円体を使用するかどうかを示す真偽値です。デフォルト値は `false` です。
#### 戻り値
[Section titled “戻り値”](#戻り値-14)
**型** `[x: number, y: number, z: number] | undefined`
デカルト座標の位置です。
### > cartesianToCartographic
[Section titled “> cartesianToCartographic”](#-cartesiantocartographic)
デカルト座標を地理座標に変換します。
#### 構文
[Section titled “構文”](#構文-15)
```ts
reearth.viewer.tools.cartesianToCartographic: (
x: number,
y: number,
z: number,
options?: { useGlobeEllipsoid?: boolean }
) => [lng: number, lat: number, height: number] | undefined;
```
#### パラメータ
[Section titled “パラメータ”](#パラメータ-10)
##### x
[Section titled “x”](#x-1)
**型** `number`
位置の x 座標です。
##### y
[Section titled “y”](#y-1)
**型** `number`
位置の y 座標です。
##### z
[Section titled “z”](#z)
**型** `number`
位置の z 座標です。
##### options
[Section titled “options”](#options-2)
**型** `{ useGlobeEllipsoid?: boolean }`(省略可能)
* **useGlobeEllipsoid:** グローブの楕円体を使用するかどうかを示す真偽値です。デフォルト値は `false` です。
#### 戻り値
[Section titled “戻り値”](#戻り値-15)
**型** `[lng: number, lat: number, height: number] | undefined`
地理座標の位置です。
### > transformByOffsetOnScreen
[Section titled “> transformByOffsetOnScreen”](#-transformbyoffsetonscreen)
スクリーン上のオフセットによって位置を変換します。
#### 構文
[Section titled “構文”](#構文-16)
```ts
reearth.viewer.tools.transformByOffsetOnScreen: (
rawPosition: [x: number, y: number, z: number],
screenOffset: [x: number, y: number]
) => [x: number, y: number, z: number] | undefined;
```
#### パラメータ
[Section titled “パラメータ”](#パラメータ-11)
##### rawPosition
[Section titled “rawPosition”](#rawposition)
**型** `[x: number, y: number, z: number]`
地球上の元の位置です。
##### screenOffset
[Section titled “screenOffset”](#screenoffset)
**型** `[x: number, y: number]`
スクリーン上のオフセットです。
#### 戻り値
[Section titled “戻り値”](#戻り値-16)
**型** `[x: number, y: number, z: number] | undefined`
変換後の位置です。
### > isPositionVisibleOnGlobe
[Section titled “> isPositionVisibleOnGlobe”](#-ispositionvisibleonglobe)
指定した位置がグローブ上で表示可能かどうかを確認します。
#### 構文
[Section titled “構文”](#構文-17)
```ts
reearth.viewer.tools.isPositionVisibleOnGlobe: (
position: [x: number, y: number, z: number]
) => boolean;
```
#### パラメータ
[Section titled “パラメータ”](#パラメータ-12)
##### position
[Section titled “position”](#position-1)
**型** `[x: number, y: number, z: number]`
地球上の位置です。
#### 戻り値
[Section titled “戻り値”](#戻り値-17)
**型** `boolean`
指定した位置がグローブ上で表示可能かどうかを示す真偽値です。
## イベント
[Section titled “イベント”](#イベント)
ノート
共通イベントメソッド(`on`、`off`)の詳細については、[イベント](/ja/developer/plugin/api-reference/events) ページを参照してください。
### resize
[Section titled “resize”](#resize)
`resize` イベントは、ビューアがリサイズされたときにトリガーされます。
#### 構文
[Section titled “構文”](#構文-18)
```ts
reearth.viewer.on("resize", ({width: number, height: number, isMobile:boolean}) => void);
```
#### パラメータ
[Section titled “パラメータ”](#パラメータ-13)
* **width:** ビューポートの幅です。
* **height:** ビューポートの高さです。
* **isMobile:** ビューポートがモバイルデバイスかどうかを示す真偽値です。bowser のユーザーエージェント検出に基づき判定されます。
#### 使用例
[Section titled “使用例”](#使用例-2)
```javascript
reearth.viewer.on("resize", ({ width, height, isMobile }) => {
console.log(`width: ${width}, height: ${height}, isMobile: ${isMobile}`);
});
```
### マウスイベント
[Section titled “マウスイベント”](#マウスイベント)
ビューアにはリッスン可能なマウスイベントのセットがあります。これらはすべて同じパラメータを持ちます。
サポートされているイベントは以下のとおりです。
* click
* doubleClick
* mouseDown
* mouseUp
* rightClick
* rightDown
* rightUp
* middleClick
* middleDown
* middleUp
* mouseMove
* mouseEnter
* mouseLeave
* wheel
#### 構文
[Section titled “構文”](#構文-19)
```ts
reearth.viewer.on("click", (event: MouseEvent)=> void);
```
#### パラメータ
[Section titled “パラメータ”](#パラメータ-14)
**event:** MouseEvent
```ts
type MouseEvent = {
x?: number;
y?: number;
lat?: number;
lng?: number;
height?: number;
layerId?: string;
delta?: number;
};
```
* **x:** ビューアを基準としたカーソルの x 座標です。
* **y:** ビューアを基準としたカーソルの y 座標です。
* **lat:** 地球上のカーソルの緯度です。
* **lng:** 地球上のカーソルの経度です。
* **height:** 地球上のカーソルの高さです。
* **layerId:** カーソルが乗っているオブジェクトのレイヤ ID です。
* **delta:** ホイールイベントのデルタ値です。
#### 使用例
[Section titled “使用例”](#使用例-3)
```javascript
reearth.viewer.on("mouseMove", ({ lat, lng, height }) => {
console.log(`lat: ${lat}, lng: ${lng}, height: ${height}`);
});
```
# 例
> 機能別に Visualizer プラグインの例を紹介します。
プラグインプレイグラウンドには、すぐに動かせるサンプルプラグイン(プリセット)が用意されています。ブラウザ上で開いて実行し、そのまま編集して試せるため、動作する実例を見て学ぶのに最適です。
[プラグインプレイグラウンド](https://visualizer.reearth.io/plugin-playground?plugin-id=my-plugin) を開き、**Plugins** パネルからプリセットを選択してコードを読み込み、実行してください。例は Playground 内と同じカテゴリで分類しています。
各プリセットは、**Share** ボタンで共有リンクをコピーするか、**Export** ボタンで `.zip` をダウンロードできます。非常に大きいプリセットはリンク共有できず、エクスポートのみ対応します。
## User Interface
[Section titled “User Interface”](#user-interface)
`reearth.ui` および関連 API による、パネル、ナビゲーション、ポップアップ、ダイアログなどのカスタム UI 構築。
* **Responsive Panel**: ユーザーがリスト項目を追加/削除できるパネルウィジェット
* **Sidebar**: 検索バーとメニュー項目を持つ折りたたみ式サイドバー
* **Header**: ロゴとメニューリンクを備えた固定トップナビゲーションバー
* **Popup**: ポップアップウィンドウの開閉、再配置、メッセージング(`reearth.popup` も使用)
* **Modal Window**: モーダルダイアログの表示と、メッセージ受信によるクローズ(`reearth.modal` を使用)
## Data
[Section titled “Data”](#data)
プラグイン、UI、Visualizer 間でのデータ受け渡し、およびクライアント側でのデータ保存。
* **Messenger Between Extension and Visualizer**: マップクリック座標を取得し、そこへカメラを飛ばす(`reearth.viewer`、`reearth.extension` を使用)
* **Messenger Between Extensions**: 2 つのウィジェット拡張間で双方向メッセージング(`reearth.extension` を使用)
* **Extension Property**: `reearth.yml` の schema で定義したプロパティを読み取り表示(`reearth.extension` を使用)
* **Client Storage**: ライト/ダークテーマの選択を保存し、次回も維持(`reearth.data` を使用)
## Viewer & Scene Settings
[Section titled “Viewer & Scene Settings”](#viewer--scene-settings)
`reearth.viewer` を使ったシーン環境の制御と、ビューア状態の取得。
* **Enable Shadow Style**: スイッチでシーンの影描画を切り替える
* **Enable Terrain**: Cesium World Terrain と depth testing を切り替える
* **Take Screenshot**: 現在の 3D ビューを PNG としてダウンロード
* **Mouse Events**: クリック地点の緯度・経度・高さを表示
* **Get Current Location**: デバイスの現在地を取得してカメラを移動(`reearth.camera` も使用)
## Manage Layer
[Section titled “Manage Layer”](#manage-layer)
`reearth.layers` による、多様な形式のデータレイヤの追加と制御。
* **Add GeoJSON**: GeoJSON レイヤ(インライン/URL)+ マーカー/ポリゴン/ポリライン
* **Add Large GeoJSON**: `useAsResource` フラグで大規模 GeoJSON を最適化
* **Add CZML**: CZML レイヤ(data URI/URL)
* **Add KML**: KML レイヤ(data URI/URL)
* **Add CSV**: URL の CSV からレイヤ追加(lat/lng 列をマーカーにマッピング)
* **Add 3D Tiles**: 3D Tiles レイヤ(基本色/PBR スタイル)
* **Add Photogrammetric 3D Model**: 写真測量 3D Tiles データセット
* **Add Point Cloud**: 3D Tiles 形式の点群データセット
* **Add OSM 3D Tiles**: 組み込み `osm-buildings` タイプによる OSM 建物表示
* **Add WMS**: リモートサーバーの WMS タイルレイヤ
* **Add Google Photorealistic 3D Tiles**: Google のフォトリアルタイル(Google Maps API キーが必要)
* **Hide, Fly To, Delete Layer**: レイヤ単位の表示/非表示、fly-to、削除操作(`reearth.camera` も使用)
* **Override Layer Data**: ポリゴンのジオメトリをその場で更新
* **Show Selected Feature Information**: 選択フィーチャーのプロパティを選択時に表示
* **Add Infobox to Show All Properties**: すべてのプロパティを表示するインフォボックス
* **Add Infobox to Show Specific Properties**: 指定したプロパティのみ表示するインフォボックス
* **Add Infobox to Show Rich Blocks**: テキスト/画像/Markdown/動画などのリッチブロックを持つインフォボックス
## Manage Layer Style
[Section titled “Manage Layer Style”](#manage-layer-style)
共有プロパティから条件分岐、フィーチャーベースのルールまで、レイヤスタイルの適用。
* **Layer Styling Examples**: GeoJSON / CZML / KML / CSV に同じスタイリングを適用
* **Feature Style 3D Tiles**: 3D Tiles の color / PBR / shadows / highlight / wireframe
* **Feature Style 3D Model**: タイムライン駆動のアニメーション GLTF モデルのスタイリング(`reearth.timeline` も使用)
* **Override Style**: 高さに応じた 2 種のカラーグラデーションを切り替える
* **Style With Condition**: 高さ範囲に応じて色を割り当てる条件式
* **Filter Features by Style**: プロパティ条件でマーカーを表示/非表示
## Camera
[Section titled “Camera”](#camera)
`reearth.camera` によるカメラ移動と制御。
* **Zoom In Out**: ズームイン/ズームアウトボタン
* **Camera Rotation**: ターゲットの周りにカメラを連続回転
* **Camera Position**: ライブなカメラ位置を追跡し、手動で新しい値を適用
## Timeline
[Section titled “Timeline”](#timeline)
`reearth.timeline` による時間再生制御と、時間ベースのアニメーション。
* **Playback Control**: play/pause、速度、range-type の制御+ライブ時計
* **Time Driven Features**: 時間とともに押し出し高さが変わる CZML ポリゴン(`reearth.layers` も使用)
* **Time Driven Path**: 時間サンプル位置により 3D 列車モデルをルートに沿ってアニメーション(`reearth.layers` も使用)
# 公式プラグイン
> Re:Earth チームが管理するプラグインを紹介します。
公式プラグインは Re:Earth チームが開発・保守しているプラグインです。すぐにインストールして利用でき、プラグイン開発の実用的な参考にもなります。以下は Re:Earth Visualizer Plugins Hub で公開されているものです。
## CMS Data Visualizer
[Section titled “CMS Data Visualizer”](#cms-data-visualizer)
CMS のデータを 3D マップ上に可視化し、マーカーや情報表示をカスタマイズできます。
[View on GitHub](https://github.com/reearth-plugins/cms-data-visualizer-plugin)
## CMS CSV Importer
[Section titled “CMS CSV Importer”](#cms-csv-importer)
Visualizer エディタから CSV データを CMS のモデルへ直接インポートします。
[View on GitHub](https://github.com/reearth-plugins/cms-csv-importer)
## Legend Panel
[Section titled “Legend Panel”](#legend-panel)
分かりやすい地図凡例を作成するためのカスタマイズ可能な凡例パネル。React / TypeScript / Tailwind CSS で構築されています。
[View on GitHub](https://github.com/reearth-plugins/legend-panel-plugin)
## Navigation Panel
[Section titled “Navigation Panel”](#navigation-panel)
滑らかなカメラ移動とズーム操作を、視覚的なフィードバック付きで提供する直感的なナビゲーションコントロールパネル。
[View on GitHub](https://github.com/reearth-plugins/navigation-panel-plugin)
***
公式プラグインに加え、コミュニティ製プラグインも含む最新一覧は、[Re:Earth Visualizer Plugins Hub](https://github.com/reearth-plugins/visualizer-plugin-hub) を参照してください。
# プラグインプレイグラウンドで動かす
> ローカル開発環境を準備せずにプラグインを実行、編集します。
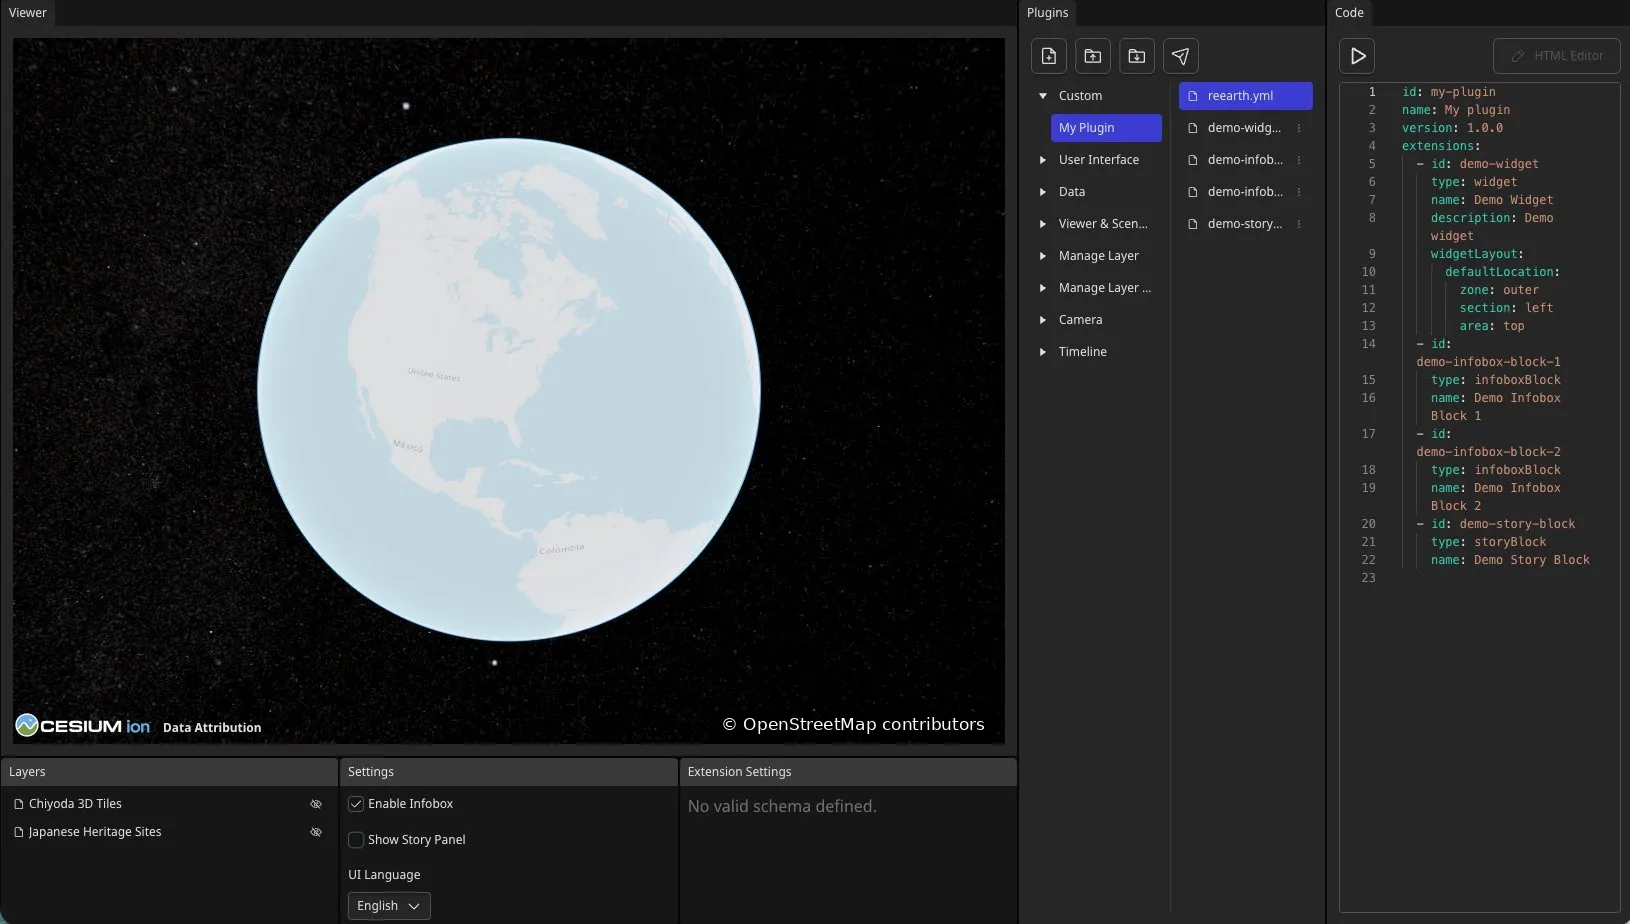
## プラグインプレイグラウンドで動かす
[Section titled “プラグインプレイグラウンドで動かす”](#プラグインプレイグラウンドで動かす)
プラグインプレイグラウンドは、Re:Earth Visualizer プラグインを**ブラウザ上で**作成・検証できるインタラクティブ環境です。コードを書いて実行し、結果をライブマップ上で即座に確認できます。Playground の核心はこの「変更 → 実行 → 観察」の高速ループにあり、すべてが 1 画面で完結するため、パッケージングやインストールなしにアイデアを試してすぐ効果を確認できます。インストール作業やローカル環境構築が不要なため、プラグインに初めて触れる場合でも、アイデアのプロトタイピングでも、最速で試せます。
Playground は次のリンクから開けます:[プラグインプレイグラウンド](https://visualizer.reearth.io/plugin-playground?plugin-id=my-plugin)
## Playground のレイアウト
[Section titled “Playground のレイアウト”](#playground-のレイアウト)
Playground は 3 つのカラムに分かれています。
* **Viewer**(左)— プラグインがリアルタイムに動作するライブマップ。下には現在のシーンの **Layers** / **Settings** / **Extension Settings** パネルがあります。
* **Plugins**(中央)— 利用可能なプラグインと、選択したプラグインを構成するファイル(`reearth.yml` や各拡張の JavaScript ファイルなど)を一覧表示します。上部にはプラグイン/ファイル管理のボタン列があります。
* **Code**(右)— 選択したファイル内容を表示するコードエディタ。ここでプラグインコードを編集します。
Playground を開くと、**Custom** カテゴリに **My Plugin** というデフォルトプラグインが既にロードされています。`reearth.yml` とサンプル拡張ファイルが事前に用意されているので、そのまま実行することも、出発点として改変することもできます。
## Plugins パネルのボタン
[Section titled “Plugins パネルのボタン”](#plugins-パネルのボタン)
**Plugins** パネル上部のボタン列で作業を管理できます。
* **Add file** — 現在のプラグインに新しいファイルを追加します。
* **Import plugin** — 既存のプラグインを Playground に読み込みます。
* **Export plugin** — 現在のプラグインを `reearth.yml` と JavaScript ファイルを含む `.zip` としてダウンロードします。これは Re:Earth Visualizer にインストールするのと同じ形式です。
* **Share plugin** — プラグインの共有リンクをクリップボードにコピーし、他の人に送れるようにします。
## プリセット例を動かす
[Section titled “プリセット例を動かす”](#プリセット例を動かす)
Playground には、**User Interface**、**Data**、**Viewer & Scene Settings**、**Manage Layer**、**Camera**、**Timeline** などのカテゴリに分かれた、すぐに動かせるサンプルプラグイン(プリセット)が用意されています。これらは動作する実例として最適で、実際のコードから学べます。
プリセットを実行する手順:
1. **Plugins** パネルでカテゴリを選び、プリセットを 1 つ選択します。コードが **Code** エディタに読み込まれます。
2. **Code** パネル上部の **run** ボタンをクリックします。プラグインが実行され、**Viewer** のマップ上に表示されます。
3. **Code** エディタでコードを編集し、再度 **run** をクリックすると変更が反映されます。
この「ロード → 実行 → 編集」のループが Playground 作業の中心で、各変更の効果をすぐに確認できます。
## HTML Editor で UI を編集する
[Section titled “HTML Editor で UI を編集する”](#html-editor-で-ui-を編集する)
拡張の UI は、JavaScript ファイル内のバッククォート(\`)文字列として HTML を記述します。数行なら問題ありませんが、長くなると編集しづらくなります。
その場合、**Code** パネル上部の **HTML Editor** ボタンをクリックしてください。UI 用の専用エディタが開き、通常のコードエディタと同様に HTML / CSS / JavaScript を書けます(シンタックスハイライトあり)。編集後に **Submit** をクリックすると、変更がプラグインに反映されます。
## プラグインをエクスポートする
[Section titled “プラグインをエクスポートする”](#プラグインをエクスポートする)
プラグインが期待通りに動作したら、**Plugins** パネルの **Export plugin** をクリックして `.zip` としてダウンロードします。
* ダウンロードした `.zip` は、任意の Re:Earth Visualizer プロジェクトにインストールできます。
* あるいは、「[ローカル開発環境をセットアップする](/ja/developer/plugin/get-started/set-up-a-local-development-environment/)」を参照して、ローカル環境で開発を続けることもできます。
# ローカル開発環境をセットアップする
> Visualizer プラグイン開発用のローカル環境を準備します。
ノート
このセクションでは、現在のテンプレートベースのワークフローを説明します。Re:Earth Visualizer のプラグイン CLI は現在利用できません。
プラグインプレイグラウンドは素早い試作に最適ですが、本格的なプラグインを作る場合はローカル開発環境が適しています。自分のエディタでコードを書き、`.zip` を手動でビルドして再インストールすることなく、Re:Earth Visualizer 上でほぼ即時に変更を確認できます。
このワークフローは次の 2 つで構成されます:
* テンプレートから作成するプラグインプロジェクト
* DEV\_PLUGIN 機能を使い、プレビューサーバーからプラグインを直接読み込むローカル版 Re:Earth Visualizer
## 前提条件
[Section titled “前提条件”](#前提条件)
このガイドでは、Re:Earth Visualizer がローカルで起動しており `http://localhost:3000` でアクセスできることを前提とします。Visualizer 本体(サーバー/DB を含む)のセットアップは別の手順です。詳細は [reearth-visualizer repository](https://github.com/reearth/reearth-visualizer) を参照してください。
また、[Node.js](https://nodejs.org/) と [Yarn](https://yarnpkg.com/) がインストールされている必要があります。
## テンプレートからプラグインを作成する
[Section titled “テンプレートからプラグインを作成する”](#テンプレートからプラグインを作成する)
推奨する開始点は、React / ShadCN / Tailwind CSS を用いた [Re:Earth Visualizer Plugin ShadCN Template](https://github.com/reearth-plugins/reearth-visualizer-plugin-shadcn-template) です。
ノート
このテンプレートは便利な出発点ですが必須ではありません。どのフレームワークやライブラリを使っても構いません。重要なのは DEV\_PLUGIN 機能で、ローカルのプレビューサーバーからプラグインを読み込める点です。
テンプレートからプロジェクトを作成し、ターミナルでそのディレクトリを開いたら:
1. プロジェクトディレクトリへ移動:
```bash
cd your-new-plugin
```
2. 依存関係をインストール:
```bash
yarn install
```
3. 必要ファイルを生成するため、初回ビルドを実行:
```bash
yarn build
```
4. 開発/プレビューサーバーを起動:
```bash
yarn dev-build
```
この最後のコマンドは、保存のたびに自動でビルドし、`http://localhost:5005` のプレビューサーバーから配信します。
## Re:Earth Visualizer で DEV\_PLUGIN を有効化する
[Section titled “Re:Earth Visualizer で DEV\_PLUGIN を有効化する”](#reearth-visualizer-で-dev_plugin-を有効化する)
次に、ローカル Visualizer がそのプレビューサーバーからプラグインをロードするよう設定します。
1. ローカル Re:Earth Visualizer プロジェクトの `web` ディレクトリへ移動し、まだ存在しなければ `.env` ファイルを作成します:
```bash
cd web
touch .env
```
2. `env` にプレビューサーバー URL を追加します:
```bash
REEARTH_WEB_DEV_PLUGIN_URLS='["http://localhost:5005"]'
```
`.env` を保存すると Web サーバーは自動的に再起動します。
## ウィジェットプラグインをプロジェクトに追加する
[Section titled “ウィジェットプラグインをプロジェクトに追加する”](#ウィジェットプラグインをプロジェクトに追加する)
両方のサーバーが起動したら、Visualizer 上でプラグインをホストするプロジェクトを用意します。
1. `http://localhost:3000` でローカル Re:Earth Visualizer を開きます。
2. ダッシュボードから新しいプロジェクトを作成します。
3. プロジェクトをダブルクリックして開きます。
4. エディタのヘッダーで **Install Dev Plugins** をクリックし、プレビューサーバーからプラグインを取得してインストールします。
5. **Widgets** タブを開き、シーンにプラグインのウィジェットを追加します。
ノート
この手順はウィジェット拡張向けです。InfoboxBlock や StoryBlock の拡張を持つプラグインもインストール手順(ステップ 1〜4)は同じですが、シーンへの追加は **Widgets** タブではなく、レイヤのインフォボックス設定やストーリーページから行います。各拡張タイプがどこに表示されるかは「[拡張タイプの違い](/ja/developer/plugin/overview/extension-types/)」を参照してください。
## 開発ループ
[Section titled “開発ループ”](#開発ループ)
接続できると、日々の作業はとても短くなります。
1. プラグインコードを変更して保存すると、自動的に再ビルドされます。
2. Visualizer のエディタヘッダーで **Reload Dev Plugin Extensions** をクリックすると、更新された拡張コードが読み込まれます。
ページ全体を再読み込みするのではなく、プラグインだけが再読み込みされるため、変更はほぼ即時に反映されます。
## DEV\_PLUGIN の 2 つのボタン
[Section titled “DEV\_PLUGIN の 2 つのボタン”](#dev_plugin-の-2-つのボタン)
DEV\_PLUGIN ワークフローでは、Visualizer のエディタヘッダーに 2 つのボタン(どちらもパズルピースアイコン)が追加されます。
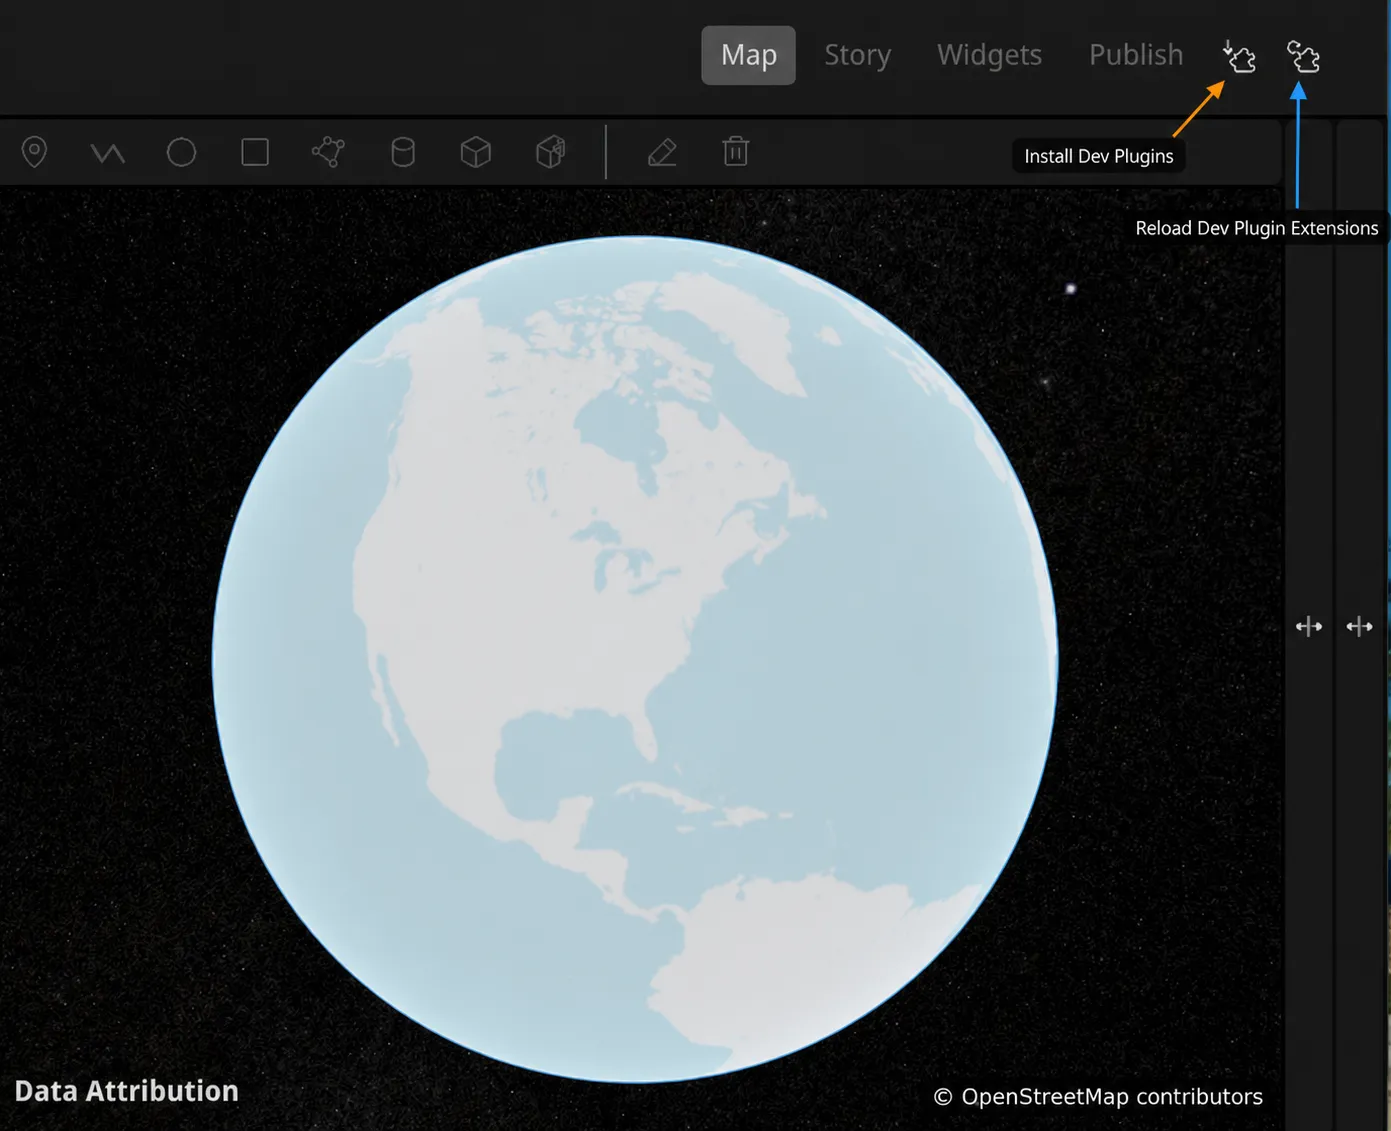
* **Install Dev Plugins** — プレビューサーバーからプラグインを取得し、`.zip` にパッケージ化してインストールします。
* **Reload Dev Plugin Extensions** — ページを再読み込みせずに、プレビューサーバーから拡張コードを再読み込みします。
どちらを押すべきかは、変更内容に応じて次の表で判断してください。
| 変更したもの | 使用するボタン |
| ------------------------------ | ---------------------------- |
| プロジェクトへの初回セットアップ | Install Dev Plugins |
| 拡張コード(TypeScript / JavaScript) | Reload Dev Plugin Extensions |
| `reearth.yml`(プラグインマニフェスト) | Install Dev Plugins |
# ユーザーが設定できるプロパティを受け取る
> インスペクターでユーザーが設定したプロパティを読み取ります。
このガイドを終えると、Re:Earth Visualizer のインスペクターパネルからユーザーが設定できる項目をプラグインに追加し、拡張コードからその値を読み取れるようになります。このガイドは、`reearth.yml` と拡張ファイルの基本的な構造を把握していることを前提としています。
ユーザーが設定できるプロパティを追加するには、`reearth.yml` でスキーマを宣言します。Re:Earth Visualizer がそのスキーマをインスペクターパネルに表示し、拡張コードからは `reearth.extension` を使って値を読み取れます。
## サンプルコード
[Section titled “サンプルコード”](#サンプルコード)
この例では、ユーザーが背景色を選択できるカラーピッカーを追加します。拡張コードはその色を読み取り、UI に渡してパネルの背景に適用します。
**reearth.yml**
```yaml
id: accept-props-plugin
name: Accept Props Plugin
version: 1.0.0
extensions:
- id: accept-props
type: widget
name: Accept Props
schema:
groups:
- id: appearance
fields:
- id: primary_color
type: string
ui: color
title: Primary color
defaultValue: "#3a86ff"
```
**accept-props.js**
```javascript
const color =
reearth.extension.widget?.property?.appearance?.primary_color ?? "#3a86ff";
reearth.ui.show(`
`);
```
## 結果
[Section titled “結果”](#結果)
パネルが地図上に表示されます。インスペクターパネルで別の色を選択すると、プラグインをリロードした際にその色がパネルに反映されます。
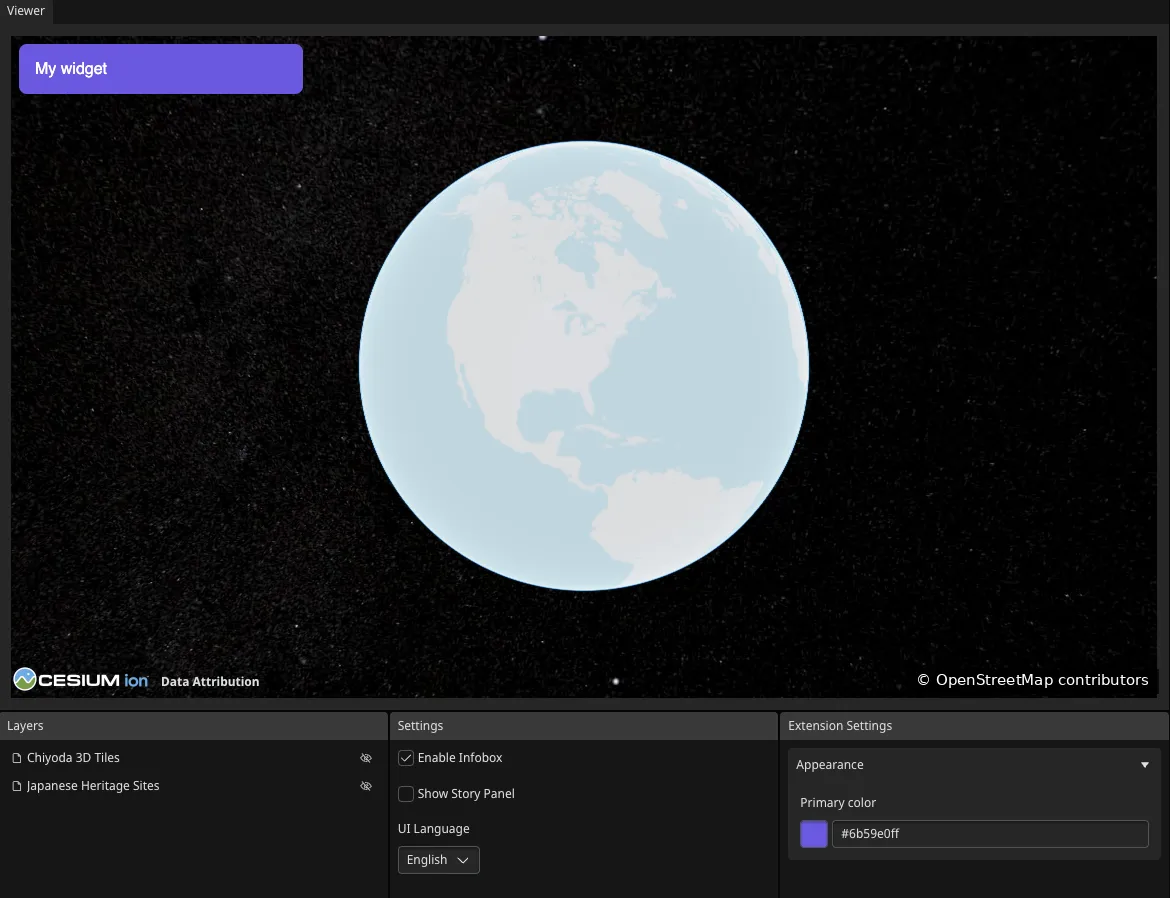
地図データ提供:[OpenStreetMap](https://www.openstreetmap.org/copyright)
## 仕組み
[Section titled “仕組み”](#仕組み)
**`reearth.yml` でスキーマを宣言する**
スキーマはウィジェットの `schema` キーの下に記述します。`groups` は設定パネルのセクションを定義し、各 `fields` がひとつの設定項目に対応します。
```yaml
schema:
groups:
- id: appearance
fields:
- id: primary_color
type: string
ui: color
title: Primary color
defaultValue: "#3a86ff"
```
* **`id`**: コードでフィールドを参照するために使う識別子。
* **`type`**: フィールドの値の型。`string`、`number`、`bool` などが使えます。
* **`ui`**: インスペクターに表示するウィジェットの種類。`color` を指定するとカラーピッカーが表示されます。
* **`title`**: インスペクターに表示されるラベル。
* **`defaultValue`**: 初期値。
**コードで値を読み取る**
`reearth.extension` を通じてプロパティにアクセスします。パスは `widget → property → <グループ ID> → <フィールド ID>` の順になります。
```javascript
const color =
reearth.extension.widget?.property?.appearance?.primary_color ?? "#3a86ff";
```
オプショナルチェーン(`?.`)を使うのは、ウィジェット・グループ・フィールドがどれかひとつでも未設定の場合に `undefined` を返すためです。`??` はフォールバック値として機能します。
## 次のステップ
[Section titled “次のステップ”](#次のステップ)
* [reearth.extension API リファレンス](https://visualizer.developer.reearth.io/plugin-api/extension/): ウィジェット・インフォボックスブロック・ストーリーブロックのプロパティの完全な一覧
* [プラグインの構造](/ja/developer/plugin/overview/plugin-structure/): スキーマフィールドの完全なリストと各タイプの説明
# レイヤを追加する
> データをレイヤとして Visualizer のシーンに追加します。
このガイドを終えると、プラグインから地図にレイヤを追加できるようになります(例:特定の座標にマーカーを配置する)。このガイドは、`reearth.yml` と拡張ファイルの基本的な構造を把握していることを前提としています。
レイヤを追加するには、レイヤのデータと表示方法を記述したレイヤオブジェクトを `reearth.layers.add` に渡します。このメソッドは新しいレイヤの ID を返します。この ID を保持しておくと、後でレイヤを変更・削除できます。
## サンプルコード
[Section titled “サンプルコード”](#サンプルコード)
この例では、東京の座標に赤いマーカーをひとつ追加します。
**reearth.yml**
```yaml
id: add-layer-plugin
name: Add Layer Plugin
version: 1.0.0
extensions:
- id: add-layer
type: widget
name: Add Layer
```
**add-layer.js**
```javascript
const layerId = reearth.layers.add({
type: "simple",
data: {
type: "geojson",
value: {
type: "FeatureCollection",
features: [
{
type: "Feature",
properties: {},
geometry: {
type: "Point",
coordinates: [139.97422779688281, 35.74642872517698],
},
},
],
},
},
marker: {
style: "point",
pointColor: "#ff0000",
pointSize: 12,
},
});
if (layerId) {
console.log("レイヤを追加しました。ID:", layerId);
} else {
console.log("レイヤの追加に失敗しました。");
}
reearth.camera.flyTo(
{
lat: 35.74642872517698,
lng: 139.97422779688281,
height: 200000,
},
{ duration: 2 }
);
```
## 結果
[Section titled “結果”](#結果)
ウィジェットがロードされると、カメラが東京に移動し、指定した座標に赤いマーカーが表示されます。
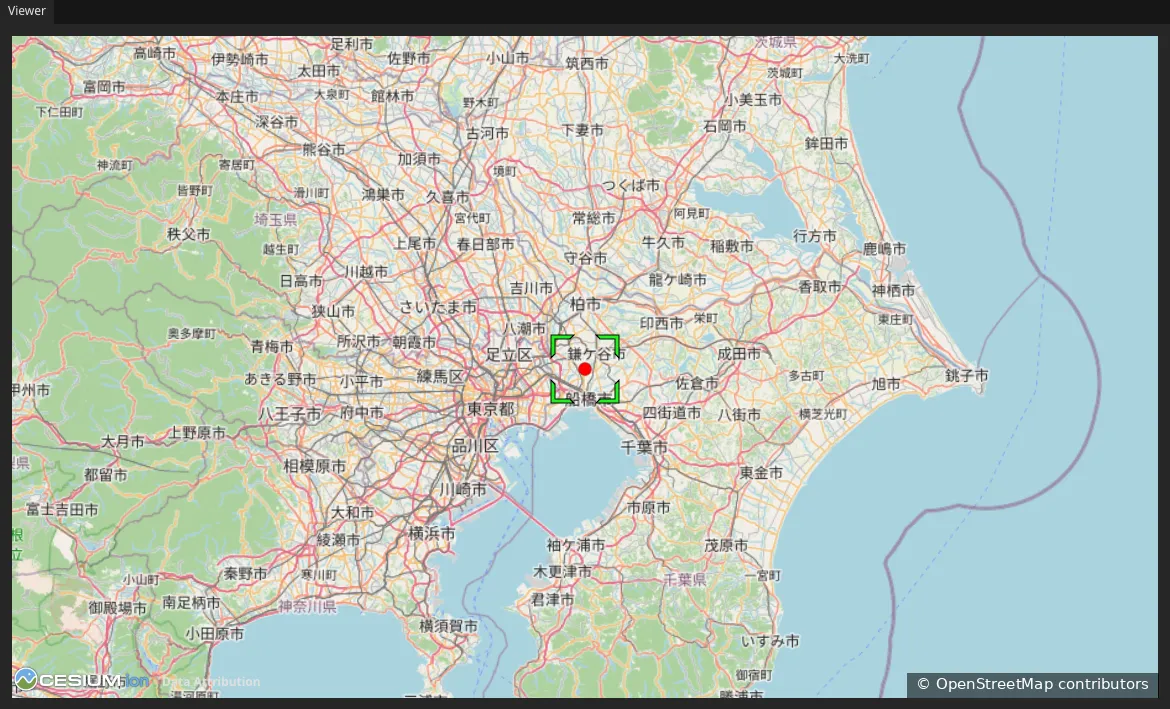
地図データ提供:[OpenStreetMap](https://www.openstreetmap.org/copyright)
## 仕組み
[Section titled “仕組み”](#仕組み)
`reearth.layers.add` にレイヤオブジェクトをひとつ渡します。オブジェクトには 3 つの重要な部分があります。
* **`type`**: レイヤの種類。データを直接提供するレイヤには `"simple"` を使います。ほとんどの場合これで対応できます。
* **`data`**: レイヤのソースデータを記述します。
* **`type`**: データ形式。この例では `"geojson"` を使用。他にも `"czml"`、`"csv"`、`"3dtiles"`、`"kml"` などがサポートされています。
* **`value`**: データ本体をインラインで指定。外部ソースからデータを読み込む場合は `value` の代わりに `url` を指定できます。
* **外観キー**: Re:Earth Visualizer にデータのレンダリング方法を指示します。この例では `marker` に `style: "point"`、`pointColor`、`pointSize` を指定。他の外観キーには `polyline`、`polygon`、`model` などがあります。
`reearth.layers.add` は新しいレイヤの ID を文字列で返します。レイヤを追加できなかった場合は `undefined` を返します。後で `reearth.layers.override` でレイヤを変更したり、`reearth.layers.delete` で削除したりする場合は、この ID を保持しておいてください。
ノート
`reearth.layers.delete` で削除できるのは、プラグイン API 経由で一時的に追加したレイヤのみです。保存済みプロジェクトの一部であるレイヤは削除できません。
## 次のステップ
[Section titled “次のステップ”](#次のステップ)
* [reearth.layers API リファレンス](https://visualizer.developer.reearth.io/plugin-api/layers/): レイヤオブジェクトの全項目、すべてのデータ型、外観オプション
* [reearth.camera API リファレンス](https://visualizer.developer.reearth.io/plugin-api/camera/): `flyTo` とその他のカメラ操作
* [レイヤにインフォボックスを設定する](/ja/developer/plugin/guides/configure-an-infobox-for-a-layer/): ユーザーがレイヤをクリックしたときにフィーチャの詳細を表示する
# 背景地図を変更する
> プラグインから組み込みまたはカスタムの背景地図を変更します。
このガイドを終えると、プラグインから背景地図(地球上に表示されるベース画像)を変更できるようになります。このガイドは、`reearth.yml` と拡張ファイルの基本的な構造を把握していることを前提としています。
背景地図を変更するには、`tiles` 配列を指定して `reearth.viewer.overrideProperty` を呼び出します。各エントリがひとつのタイルソースを表します。Re:Earth Visualizer にはいくつかの組み込み背景地図が用意されており、名前で選択できます。また、URL を指定してカスタムのタイルサーバーを使うこともできます。
ノート
`overrideProperty` で行った変更は一時的なものです。プロジェクトには保存されず、ページをリロードすると元に戻ります。
## サンプルコード
[Section titled “サンプルコード”](#サンプルコード)
この例では、背景地図を国土地理院標準地図に切り替えます。
**reearth.yml**
```yaml
id: basemap-plugin
name: Basemap Plugin
version: 1.0.0
extensions:
- id: basemap-demo
type: widget
name: Basemap Demo
```
**basemap-demo.js**
```javascript
reearth.viewer.overrideProperty({
tiles: [
{
id: "gsi",
type: "japan_gsi_standard",
},
],
});
```
## 結果
[Section titled “結果”](#結果)
ウィジェットがロードされると、地球のベース画像が国土地理院標準地図に切り替わります。
## 仕組み
[Section titled “仕組み”](#仕組み)
`reearth.viewer.overrideProperty` は実行時にビューアのプロパティを設定します。背景地図を変更するには `tiles` 配列を渡します。指定した画像が現在の背景地図と置き換わります。各タイルエントリには `id`(任意の一意な識別子)と、組み込みの `type` またはカスタムの `url` が必要です。
### 組み込み背景地図を使う
[Section titled “組み込み背景地図を使う”](#組み込み背景地図を使う)
Re:Earth Visualizer の組み込み背景地図を使うには、`type` に背景地図の名前を設定します。URL は不要で、各組み込み背景地図はタイルの読み込み先を既に知っています。
| タイプ | 背景地図 | Cesium Ion トークンが必要 |
| -------------------- | ------------------ | ------------------ |
| `open_street_map` | OpenStreetMap | いいえ |
| `japan_gsi_standard` | 国土地理院標準地図 | いいえ |
| `carto_light` | CARTO ライト | いいえ |
| `default` | Cesium Ion デフォルト画像 | はい |
| `default_road` | Cesium Ion ロードマップ | はい |
| `default_label` | Cesium Ion ラベル付き画像 | はい |
| `black_marble` | 夜の地球 | はい |
「はい」と表示されている背景地図は Cesium Ion から画像を読み込むため、シーンに Cesium Ion のアクセストークンが設定されている場合のみ使用できます。
### カスタム背景地図を使う
[Section titled “カスタム背景地図を使う”](#カスタム背景地図を使う)
上記のリストにないタイルサーバーを使う場合は、標準の `{z}/{x}/{y}` テンプレート形式で `url` を指定します。
```javascript
reearth.viewer.overrideProperty({
tiles: [
{
id: "custom",
url: "https://example.com/tiles/{z}/{x}/{y}.png",
},
],
});
```
注意
各背景地図にはそれぞれ利用規約と帰属表示の要件があります。組み込み・カスタムを問わず、背景地図を使用する際はプロバイダーの帰属表示ルールに従い、公開前に利用規約を確認してください。
## 次のステップ
[Section titled “次のステップ”](#次のステップ)
* [reearth.viewer API リファレンス](https://visualizer.developer.reearth.io/plugin-api/viewer/): `overrideProperty` とその他のビューアメソッド
# プラグインと Re:Earth の間で通信する
> プラグインと Re:Earth の間でメッセージを送受信します。
このガイドを終えると、プラグインの UI(iframe)とロジック(拡張コード)の間でメッセージを双方向に送受信できるようになります。このガイドは、`reearth.yml` と拡張ファイルの基本的な構造を把握していることを前提としています。
Re:Earth Visualizer のプラグインは、ロジックを担う拡張コードと UI を担う iframe の 2 つの部分で構成されています。これらは `postMessage` / `on("message")` のパターンを使って通信します。
## サンプルコード
[Section titled “サンプルコード”](#サンプルコード)
この例では、ボタンがひとつある UI パネルを作ります。ボタンをクリックするとロジック側にメッセージが送られ、ロジック側はカメラを東京に向け、確認メッセージを UI に返します。
**reearth.yml**
```yaml
id: communicate-plugin
name: Communicate Plugin
version: 1.0.0
extensions:
- id: communicate-demo
type: widget
name: Communicate Demo
```
**communicate-demo.js**
```javascript
reearth.ui.show(`
`);
reearth.extension.on("message", (message) => {
if (message?.action === "flyToTokyo") {
reearth.camera.flyTo(
{ lat: 35.6762, lng: 139.6503, height: 150000 },
{ duration: 2 }
);
reearth.ui.postMessage({
action: "done",
message: "東京へ移動しました!",
});
}
});
```
## 結果
[Section titled “結果”](#結果)
地図上にパネルが表示されます。ボタンをクリックするとカメラが東京に向かい、ステータスメッセージが「東京へ移動しました!」に変わります。
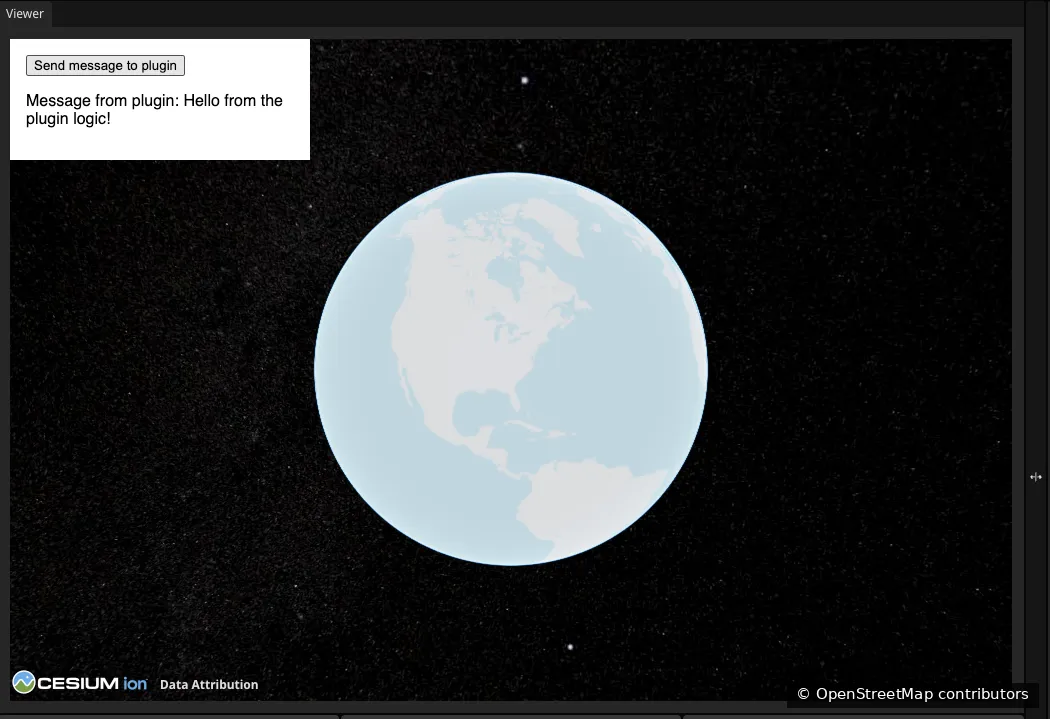
地図データ提供:[OpenStreetMap](https://www.openstreetmap.org/copyright)
## 仕組み
[Section titled “仕組み”](#仕組み)
プラグインには 2 つのメッセージの流れがあります。
**UI → ロジック**
UI(iframe)は `parent.postMessage` を使って拡張コードにメッセージを送ります。
```javascript
parent.postMessage({ action: "flyToTokyo" }, "*");
```
拡張コード側では `reearth.extension.on("message", handler)` で受け取ります。
```javascript
reearth.extension.on("message", (message) => {
if (message?.action === "flyToTokyo") {
// 処理
}
});
```
**ロジック → UI**
拡張コードは `reearth.ui.postMessage` を使って UI にメッセージを送ります。
```javascript
reearth.ui.postMessage({ action: "done", message: "東京へ移動しました!" });
```
UI 側では `window.addEventListener("message", handler)` で受け取ります。
```javascript
window.addEventListener("message", function (e) {
if (e.data?.action === "done") {
document.getElementById("status").textContent = e.data.message;
}
});
```
メッセージのペイロードには任意のシリアライズ可能な値を使えます。`action` フィールドはあくまでも規約です。何を送るかは自由に決められます。
## 次のステップ
[Section titled “次のステップ”](#次のステップ)
* [reearth.ui API リファレンス](https://visualizer.developer.reearth.io/plugin-api/ui/): `show`、`postMessage` などの完全な一覧
* [reearth.extension API リファレンス](https://visualizer.developer.reearth.io/plugin-api/extension/): メッセージイベントとプロパティアクセス
* [プラグインシステムの仕組み](/ja/developer/plugin/overview/how-the-plugin-system-works/): 2 つの部分がどのように分離されているかの詳細
# レイヤにインフォボックスを設定する
> レイヤの情報を表示するインフォボックスを設定します。
このガイドを終えると、レイヤにインフォボックスを付与できるようになります。ユーザーがそのレイヤのフィーチャをクリックすると、フィーチャの情報を表示するパネルが開きます。このガイドは、レイヤの追加に慣れていることを前提としています([レイヤを追加する](/ja/developer/plugin/guides/add-a-layer/)を参照)。
インフォボックスはレイヤ自体の `infobox` プロパティとして設定します。インフォボックスにひとつ以上のブロックを追加すると、ユーザーがそのレイヤのフィーチャを選択したときに Re:Earth Visualizer がそれらを表示します。
## サンプルコード
[Section titled “サンプルコード”](#サンプルコード)
この例では、いくつかのプロパティを持つマーカーをひとつ追加し、フィーチャが選択されたときにそのすべてのプロパティを自動で表示するインフォボックスを付与します。
**reearth.yml**
```yaml
id: infobox-demo-plugin
name: Infobox Demo Plugin
version: 1.0.0
extensions:
- id: infobox-demo
type: widget
name: Infobox Demo
```
**infobox-demo.js**
```javascript
reearth.layers.add({
type: "simple",
data: {
type: "geojson",
value: {
type: "FeatureCollection",
features: [
{
type: "Feature",
properties: {
name: "東京タワー",
height: "333 m",
category: "ランドマーク",
},
geometry: {
type: "Point",
coordinates: [139.7454, 35.6586],
},
},
],
},
},
infobox: {
blocks: [
{
pluginId: "reearth",
extensionId: "propertyInfoboxBetaBlock",
},
],
},
marker: {
style: "point",
pointColor: "#ff0000",
pointSize: 12,
},
});
reearth.camera.setView({
lat: 35.6586,
lng: 139.7454,
height: 80000,
heading: 0,
pitch: -1.5708,
roll: 0,
});
```
## 結果
[Section titled “結果”](#結果)
東京タワーの位置にマーカーが表示されます。クリックするとインフォボックスが開き、フィーチャのプロパティ(名前、高さ、カテゴリ)が一覧表示されます。
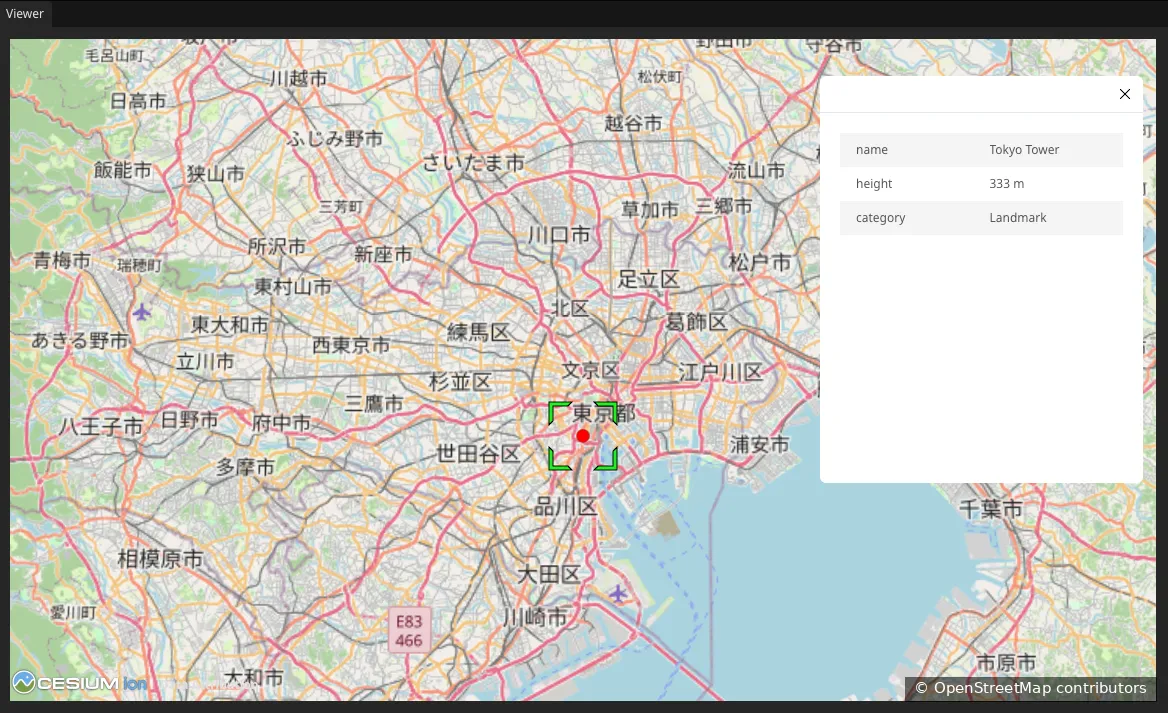
地図データ提供:[OpenStreetMap](https://www.openstreetmap.org/copyright)
## 仕組み
[Section titled “仕組み”](#仕組み)
インフォボックスはレイヤ自体に設定します。`reearth.layers.add` に渡す `infobox` プロパティを通じて定義します。
```javascript
infobox: {
blocks: [
{ pluginId: "reearth", extensionId: "propertyInfoboxBetaBlock" }
]
}
```
* **`blocks`**: インフォボックスに表示するブロックのリスト(順番通り)。
* **`pluginId`** と **`extensionId`**: 表示するブロックを識別します。ここでは `reearth` / `propertyInfoboxBetaBlock` という組み込みブロックを使用しており、選択されたフィーチャのすべてのプロパティを自動で一覧表示します。ブロックのコードを書かなくても完全なプロパティ表示が得られます。
インフォボックスに表示されるプロパティは、GeoJSON の各フィーチャの `properties` オブジェクトから取得されます。ここでは `name`、`height`、`category` です。プロパティを追加するとインフォボックスにも表示されます。
インフォボックスはレイヤに属しているため、ユーザーがそのレイヤのフィーチャを選択したときだけ表示されます。フィーチャをクリックするまでは何も表示されません。
## 次のステップ
[Section titled “次のステップ”](#次のステップ)
* [レイヤを追加する](/ja/developer/plugin/guides/add-a-layer/): このガイドの土台となるレイヤの基本
* [reearth.layers API リファレンス](https://visualizer.developer.reearth.io/plugin-api/layers/): インフォボックスとブロックのオプションを含む完全なレイヤオブジェクト
* [拡張タイプの違い](/ja/developer/plugin/overview/extension-types/): InfoboxBlock 拡張タイプとここで作ったものの関係
# UI を表示する
> Visualizer プラグインからユーザーインターフェースを表示します。
このガイドを終えると、Re:Earth Visualizer 内でプラグインのカスタム UI を描画できるようになります。ここでは、`reearth.yml` と拡張ファイルからなる基本的なプラグイン構成を理解していることを前提とします。
プラグインは `reearth.ui.show` に HTML を渡すことで UI を表示します。Re:Earth Visualizer はその HTML を iframe 内にレンダリングします。iframe は通常の Web ページのように振る舞うため、標準の HTML / CSS / JavaScript を使って任意の UI を構築できます。
## サンプルコード
[Section titled “サンプルコード”](#サンプルコード)
この例では、見出しとスタイル付きボックスを持つシンプルなパネルを描画します。
**reearth.yml**
```yaml
id: ui-demo-plugin
name: UI Demo Plugin
version: 1.0.0
extensions:
- id: ui-demo
type: widget
name: UI Demo
```
**ui-demo.js**
```javascript
reearth.ui.show(`
Hello from my plugin
This UI is rendered inside an iframe.
`);
```
## 結果
[Section titled “結果”](#結果)
このウィジェットをシーンに追加すると、メインビューにパネルが表示されます。
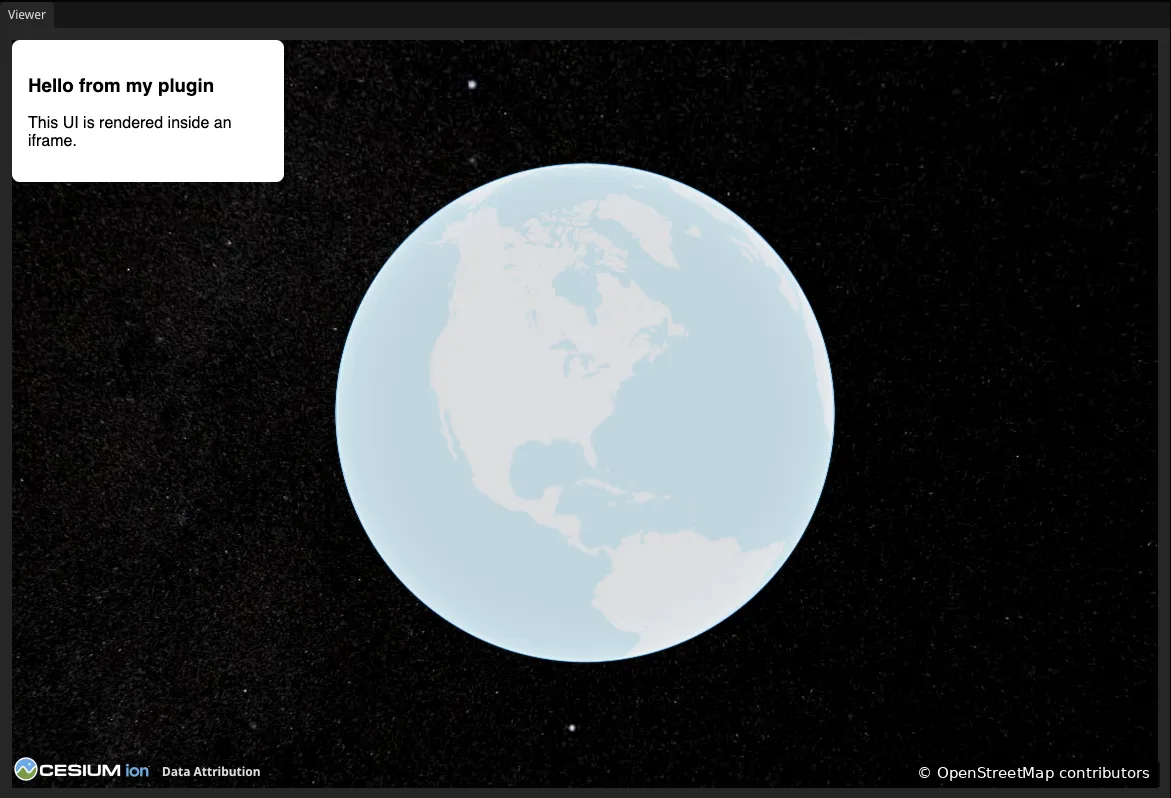
## 仕組み
[Section titled “仕組み”](#仕組み)
**`reearth.ui.show` は HTML をレンダリングします**
UI は HTML 文字列として `reearth.ui.show` に渡します。UI に必要なマークアップ、スタイル、スクリプトはすべてこの文字列内に含めます。
```javascript
reearth.ui.show(`...
`);
```
HTML は iframe 内で実行されるため、Visualizer 本体のページから隔離されます。これにより、スタイルが競合しにくく、独立した UI を作れます。
**CSS でサイズを設定します**
iframe はコンテンツに合わせてサイズが決まります。ルート要素に対して `width: 240px` のように CSS で寸法を指定してください。`html, body` に `margin: 0` を設定すると、ブラウザ既定の余白が消え、UI が端まで詰まって表示されます。
## 次に読む
[Section titled “次に読む”](#次に読む)
* [reearth.ui API リファレンス](https://visualizer.developer.reearth.io/plugin-api/ui/) — `show` / `resize` / `close` など表示関連 API の一覧
* [ユーザーが設定できるプロパティを受け取る](/ja/developer/plugin/guides/accept-user-configurable-properties/) — インスペクターから UI を設定可能にする
# 大規模データセットを最適化してレンダリングする
> 大規模データセットのレンダリング性能を改善します。
このガイドを終えると、パフォーマンスオプションを有効にして大規模な GeoJSON データセットを効率的に読み込めるようになります。このガイドは、レイヤの追加に慣れていることを前提としています([レイヤを追加する](/ja/developer/plugin/guides/add-a-layer/)を参照)。
座標が何千もある非常に大きな GeoJSON ファイルは、通常の方法で読み込むとレンダリングが遅くなることがあります。Re:Earth Visualizer には `useAsResource` というパフォーマンスオプションがあり、大規模な GeoJSON データをより効率的に処理できます。フィーチャが約 6,000 を超える GeoJSON にはこのオプションを使用してください。
## サンプルコード
[Section titled “サンプルコード”](#サンプルコード)
この例では、パフォーマンスオプションを有効にして東京エリアの境界を表す大規模な GeoJSON レイヤを追加します。
**reearth.yml**
```yaml
id: large-dataset-plugin
name: Large Dataset Plugin
version: 1.0.0
extensions:
- id: large-dataset
type: widget
name: Large Dataset
```
**large-dataset.js**
```javascript
reearth.layers.add({
type: "simple",
data: {
type: "geojson",
url: "https://reearth.github.io/visualizer-plugin-sample-data/public/geojson/tokyo-boundary.geojson",
geojson: {
useAsResource: true,
},
},
polygon: {},
});
reearth.camera.flyTo(
{ lat: 35.68, lng: 139.40, height: 176000 },
{ duration: 2 }
);
```
## 結果
[Section titled “結果”](#結果)
GeoJSON の境界データが読み込まれ、東京エリア全体にレンダリングされます。`useAsResource` が有効になっているため、Visualizer 側からのスタイリングは適用されず、デフォルトの色で表示されます。外観を変更するには、GeoJSON ファイル自体にスタイルを定義してください(下記参照)。
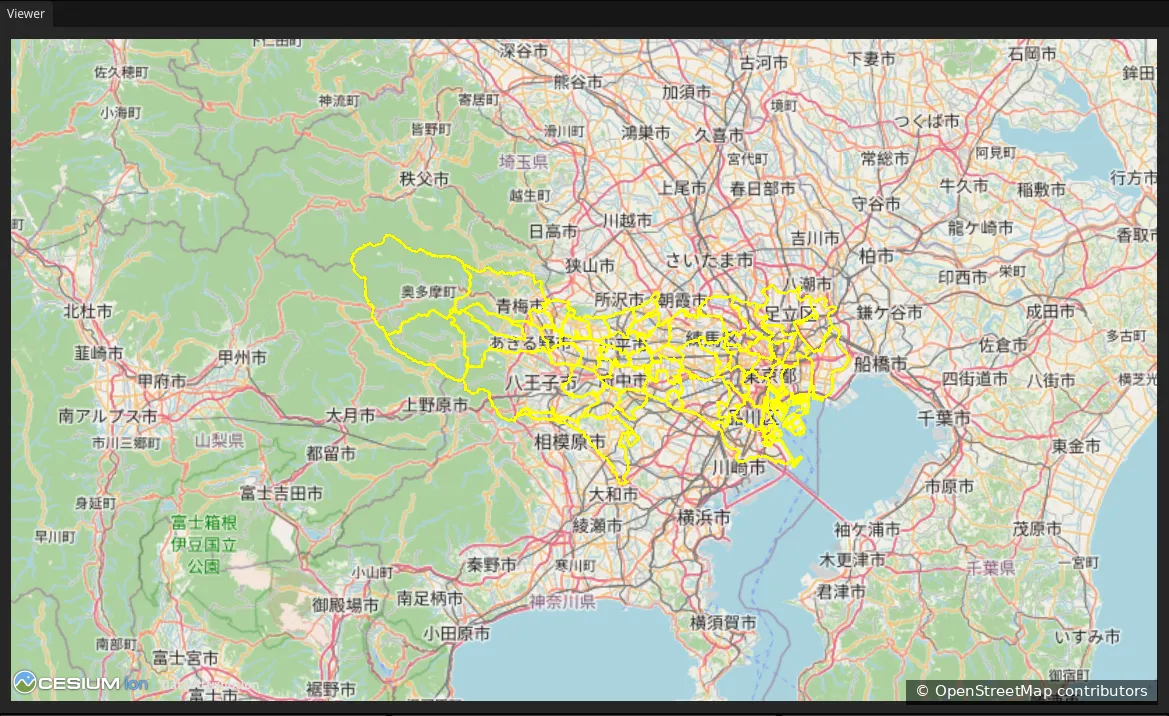
地図データ提供:[OpenStreetMap](https://www.openstreetmap.org/copyright)
## 仕組み
[Section titled “仕組み”](#仕組み)
パフォーマンスオプションはレイヤの `data` ブロック内の `geojson` キーに設定します。
```javascript
data: {
type: "geojson",
url: "https://example.com/large-data.geojson",
geojson: {
useAsResource: true,
},
}
```
`useAsResource: true` を設定すると、Re:Earth Visualizer は大規模データセット向けに最適化された方法で GeoJSON をレンダリングします。フィーチャが約 6,000 を超える GeoJSON に推奨されます。
注意
`useAsResource` が有効な場合、Visualizer 側からレイヤをスタイリングできません(例:`polygon`、`marker`、`polyline` の外観オプション)。代わりに、GeoJSON ファイルの各フィーチャに標準のスタイルプロパティを直接定義してください。例:
```json
"properties": {
"stroke": "#fb0404",
"stroke-width": 2,
"stroke-opacity": 1
}
```
ノート
このサンプルで使用している境界データは、国土交通省(MLIT)のオープンデータです。外部データを使用する際は、利用規約を確認し、帰属表示の要件に従ってください。
## 次のステップ
[Section titled “次のステップ”](#次のステップ)
* [レイヤを追加する](/ja/developer/plugin/guides/add-a-layer/): このガイドの土台となるレイヤの基本
* [reearth.layers API リファレンス](https://visualizer.developer.reearth.io/plugin-api/layers/): 完全なレイヤとデータオブジェクト
# タイムラインを再生する
> プラグインからタイムラインの再生を設定、制御します。
このガイドを終えると、プラグインから Re:Earth Visualizer のタイムラインを制御できるようになります。時間範囲の設定、再生・一時停止、速度の調整、時間の進行に応じた処理が可能になります。このガイドは、`reearth.yml` と拡張ファイルの基本的な構造を把握していることを前提としています。
タイムラインは、シーンの時系列データとアニメーションを駆動します。`reearth.timeline` を通じて、プラグインはタイムラインの範囲設定、再生・一時停止、速度変更、進行に応じたイベント受信ができます。
## サンプルコード
[Section titled “サンプルコード”](#サンプルコード)
この例では、時計と **再生** ボタン・**一時停止** ボタンを持つ小さなパネルを表示します。**再生** をクリックすると 2023 年を通じてタイムラインが進み、時計が現在時刻をリアルタイムで更新します。
**reearth.yml**
```yaml
id: timeline-plugin
name: Timeline Plugin
version: 1.0.0
extensions:
- id: timeline-demo
type: widget
name: Timeline Demo
```
**timeline-demo.js**
```javascript
reearth.ui.show(`
`);
reearth.timeline?.setTime?.({
start: new Date("2023-01-01T00:00:00Z"),
stop: new Date("2023-12-31T23:59:59Z"),
current: new Date("2023-01-01T00:00:00Z"),
});
reearth.timeline?.setSpeed?.(3600 * 2);
reearth.extension.on("message", (message) => {
if (message?.action === "play") {
reearth.timeline?.play?.();
}
if (message?.action === "pause") {
reearth.timeline?.pause?.();
}
});
reearth.timeline?.on?.("tick", (currentTime) => {
reearth.ui.postMessage({ action: "tick", time: currentTime.toISOString() });
});
```
## 結果
[Section titled “結果”](#結果)
時計と **再生** ボタン・**一時停止** ボタンを持つパネルが表示されます。**再生** をクリックするまでは何も動きません。クリックすると 2023 年を通じて時計が進みます。**一時停止** をクリックすると、その時点で止まります。
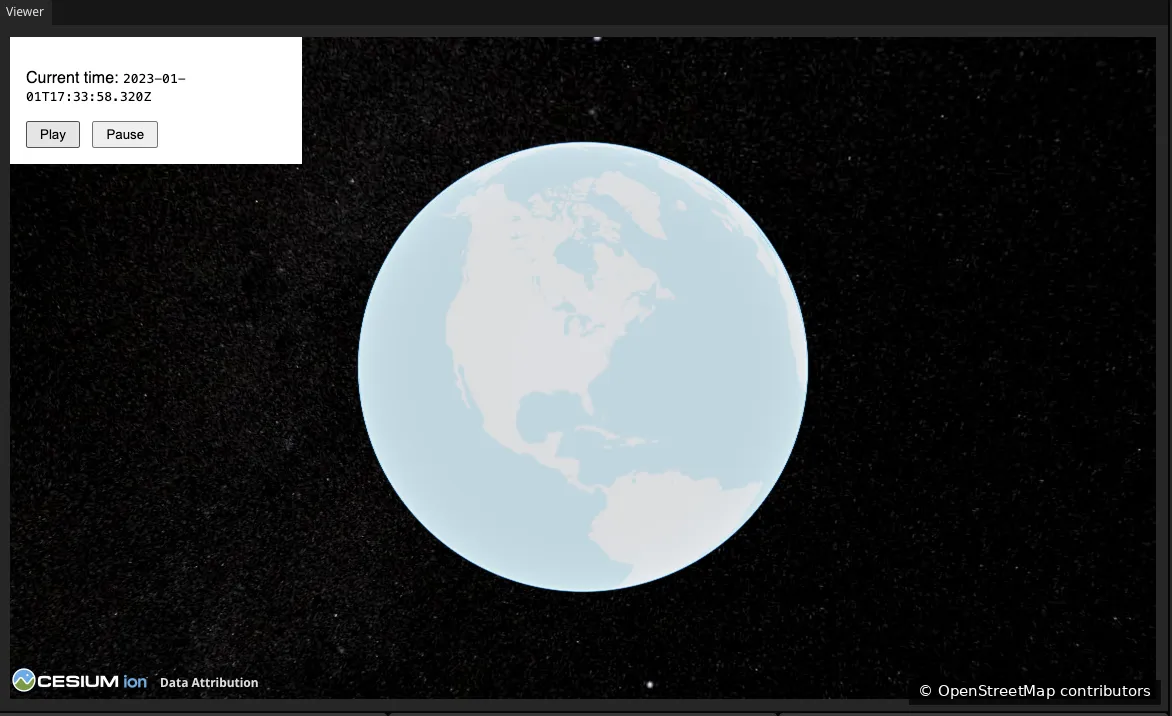
地図データ提供:[OpenStreetMap](https://www.openstreetmap.org/copyright)
## 仕組み
[Section titled “仕組み”](#仕組み)
`reearth.timeline` 名前空間は、タイムラインの範囲設定、再生制御、時間進行への反応のためのメソッドを提供します。
**時間範囲を設定する**
`setTime` はタイムラインの範囲と開始位置を定義します。3 つの `Date` 値を持つオブジェクトを渡します。
```javascript
reearth.timeline?.setTime?.({
start: new Date("2023-01-01T00:00:00Z"),
stop: new Date("2023-12-31T23:59:59Z"),
current: new Date("2023-01-01T00:00:00Z"),
});
```
* **`start`**: タイムラインの開始時刻。
* **`stop`**: タイムラインの終了時刻。
* **`current`**: 再生を開始する位置。
**再生を制御する**
`play` は現在位置からタイムラインを開始し、`pause` はリセットせずに停止します。
```javascript
reearth.timeline?.play?.();
reearth.timeline?.pause?.();
```
**速度を設定する**
`setSpeed` はリアルタイムに対するタイムラインの進行速度を制御します。値はリアル 1 秒あたりのタイムライン秒数です。`1` はリアルタイム、`3600 * 2` は 1 秒あたり 2 時間です。
```javascript
reearth.timeline?.setSpeed?.(3600 * 2);
```
**時間の変化に反応する**
`tick` イベントは再生中に現在時刻が進むたびに発火します。ハンドラは現在時刻を `Date` として受け取ります。ハンドラは軽量に保ち、ティックごとに重い処理やログ出力を行わないようにしてください。
```javascript
reearth.timeline?.on?.("tick", (currentTime) => {
reearth.ui.postMessage({ action: "tick", time: currentTime.toISOString() });
});
```
ノート
タイムラインのメソッドはオプショナルチェーン(`?.`)を使って呼び出します。タイムラインはすべてのコンテキストで利用できるとは限らないためです。
## 次のステップ
[Section titled “次のステップ”](#次のステップ)
* [reearth.timeline API リファレンス](https://visualizer.developer.reearth.io/plugin-api/timeline/): `stepType`、`rangeType` を含むタイムラインメソッド・プロパティ・イベントの全一覧
* [プラグインと Re:Earth の間で通信する](/ja/developer/plugin/guides/communicate-between-a-plugin-and-reearth/): UI ボタンが拡張ロジックにメッセージを送る仕組み
# 拡張タイプの違い
> ウィジェット、InfoboxBlock、StoryBlock の拡張タイプを比較します。
プラグインは拡張を通じて機能を提供します。Re:Earth Visualizer がサポートする拡張タイプは、ウィジェット、InfoboxBlock、StoryBlock の 3 種類です。それぞれインターフェース内の異なる場所に表示され、適した用途も異なります。
拡張タイプによって表示場所とユーザーの操作方法が決まるため、適切なタイプを選ぶことはプラグインを設計する際の最初の判断になります。
| 拡張タイプ | 表示場所 | 適した用途 |
| ------------ | -------------------- | -------------------------- |
| ウィジェット | メインの地図ビュー上にフローティング表示 | 常に表示する操作パネルや情報 |
| InfoboxBlock | 地物のインフォボックス内 | ユーザーが特定の地物を選択したときに表示する詳細情報 |
| StoryBlock | ストーリーページ内 | ガイド付きのストーリーに埋め込むリッチコンテンツ |
## ウィジェット
[Section titled “ウィジェット”](#ウィジェット)
ウィジェットは、Visualizer のメインビュー上にフローティング表示される拡張です。Widget Align System を使って、画面の端や隅に配置できます。
シーンを開いている間は常に表示されるため、検索ボックス、凡例、ライブデータパネル、シーン内の操作を実行するボタンなど、継続的にアクセスする必要がある操作や情報に適しています。
ユーザーのシーン内での操作にかかわらず、地図上に常に表示したい操作や情報にはウィジェットを使用します。
## InfoboxBlock
[Section titled “InfoboxBlock”](#infoboxblock)
InfoboxBlock は、ユーザーがレイヤ上の地物を選択したときに開くパネルであるインフォボックス内に表示される拡張です。その地物に関する情報の一部として表示されます。
InfoboxBlock は地物の選択に連動するため、整形されたデータカード、地物の属性から作成したグラフ、外部ソースから取得した詳細など、特定の地物に関連するコンテンツの表示に適しています。
ユーザーが地図上の特定の地物を選択したときだけ、その地物に関する情報を表示したい場合は InfoboxBlock を使用します。
## StoryBlock
[Section titled “StoryBlock”](#storyblock)
StoryBlock は、ストーリーページに埋め込まれる拡張です。ストーリーのコンテンツの一部となり、ユーザーが物語を進めるとインラインで表示されます。
StoryBlock は、インタラクティブなグラフ、タイムライン、データに基づく図など、通常のテキストや画像を超えるカスタムコンテンツをストーリーに加える用途に適しています。
メインの地図ビューや地物のインフォボックスではなく、ストーリーページ内にカスタムコンテンツを追加したい場合は StoryBlock を使用します。
# プラグインシステムの仕組み
> Visualizer プラグインを構成する WebAssembly と iframe の環境を説明します。
Visualizer のプラグインは、単一のコードとして動作するわけではありません。各プラグインは、別々の環境で動作して相互に通信する 2 つの部分に分かれています。この構成により、コードが実行される場所ごとに、できることとできないことが決まります。
## プラグインの実行方法
[Section titled “プラグインの実行方法”](#プラグインの実行方法)
プラグインが読み込まれると、Visualizer はコードを次の 2 つの環境で実行します。
* Visualizer のデータとプラグインAPIに直接アクセスできる **WebAssembly** 環境
* すべての UI 描画を担当し、標準のブラウザ API を利用できる **iframe** 環境
どちらか一方だけですべてを実行することはできません。WebAssembly 側は Visualizer のデータを読み取って操作できますが、HTML の描画や多くのブラウザ API の利用はできません。iframe 側は HTML の描画やブラウザ API の利用ができますが、Visualizer のデータへ直接アクセスできません。2 つの環境が互いを補完します。
両者は、異なる実行コンテキスト間で安全に通信するための標準的なブラウザ機能である `postMessage` を使って通信します。UI が Visualizer のデータを必要とするときは、WebAssembly 側にデータを要求します。WebAssembly 側はデータを取得し、iframe 側へ送信します。
## WebAssembly 側
[Section titled “WebAssembly 側”](#webassembly-側)
WebAssembly 側はプラグインのエントリーポイントです。プラグインが読み込まれたときに最初に実行され、Visualizer と同じスレッドで同期的に動作します。
**できること:**
* Visualizer のシーンデータへアクセスする。
* プラグインAPIを呼び出す。
* レイヤのプロパティの更新など、Visualizer のシーンを部分的に変更する。
* シーンのイベントを購読する。
* `postMessage` を使って iframe 側とデータを送受信する。
**できないこと:**
* HTML や UI を直接描画する。UI の描画は iframe 側で行う必要があります。
* 多くのブラウザ API を利用する。利用できるのは `console.log` など一部に限られます。
* 外部サーバーへ HTTP リクエストを送信する。
ノート
WebAssembly 側の JavaScript は [QuickJS](https://bellard.org/quickjs/) で実行されます。ユーザーが使用するブラウザにかかわらず、ECMAScript 2020 をサポートします。
## iframe 側
[Section titled “iframe 側”](#iframe-側)
iframe 側は、プラグインの視覚的な要素をすべて処理します。通常のウェブページと同じように動作し、ブラウザ API を利用できます。
**できること:**
* 通常のウェブページと同じように HTML を描画する。
* DOM API、Canvas、`fetch` などのブラウザ API を利用する。
* サーバーのレスポンスヘッダーに `Access-Control-Allow-Origin: *` が含まれている場合、外部サーバーへ HTTP リクエストを送信する。
* `postMessage` を使って WebAssembly 側とデータを送受信する。
**できないこと:**
* Visualizer のデータへ直接アクセスしたり変更したりする。`postMessage` を通じて WebAssembly 側へ要求する必要があります。
* Visualizer のバックエンドと直接通信する。
* レスポンスヘッダーに `Access-Control-Allow-Origin: *` が含まれていないサーバーへ HTTP リクエストを送信する。iframe は null オリジンでサンドボックス化されています。
* 同じサンドボックス上の理由により、ローカルストレージを利用する。
* 親ページから明示的な権限を必要とするブラウザ API を利用する。たとえば、Clipboard API はサンドボックス化された iframe ではデフォルトで利用できません。
## 要点
[Section titled “要点”](#要点)
| 機能 | WebAssembly 側 | iframe 側 |
| ------------------- | ------------- | -------- |
| サンドボックス化 | ✅ | ✅ |
| エントリーポイント(最初に実行) | ✅ | ❌ |
| プラグインAPIへのアクセス | ✅ | ❌ |
| HTML の描画 | ❌ | ✅ |
| ブラウザ API の利用 | ❌ | ✅ |
| `postMessage` による通信 | ✅ | ✅ |
## 制約事項
[Section titled “制約事項”](#制約事項)
**`postMessage` のシリアライズ:** `postMessage` で送信できるのは、JSON としてシリアライズ可能なデータだけです。`ArrayBuffer` や `Blob` などのオブジェクトは直接送信できません。バイナリーデータは、送信前に base64 文字列へエンコードしてください。
**プラグインのサイズ:** プラグインは 10 MB 以下の `.zip` ファイルとしてパッケージ化する必要があります。
**静的アセット:** 画像、HTML、CSS などの JavaScript 以外のファイルは、プラグイン内に含めることができません。JavaScript に文字列として埋め込むか、一般公開されたサーバーに配置して URL で参照してください。
**ローカルストレージ:** ローカルストレージは両方の環境で利用できません。データを永続化するには、プラグインAPIが提供するストレージ API または外部サーバーを使用してください。
# プラグイン構成
> マニフェストと拡張のファイルから Visualizer プラグインを構成する仕組みを説明します。
Re:Earth Visualizer のプラグインは、1 つの `reearth.yml` 設定ファイルと、拡張ごとに 1 つ用意する JavaScript ファイルで構成される `.zip` ファイルです。`reearth.yml` はプラグインの情報と拡張を定義し、各 JavaScript ファイルには対応する拡張のロジックを記述します。Visualizer は、これらのファイルを使ってプラグインを読み込み、実行します。
## `reearth.yml`
[Section titled “reearth.yml”](#reearthyml)
すべてのプラグインは、`.zip` のルートに `reearth.yml` という名前のファイルを含める必要があります。この YAML ファイルには、名前、バージョン、説明、拡張など、プラグインのメタデータを記述します。
reearth.yml
```yaml
id: demo-plugin
name: Demo Plugin
version: 1.0.0
extensions:
- id: demo-widget
type: widget
name: Demo Widget
```
注意
`id` フィールドで使用できる文字は、英字(`a-zA-Z`)、数字(`0-9`)、ハイフン(`-`)、アンダースコア(`_`)のみで、最大 100 文字です。`reearth` は予約されているため、ID として使用できません。
サポートされているフィールドの一覧については、[プラグインマニフェストのスキーマ](https://github.com/reearth/reearth-visualizer/blob/main/server/schemas/plugin_manifest.json)を参照してください。
## 拡張の JavaScript
[Section titled “拡張の JavaScript”](#拡張の-javascript)
`reearth.yml` で宣言した各拡張には、対応する JavaScript ファイルが必要です。ファイル名は拡張の `id` と完全に一致させてください。たとえば、`id: demo-widget` の拡張には `demo-widget.js` というファイルが必要です。
注意
拡張の `id` と JavaScript のファイル名は、完全に一致させてください。どちらにも空白や特殊文字を使用しないでください。
JavaScript ファイルには、その拡張のロジックを記述します。コードは WebAssembly 側で実行され、グローバルに公開されたプラグインAPIを利用できます。
demo-widget.js
```javascript
reearth.ui.show(`Hello, World!
`);
```
ノート
拡張の JavaScript は [QuickJS](https://bellard.org/quickjs/) で実行されます。ECMAScript 2020 と互換性のあるコードを使用してください。
## パッケージ化とインストール
[Section titled “パッケージ化とインストール”](#パッケージ化とインストール)
`reearth.yml` とすべての拡張の JavaScript ファイルを用意したら、1 つの `.zip` ファイルにまとめます。この `.zip` は、任意の Re:Earth Visualizer プロジェクトにインストールできます。
```text
my-plugin.zip
├── reearth.yml
└── demo-widget.js
```
複数の拡張がある場合は、それぞれに対応する JavaScript ファイルを含めます。
```text
my-plugin.zip
├── reearth.yml
├── demo-widget.js
└── demo-infobox-block.js
```
ノート
プラグインのサイズは 10 MB 以下である必要があります。画像や CSS など、JavaScript 以外のファイルを `.zip` に含めることはできません。詳しくは[制約事項](/ja/developer/plugin/overview/how-the-plugin-system-works/#%E5%88%B6%E7%B4%84%E4%BA%8B%E9%A0%85)を参照してください。
`.zip` を繰り返し作成してインストールする手間を省き、効率よく開発する方法については、[ローカル開発環境をセットアップする](/ja/developer/plugin/get-started/set-up-a-local-development-environment/)を参照してください。
# プラグインとは?
> プラグインとは何か、Re:Earth Visualizer で何ができるかを説明します。
プラグインとは、既存のアプリケーションのコアコードを変更せずに、新しい機能を追加するソフトウェアコンポーネントです。機能がプラットフォーム本体に実装されるのを待つ代わりに、自分でプラグインを開発したり、他の人が開発したプラグインをインストールしたりできます。ホストアプリケーションは、実行時にそのプラグインを読み込みます。
プラグインは、日常的に使うさまざまなソフトウェアに存在します。広告をブロックしたりパスワードを保存したりするブラウザ拡張、VS Code に言語サポートを追加するエディター拡張、背景地図に独自データを重ねる地図オーバーレイなどです。いずれも、明確に定義されたインターフェースを通じてホストアプリケーションに接続し、その機能を拡張する自己完結型のコードパッケージです。
## Re:Earth Visualizer におけるプラグイン
[Section titled “Re:Earth Visualizer におけるプラグイン”](#reearth-visualizer-におけるプラグイン)
Re:Earth Visualizer のプラグインは、カスタム UI の追加、シーンの操作、データの利用などによって、プラットフォームの機能を拡張します。コードと設定ファイルをまとめたパッケージとしてプロジェクトに追加します。
インストールされたプラグインは、1 つ以上の\*\*拡張(Extension)\*\*を通じて機能を提供します。拡張は、Visualizer のインターフェース内でプラグインの動作を構成する個別の単位です。拡張タイプにはウィジェット、InfoboxBlock、StoryBlock の 3 種類があり、それぞれ目的と表示場所が異なります。
システムレベルでは、Visualizer プラグインはコアアプリケーションを変更せずに機能を追加する拡張の集まりであり、WebAssembly と iframe の 2 つの環境で動作します。詳しくは[拡張タイプの違い](/ja/developer/plugin/overview/extension-types/)を参照してください。
## プラグインでできること
[Section titled “プラグインでできること”](#プラグインでできること)
プラグインを使うと、Re:Earth Visualizer のソースコードに手を加えずに、組み込み機能を超えた機能を追加できます。たとえば、次のことができます。
* 外部 API やサービスから取得したデータを、地図上やインフォボックスに表示する。
* フィルター、スライダー、検索入力など、シーンを操作するためのカスタムコントロールを作成する。
* 選択したレイヤのデータを使い、地物の選択に応じた情報を表示する。
* 静的なコンテンツだけでなく、データに応じて変化する要素をストーリーページに追加する。
* ユーザー入力やリアルタイムイベントに応じて、Visualizer 内の操作を自動化する。
## 代表的なユースケース
[Section titled “代表的なユースケース”](#代表的なユースケース)
### ナビゲーション操作
[Section titled “ナビゲーション操作”](#ナビゲーション操作)
ナビゲーションウィジェットは、画面上のボタンでカメラを任意の方向へ滑らかに移動し、初期表示へ戻したり、ズームイン・ズームアウトしたりできます。キーボードショートカットや地球を直接操作する方法に代わる、直感的なナビゲーションを提供します。
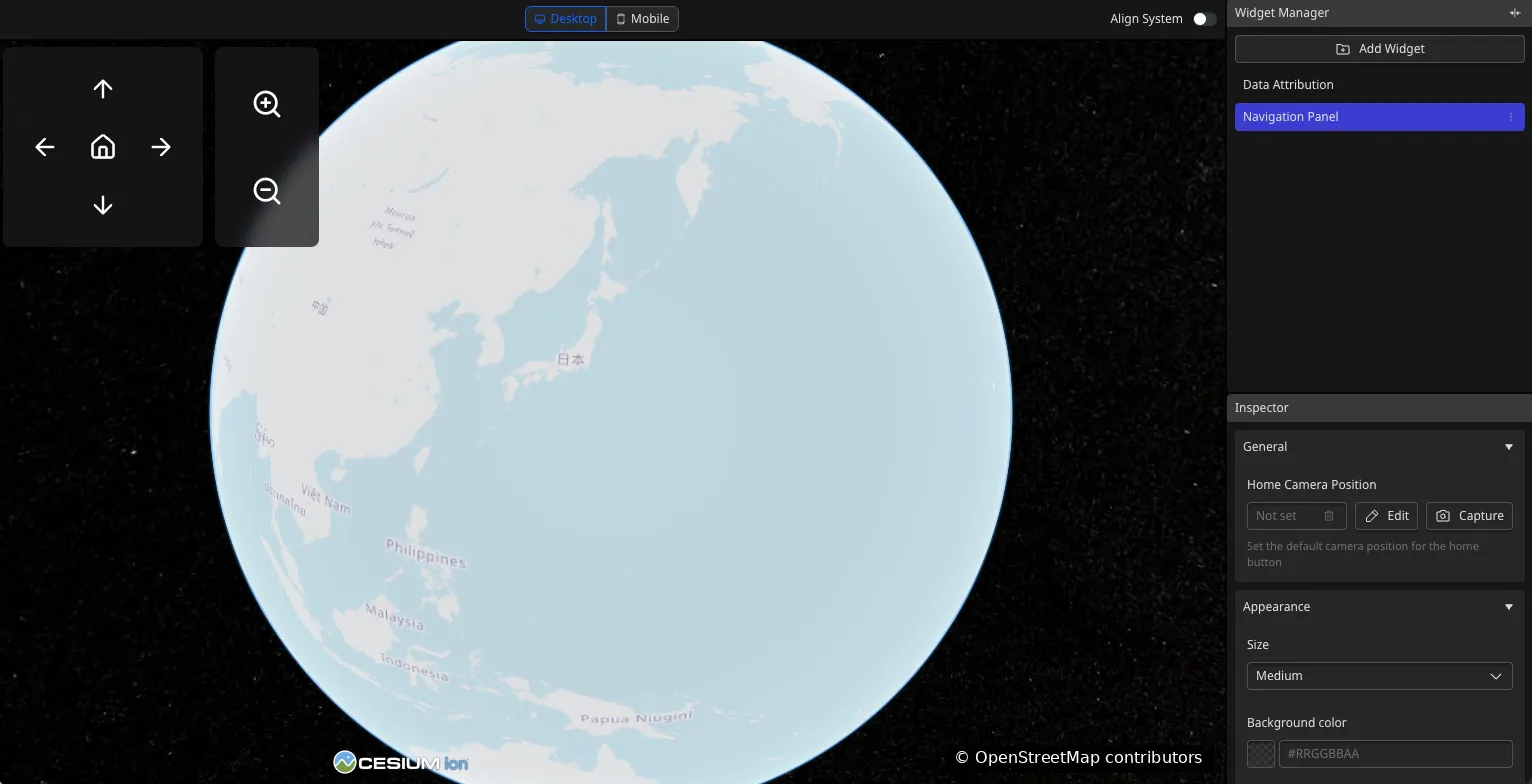
地図データ: [OpenStreetMap](https://www.openstreetmap.org/copyright)
### 画像オーバーレイ
[Section titled “画像オーバーレイ”](#画像オーバーレイ)
このウィジェットは、設定可能な画像とキャプションを地図上に直接表示します。画像 URL とキャプションのテキストは **インスペクター** パネルで設定できるため、プラグインのコードを変更せずに更新できます。
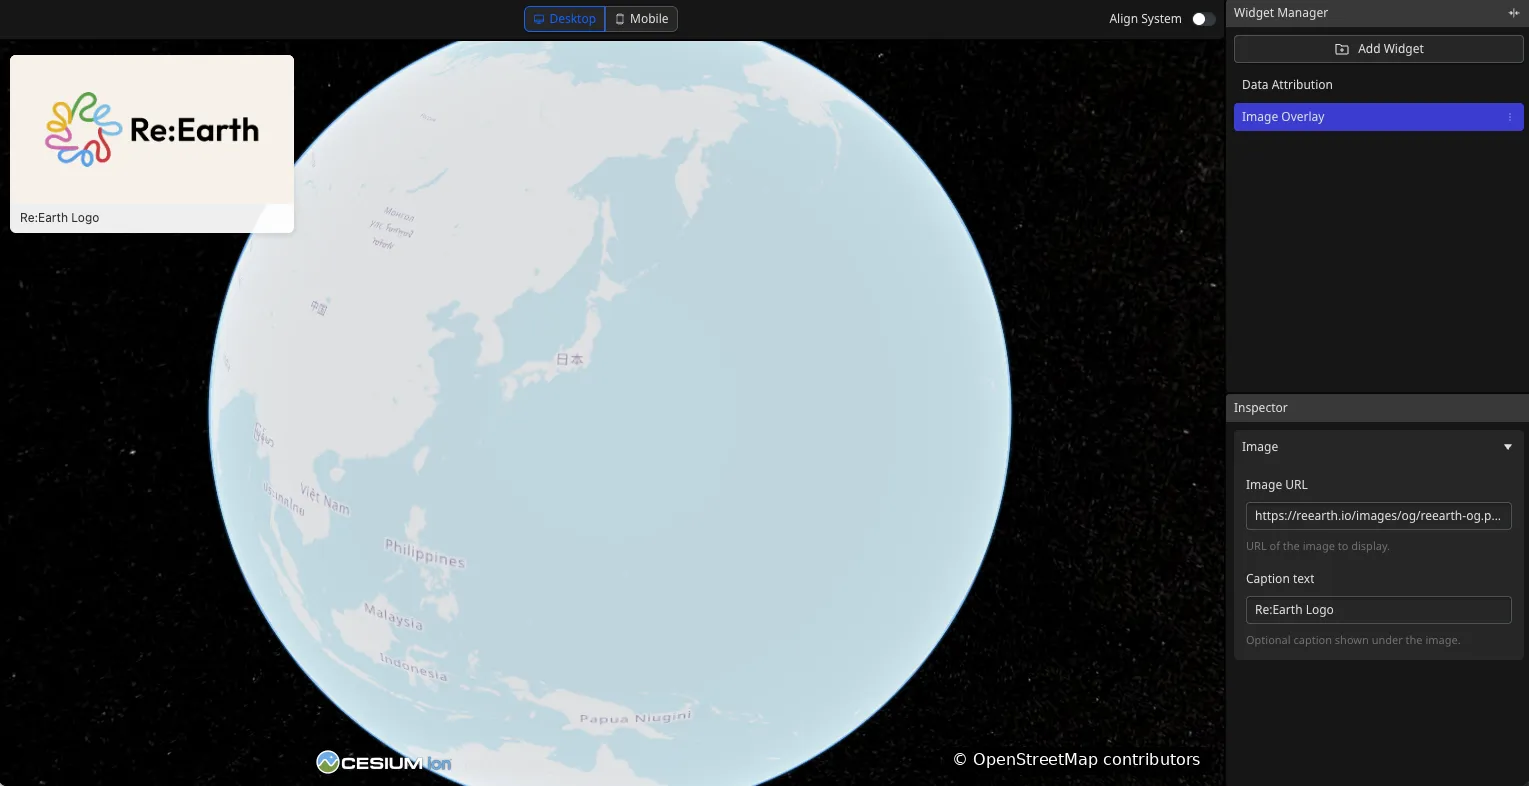
地図データ: [OpenStreetMap](https://www.openstreetmap.org/copyright)
### ライブ天気表示
[Section titled “ライブ天気表示”](#ライブ天気表示)
天気ウィジェットは、指定した場所の最新の気象情報を取得し、気温、天気、湿度、風、最終更新時刻を地図上に表示します。
地図データ: [OpenStreetMap](https://www.openstreetmap.org/copyright)
### カメラのブックマーク
[Section titled “カメラのブックマーク”](#カメラのブックマーク)
カメラブックマークウィジェットは、名前を付けて場所を保存し、クリック 1 回で保存した位置へカメラを移動できます。大規模なシーン内の注目地点を簡単に行き来できます。
地図データ: [OpenStreetMap](https://www.openstreetmap.org/copyright)
# プラグインAPIとは?
> プラグインが Re:Earth Visualizer と通信するための API を説明します。
プラグインAPIは、プラグインが Re:Earth Visualizer と通信するための仕組みです。Visualizer のソースコードへアクセスしなくても、データの読み取り、ユーザー操作への応答、地図上の表示制御、独自 UI の管理などを行えます。
API 全体は、`reearth` という 1 つのグローバルオブジェクトを通じて利用できます。プラグインに必要なすべての機能は、このオブジェクトからアクセスします。たとえば、カメラの操作には `reearth.camera`、レイヤの操作には `reearth.layers` を使用します。
API は、プラグインが行うことを基準に構成されています。プラグインはユーザーにインターフェースを提供し、地図、レイヤ、データから成るシーンを操作します。API の各要素には次の役割があります。
* **プラグイン自身(`reearth.extension`)**: 設定されたプロパティ、UI とのメッセージ通信、ライフサイクルイベントなど、プラグイン自身のコンテキストを扱います。
* **プラグインのインターフェース(`reearth.ui`、`reearth.modal`、`reearth.popup`)**: メイン UI パネル、ダイアログ、小さなアンカーウィンドウなど、ユーザーが見て操作する要素を扱います。
* **シーン(`reearth.viewer`、`reearth.camera`、`reearth.timeline`)**: ビューアの環境と設定、視点、時間に基づく再生など、ユーザーが見ている空間を扱います。
* **コンテンツ(`reearth.layers`、`reearth.data`)**: 地図レイヤやクライアント側のデータストレージなど、地図に表示するデータとプラグインが保持するデータを扱います。
* **描画・位置ツール(`reearth.sketch`、`reearth.spatialId`)**: 地図上への図形の描画や、空間 ID による位置参照を扱います。
* **システム情報(`reearth.version`、`reearth.apiVersion`、`reearth.engine`)**: Visualizer のバージョンやレンダリングエンジンなど、プラグインが動作する環境の基本情報を提供します。
これらの要素は、どのプラグインでも連携して動作します。イベントも同じ構成に含まれます。`reearth.viewer` はマウスイベント、`reearth.timeline` は `tick`、`reearth.extension` はメッセージを発行します。イベントを監視するときは、そのイベントに対応するオブジェクトへリスナーを登録します。
たとえば、保存した場所へ移動するプラグインでは、`reearth.extension` から設定を読み取り、`reearth.ui` でクリック可能な一覧を表示し、場所が選択されたときに `reearth.camera` で視点を移動します。
利用できるすべてのプロパティとメソッドについては、[API リファレンス](/ja/developer/plugin/api-reference/)を参照してください。
# FAQ
> Visualizer プラグイン開発でよくある質問への回答を紹介します。
この FAQ では、個別のガイドを必要としない短い横断的な質問を扱います。目的別の手順は「ガイド」、プロパティやメソッドの詳細は「API リファレンス」を参照してください。
## はじめに
[Section titled “はじめに”](#はじめに)
**Q: プラグイン開発を始めるのに、何かインストールが必要ですか?**
不要です。プラグインは 2 つの方法で作れます。1 つはブラウザだけで完結するプラグインプレイグラウンド、もう 1 つはローカル開発環境(自分のエディタ)を使う方法です。Playground は最も早く試せる方法で、ローカル環境はより大きく複雑なプラグインに向いています。
**Q: プラグインにはどんなファイルが必要ですか?**
最低限必要なのは、プラグインと拡張を記述する `reearth.yml` と、拡張ごとに 1 つの JavaScript ファイルです。これらをまとめて `.zip` としてパッケージ化します。
**Q: ウィジェット / InfoboxBlock / StoryBlock の違いは?**
ウィジェットは Widget Align System を使ってメインマップビューに配置します。InfoboxBlock は、レイヤ上のフィーチャを選択したときに開くインフォボックス内に表示されます。StoryBlock はストーリーページに埋め込まれます。詳細は[拡張タイプの違い](/ja/developer/plugin/overview/extension-types/)を参照してください。
## 開発
[Section titled “開発”](#開発)
**Q:「Install Dev Plugins」と「Reload Dev Plugin Extensions」はいつ使い分けますか?**
初回セットアップと `reearth.yml` を変更したときは **Install Dev Plugins** を使用します。拡張コードを変更した後は **Reload Dev Plugin Extensions** を使用します。`reearth.yml` の変更は、プラグイン構造の再登録が必要なため、完全インストールが必要です。
**Q: プラグインの UI が表示されないのはなぜですか?**
プラグイン UI は `reearth.ui.show` に HTML を渡すことで表示します。何も表示されない場合は、呼び出しが行われているか、また拡張 JavaScript のファイル名が `reearth.yml` 内の `id` と完全一致しているかを確認してください。UI は表示されているが真っ白に見える場合は、スタイルの問題の可能性があります。文字色が背景色と同じだと見えないため、UI 側で文字色と背景色を明示的に指定してください。
**Q: TypeScript は使えますか?**
はい。Visualizer が実行するのは JavaScript ですが、TypeScript で書いて JavaScript にコンパイルできます。推奨テンプレートは TypeScript に対応しています。
## 機能と制限
[Section titled “機能と制限”](#機能と制限)
**Q: 外部 API からデータを取得できないのはなぜですか?**
外部サーバーへのリクエストは、拡張ロジック(WebAssembly 側)ではなく、プラグイン UI(iframe 側)から行う必要があります。また、外部サーバーはレスポンスヘッダーに `Access-Control-Allow-Origin` を含めて CORS を許可していなければなりません。そうでない場合、リクエストは失敗します。
**Q: 特定の背景地図やタイルサーバーが読み込めないのはなぜですか?**
一部の背景地図は Cesium Ion のアクセストークンを必要とします。それ以外でも、タイルサーバーが利用できない、または CORS によりブロックされる場合があります。背景地図が表示されない場合、原因はコードではなくタイルソース側にあることが多いです。
**Q: プラグインのサイズ制限はありますか?**
あります。プラグインは 10 MB 以下の `.zip` としてパッケージ化する必要があります。画像や CSS などの非 JavaScript ファイルは `.zip` に同梱できません。JavaScript の文字列として埋め込むか、公開サーバーにホストして URL で参照してください。
**Q: プラグインで永続化できるデータを保存できますか?**
ローカルストレージは利用できません(プラグイン UI がサンドボックス化された iframe 内で動作するため)。永続化には、プラグイン API が提供するストレージ API、または外部サーバーを利用してください。
## 公開と共有
[Section titled “公開と共有”](#公開と共有)
**Q: Playground で作ったプラグインはどう共有できますか?**
**Share** ボタンで共有リンクをコピーするか、**Export** ボタンで `.zip` をダウンロードしてください。非常に大きいプラグインはリンク共有できず、エクスポートのみです。
# ツール
> Visualizer プラグイン開発用ツールのドキュメントは準備中です。
注意
このセクションは現在メンテナンス中です。
# Re:Earth Flow ドキュメント
> Re:Earth Flow のドキュメントは現在準備中です。
このドキュメントは現在準備中です。公開をお待ちください。
# チュートリアル
> Re:Earth のプロダクトを実際に触りながら進めるチュートリアルの一覧です。
チュートリアルは現在準備中です。公開をお待ちください。
# Re:Earth Visualizer ドキュメント
> Re:Earth Visualizer のドキュメントは現在準備中です。
このドキュメントは現在準備中です。公開をお待ちください。